Lesson 5: Applying Construction to Animals

8:01 PM, Tuesday March 12th 2024

DAB: Lesson 5 - Album on Imgur

Imgur: https://imgur.com/a/uADXQXB

Discover the magic of the internet at Imgur, a community powered enterta...

Thanks for the review!

I struggled with the using too much/too little of the page for many of the drawings. For several drawings, I planned on using the whole page, but the drawing ended up being smaller than planned with a lot of white space. For other pages, I ended up with room for up to three drawings (like the birds). I think the spacing will get better with time and practice, but I’m still trying to get the hang of it.

Also, I did have a question: are curved lines supposed to be drawn completely from the shoulder or are there scenarios in which small curved lines can/should be drawn from the wrist?

0 users agree
5:49 PM, Wednesday March 13th 2024
edited at 5:59 PM, Mar 13th 2024

Hello Hancollinsart, I'll be the teaching assistant handling your lesson 5 critique.

I believe this section of lesson 1 answers your question. Strive to use your whole arm for all constructional lines in your homework, but feel free to use your wrist for adding texture.

Starting with your organic intersections these are working nicely. You're keeping your forms simple which helps them to feel solid and 3D, and you're doing a good job of piling your forms up in a manner that makes them feel stable and supported, as you usually allow your forms to slump and sag over one another with a sense of gravity.

You're doing a good job with your shadows, you're projecting them boldly enough to cast onto the surfaces below, and you appear to be trying to follow a consistent light source.

In future, make sure you're taking your time with your contour curves, giving each individual line your best effort, even if the exercise demands a lot of lines. Some of your contour curves just look a tad careless compared to your organic forms with contour curves exercise from the previous lesson.

Remember you should be drawing around all your ellipses 2 full times before lifting your pen off the page, even if you feel like you can nail them in a single pass. This applies to the small ellipses on the tips of your forms. This leans into the arm's natural tendency to make elliptical motions and helps to execute the ellipses smoothly. This is something we ask students to do for every ellipse freehanded in this course as introduced here.

Moving on to your animal constructions, as we have discussed previously there are two things that we must give each of our drawings throughout this course in order to get the most out of them. Those two things are space and time. Unfortunately many of these constructions appear to have been starved of both these factors, and as a result you're not getting as much out of these exercises as you should be. We've been over space before, and as for time, make sure you're giving yourself as much time as you require to go though all the lesson instructions, carefully observe your references, and to plan each mark carefully, making full use of the ghosting method for each one. In all honesty some aspects of some of these pages appear to be a step backwards from what you have previously demonstrated that you're capable of here on one of your lesson 4 revision pages, as you've relapsed on a few issues we've previously addressed. My role as a TA is to help clarify things students may not understand from the lesson material, not as a replacement for a student's own effort in going through the lesson, or to nanny students into actually applying things they already know. It is not uncommon for students to forget things if they take a break between lessons and spread them out over a long period of time, however that doesn't seem to be the case here, as you submitted this lesson almost immediately after the 14 day cool-down. So the logical conclusion I'm led to here is that you may be (perhaps without even realising it) rushing your work. I'd like you to take some time to re-watch this video which explains how to get the most out of Drawabox, and what your responsibilities as a student are.

Using space on the page

As I think you're fully aware that most of your constructions came out too small (leading to issues like being unable to follow any of the head construction methods shown in the lesson to any recognisable degree) let's discuss a couple of strategies you can employ to help draw your next batch of constructions larger.

  • All your pages are portrait format (the long edge of the page is vertical) but if your intent is to draw a single quadruped construction on the page it is going to generally make sense to rotate the page 90 degrees and draw on it with a landscape format (the long edge being horizontal). As the majority of quadrupeds being viewed from the side are longer than they are tall, this will help you make better use of the space on the page.

  • To make your constructions larger, you're going to need to start with larger ellipses for the cranial ball, ribcage and pelvis mass. Something that can help with the size and placement of these first ellipses is to think about how tall the body is relative to the length of the legs. By observing this proportion in the reference, we can gauge how much space we'll need to leave beneath the rib cage ellipse to have room to construct the legs. Let's say the length of the leg is about equal to the height of the body for a given animal, in this case we'd draw the rib cage ellipse with enough space bellow it to fit one more ellipse of the same size, to leave room for the legs. If you're able to fit in three ellipses the same size under your rib cage, then you'll be leaving lots of space on the paper unused.

Taking actions in 3D

During your lesson 4 critique we introduced the following rule to help you to reinforce the 3D illusion of your constructions as you build them: Once you've put a form down on the page, do not attempt to alter its silhouette. Unfortunately you appear to be ignoring this rule on many of your constructions, this album contains a few examples where I've marked in red where you'd cut back inside the silhouettes of forms you had already drawn, undermining their solidity. I've marked in blue a few examples where you had extended off existing forms with one off lines or partial shapes, not providing enough information for the viewer (or you) to understand how those additions are supposed to connect to the existing structures in 3D space. Instead of altering the silhouettes of your forms in this manner, you should focus on building complete additional forms wherever you want to add to your construction or alter something. We'll talk more about this in the additional masses section of your feedback.

Additional Lineweight

On the last image in the above album, of one of your hybrids, I think some of those smaller cuts and extensions are occurring accidentally, where you'd traced back over the silhouette with a pass of additional line weight. Adding line weight across several forms in this manner makes little cuts and extensions between your forms, softening the distinctions between them, leaving you with a flatter construction. Additional line weight should not be used to reinforce the whole silhouette, it is best reserved for clarifying overlaps between your forms, and restricting it to localised areas where those overlaps occur, as discussed in this video.

Leg construction

The last point we've covered previously is using the sausage method of leg construction. You're using sausage forms to build quite a few of your legs constructions, though there are some places where your leg forms are becoming stretched spheres (which as noted on the lower left of the sausage method diagram is something to avoid, as they're too stiff) and there are cases where you're even drawing around them twice, like ellipses. There are also cases like the hybrid at the top of this page where you appear to be drawing arbitrary shapes in an effort to capture the whole leg in one step. By sticking to the characteristics of simple sausage forms we can build a foundation that feels solid and 3D- over-complicating these forms is going to make it more difficult to understand how they exist in 3D space, so they will feel flat. Once the simple sausages are in place we can build all kind of lumps b,umps and complexity onto them with additional forms, to arrive at a more characteristic construction of the leg in question. You can see a good example of this in this ant leg demo.

On some of your pages, such as these bears you'd added a bunch of extra contour curves to the surface of individual sausage forms. By leveraging a contour line at each joint to show how the sausage forms intersect as highlighted in red here we make the use of additional contour lines on the surface of individual forms redundant.

All righty, that should cover all the things that have lapsed from previous lessons. We're about an hour into this critique, which is standing at over a thousand words, but I still have a few points to get to, covering specific things which are introduced in lesson 5.

Core construction

It is good that you're starting your constructions off with simple forms for the cranial ball, ribcage and pelvis masses. Keep in mind that the ribcage should occupy roughly half the length of the torso, there are a few constructions such as the bear at the bottom of this page where the ribcage is enormous. I'd like you to review this section which introduces how to combine the ribcage and pelvis masses into a "torso sausage" as quite often you'll connect the two masses with a line on the top side, but leave the underside open, giving yourself a weaker foundation upon which to build the rest of your construction.

You're showing that you understand how to connect the cranial ball to the torso with a simple solid neck, although you don't always do so. This is an important step to remember, so don't leave the cranial ball floating in front of the body.

Additional masses

Where in lesson 4 we introduced the idea of building onto our constructions with complete additional forms, here in lesson 5 we introduce additional masses as a tool to help students design their additional forms more specifically, establishing believable relationships between existing structures and new ones.

One thing that helps with the shape here is to think about how the mass would behave when existing first in the void of empty space, on its own. It all comes down to the silhouette of the mass - here, with nothing else to touch it, our mass would exist like a soft ball of meat or clay, made up only of outward curves. A simple circle for a silhouette.

Then, as it presses against an existing structure, the silhouette starts to get more complex. It forms inward curves wherever it makes contact, responding directly to the forms that are present. The silhouette is never random, of course - always changing in response to clear, defined structure. You can see this demonstrated in this diagram.

I've provided a couple of quick additional notes for additional masses on one of your bison here. Notice how I've pulled the additional mass above the neck down from on top of the spine, around the side of the body, and pressed it against the top of the protruding shoulder mass, creating a specific inward curve. The more interlocked they are, the more spatial relationships we define between the masses, the more solid and grounded everything appears. Also notice that I have not applied any additional contour lines to the additional mass to make it feel 3D. Our goal here is to get the masses to feel 3D by designing their silhouette in a manner that explains how they connect to the existing structures in 3D space.

As your use of additional masses is a bit sparse (you tend to favour altering the silhouettes of your forms with one off lines instead) I don't have that much to go on here, and I'm hoping I'll be able to provide more comprehensive advice with your next batch of constructions.

Head Construction

The last thing I wanted to talk about is head construction. Lesson 5 has a lot of different strategies for constructing heads, between the various demos. Given how the course has developed, and how Uncomfortable is finding new, more effective ways for students to tackle certain problems. So not all the approaches shown are equal, but they do have their uses. As it stands, as explained at the top of the tiger demo page (here), the current approach that is the most generally useful, as well as the most meaningful in terms of these drawings all being exercises in spatial reasoning, is what you'll find here in this informal head demo.

There are a few key points to this approach:

  • The specific shape of the eye sockets - the specific pentagonal shape allows for a nice wedge in which the muzzle can fit in between the sockets, as well as a flat edge across which we can lay the forehead area.

  • This approach focuses heavily on everything fitting together - no arbitrary gaps or floating elements. This allows us to ensure all of the different pieces feel grounded against one another, like a three dimensional puzzle.

  • We have to be mindful of how the marks we make are cuts along the curving surface of the cranial ball - working in individual strokes like this (rather than, say, drawing the eye socket with an ellipse) helps a lot in reinforcing this idea of engaging with a 3D structure.

Try your best to employ this method when doing constructional drawing exercises using animals in the future, as closely as you can. Sometimes it seems like it's not a good fit for certain heads, but as shown in in this rhino head demo it can be adapted for a wide array of animals.

As a quick bonus to help you with tackling seated or reclining poses (such as what you tried out with your cats) I'd like to share this fox demo I made as part of another student's critique. This shows how to tackle poses where the legs are overlapping and foreshortened, as well as providing an example for how to use the sausage method of leg construction, additional masses, and the informal head demo method of head construction.

Conclusion

I'm certain you have every ability to do a great job with this lesson, but right now you don't appear to be making full use of the information at your disposal. This feedback is, by necessity, very dense, and I expect you will need to read through it all several times, and possibly take notes in your own words to help absorb it all. Once you have had some time to go through all the information here, and in your lesson 4 critique, I'd like you to complete some revisions to work on the various issues I've called out here. Additionally, I'd like you to adhere to the following restrictions when approaching these revisions:

  • Stick to one construction per page, making every effort to use as much of the space available as you can.

  • Don't work on more than one construction in a day. You can and should absolutely spread a single construction across multiple sittings or days if that's what you need to do the work to the best of your current ability (taking as much time as you need to construct each form, draw each shape, and execute each mark), but if you happen to just put the finishing touches on one construction, don't start the next one until the following day. This is to encourage you to push yourself to the limits of how much you're able to put into a single construction, and avoid rushing ahead into the next.

  • Write down beside each construction the dates of the sessions you spent on it, along with a rough estimate of how much time you spent in that session.

Please complete 6 pages of animal constructions.

Next Steps:

Please complete 6 pages of animal constructions.

When finished, reply to this critique with your revisions.
edited at 5:59 PM, Mar 13th 2024
2:30 PM, Friday March 22nd 2024

Hi,

Thank you for the very detailed feedback.

My revisions are linked here: https://imgur.com/a/BZHUZ7M

With many of the revised drawings, after I finished the core construction, I struggled with knowing the right balance of detail to add. For example, I know I shouldn’t draw every single piece of fur or spot/stripe otherwise the drawing will lose purpose and look to busy. I’ve watched the tutorial videos and read the page several times where Uncomfortable describes the importance of not drawing everything and focusing on the silhouette, but I still don’t know the right balance and worry that not drawing enough detail may make a drawing look unfinished. Do you have any other recommendations or resources for how to achieve the right balance between enough and not enough detail?

Also, I just found out I have tendinitis in my drawing arm and consequently need to change my pen/pencil grip from a thumb wrap to a more ergonomic grip. Over the last 2-3 weeks, I’ve been working on thisnew grip but I was wondering if this would require that I restart Lessons 1-4? Or, should I just continue incorporating the exercises from these lessons as part of my warmups and proceed as-is?

2:54 PM, Friday March 22nd 2024

DIO will be around to look at your revisions as per usual but I wanted to address what you mentioned at the end. If you have tendonitis - and by that I mean are in the process of recovering from it - you really shouldn't be continuing to aggravated the issue by continuing to practice drawing until it has had adequate time to heal, otherwise you risk making it worse.

If you have consulted over this with a physician - specifically continuing to draw and the grips you're using, and they confirmed that it's okay to continue, then that's fine, but if this is an adjustment you made on your own to keep going in the interim, that could be quite risky.

As to having to restart due to changing your grip, no that's not an issue, and you do not need to restart. But please, allow your arm to heal properly before continuing with the course, unless you've specifically discussed this with a doctor.

3:12 PM, Friday March 22nd 2024

Thanks so much for the reply. As of right now, the doctor said it is mild and not enough to warrant changing my work or hobbies for yet. However, they did say that I might need to decrease the intensity of both work and painting/drawing if it’s not better at my checkup in four weeks. In the meantime, they’ve recommended I do everything normally with the addition of the following practices:

  • Buy/use ergonomic wrist rests for my desk (I use a keyboard/mouse a lot for my day job)

  • Take frequent breaks every 15-30 minutes when typing or doing other repetitive motions.

  • Use a wrist brace while sleeping or driving long distances

  • Regularly do my prescribed PT exercises (these are the absolute devil and I officially hate tomato paste now, since all of my exercises are various wrist motions with 6oz cans of tomato paste).

  • Take a prescribed anti-inflammatory for the next week

  • Optional: Change my grip if I plan to still draw/paint for extended periods of time.

I’m hopeful that I’m on the upswing since my wrist/hand/arm already feels significantly better—albeit awkward—with my new grip, but I’ll closely monitor, see what the doctor says at my next checkup, and take it easy if necessary. I’ve also been doing a lot more pottery in my 50% time since that uses slightly different muscles.

Thanks again for the reply!

7:05 PM, Friday March 22nd 2024

Hello Hancollinsart, thank you for completing the additional pages.

For your question about how much detail to add, this seems to have been a bit of a distraction for you as you worked on these pages. I'm seeing a general trend for you to get to a certain point in your drawing (usually once you've constructed the torso sausage and basic leg armatures) and jump into texture and detail without fully constructing the forms - skipping over additional masses, and a few steps of head construction. Your application of fur isn't bad- I can see you've focused on adding tufts of fur where it breaks the silhouette and has the most impact, but for the purpose of getting you through this lesson I'd like you to focus on construction only for the next batch of pages.

I was pleased to see that you actually did take notes, including actionable steps with what to work on, and these pages are definitely an improvement. You're giving your constructions more space, and it looks like you're taking more time to think through what you're doing too. I'm happy to see that you're respecting the solidity of your forms, and have largely avoided cutting back inside the silhouette of forms you have already drawn. I'm happy to see that you've resisted the temptation to pile extra contour lines onto the surface of your forms, and have focused on using contour lines where your forms intersect instead, good work. You're making good progress here, though there are a few things which look like they require further clarification.

Core Construction

Your major masses are generally more correctly proportioned, and this is helping you to construct more convincing torso sausages.

When we're looking at an animal from the side like this giraffe there should be a space between the ribcage and pelvis mass as shown here.

I can't see any core neck construction on your lion or your rhino.

Leg Construction

I can see you've avoided making your leg forms elliptical, nice work. Try to stick to simple sausage forms as closely as you can. There are still some places such as here where you're deviating from sausage forms in an effort to draw the whole leg in one go. The key to keep in mind here is that the sausage method is not about capturing the legs precisely as they are - it is about laying in a base structure or armature that captures both the solidity and the gestural flow of a limb in equal measure, where the majority of other techniques lean too far to one side, either looking solid and stiff or gestural but flat. Once in place, we can then build on top of this base structure with more additional forms, here is how we could do this on your giraffe.

When attaching the legs to the body, I find that rather than drawing small ellipses like holes to plug the leg into, it helps to treat these as simplifications of some of the areas of bulky muscles that allow the animal to walk, using much larger ellipses. I've shown this in blue on the same giraffe image. These protruding shoulder and thigh masses are very useful for helping to anchor additional masses to the construction later.

Your lion seems to have had his feet amputated. I'm guessing what happened here is that the feet were obscured by long grass in the reference. If you encounter a similar situation in the future I recommend finding a second reference of the same species where the feet are visible, and use that information to help you to construct the feet. I'd also like to share these notes on foot construction where Uncomfortable shows how to introduce structure to the foot by drawing a boxy form- that is, forms whose corners are defined in such a way that they imply the distinction between the different planes within its silhouette, without necessarily having to define those edges themselves - to lay down a structure that reads as being solid and three dimensional. Then we can use similarly boxy forms to attach toes. Try using this strategy for constructing paws in future.

Additional Masses

Your use of additional masses is still very sparse. Additional masses are an important tool for developing your constructions beyond the simple, generic, balls and sausages that we use to create a solid foundation.

As well as using additional masses on the leg of the giraffe, we could also use them on the torso as seen here. (I'd also re-positioned the pelvis mass in red, and simplified the torso sausage in green, allowing it to sag slightly as discussed on the lesson intro page.

Head Construction

Here I do feel you could have paid more attention to the information presented to you. I'd like you to reread my initial critique where I went over some of the key points of the informal head demo, and asked you to follow the method for constructing heads, as closely as you can.

On your meerkat you clearly attempted to construct large angular eye sockets (though you could be paying more attention to the specific pentagonal shape) and wedge the muzzle snugly against them. On some of your other pages you seem to be largely doing your own thing with the head constructions.

On some of your pages I can't tell if you skipped over drawing eye sockets altogether, or drew them way too small and covered them with the eyeball.

A quick recap on applying the informal head demo method your lion.

1- Large, pentagonal (5 sided, with a point facing down) eye sockets. (red)

2- Wedge the base of the muzzle snugly along a full edge of each eye socket, minding the curvature of the cranial ball as we draw these lines. (blue)

3- Extrude a simple boxy muzzle form- you did this well. Construct the plane of the brow ridge/forehead area. (green)

4- Ears should attach to the head. Don't draw them as lines floating in a mass of fur. (purple)

I actually shared this rhino head demo with you previously and you don't appear to be using it to help with your own rhino head construction.

Other notes

I've also rebuilt a significant portion of your rhino construction here, to show a few of the things we've talked about in action.

1- I've shrunk down the huge ribcage. Remember it is only half the length of the torso, the rib cage is not the tummy.

2- Join the ribcage and pelvis masses together into a torso sausage, without cutting inside the pelvis mass. Construct the neck.

3- The big shoulder and thigh masses I discussed in the leg section.

4- Simple overlapping sausage forms. Make sure your lines are continuous and unbroken and don't introduce sharp corners to the sausages.

5- Contour lines at the joints. As these are intersections they occur where the forms connect together. For this to happen both forms must be present, so the contour curve stays within the region where the forms overlap. If you're not sure why that is, review this section where intersections are introduced. I also added simple forms as a base for the feet.

6- Additional masses (and toes) each with their own complete silhouette. I did see you drew some additional masses above the shoulder and neck of your your construction, though you cut them off where they passed behind the head and eachother, so they become flat partial shapes.

Okay, that should cover it. These are heading in the right direction but there are a few issues to clear up. I'll be assigning another round of revisions. As Uncomfortable discussed, please allow yourself time to heal if needed.

I'd like you to stick to the following restrictions when approaching these revisions:

  • Stick to one construction per page, making every effort to use as much of the space available as you can.

  • Focus on construction only, with no texture. I believe worrying about texture is distracting you from employing the constructional techniques that I'm trying to get you to put into practice.

  • Don't work on more than one construction in a day. You can and should absolutely spread a single construction across multiple sittings or days if that's what you need to do the work to the best of your current ability (taking as much time as you need to construct each form, draw each shape, and execute each mark), but if you happen to just put the finishing touches on one construction, don't start the next one until the following day. This is to encourage you to push yourself to the limits of how much you're able to put into a single construction, and avoid rushing ahead into the next.

  • Write down beside each construction the dates of the sessions you spent on it, along with a rough estimate of how much time you spent in that session.

Please complete 5 pages of animal constructions.

Next Steps:

Please complete 5 pages of animal constructions.

When finished, reply to this critique with your revisions.
9:12 PM, Thursday April 18th 2024

Hi, thank you for the feedback. Here is a link to the five pages of revisions: https://imgur.com/a/EuncZxi

I think there are still concepts I am not quite grasping that I need to practice more but I didn’t want to go against earlier recommendations not to do more than the required page count.

I really appreciate all of your help!

View more comments in this thread
The recommendation below is an advertisement. Most of the links here are part of Amazon's affiliate program (unless otherwise stated), which helps support this website. It's also more than that - it's a hand-picked recommendation of something I've used myself. If you're interested, here is a full list.
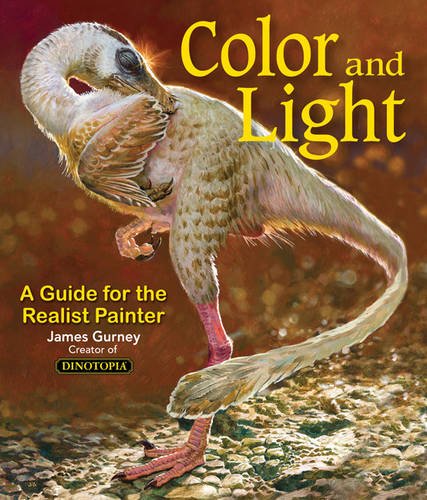
Color and Light by James Gurney

Color and Light by James Gurney

Some of you may remember James Gurney's breathtaking work in the Dinotopia series. This is easily my favourite book on the topic of colour and light, and comes highly recommended by any artist worth their salt. While it speaks from the perspective of a traditional painter, the information in this book is invaluable for work in any medium.

This website uses cookies. You can read more about what we do with them, read our privacy policy.