Lesson 5: Applying Construction to Animals

11:20 PM, Wednesday April 1st 2020

Drawabox Lesson 5 - Album on Imgur

Direct Link: https://i.imgur.com/JuUVkoU.jpg

Post with 31 views. Drawabox Lesson 5

Hey! Hope you are doing well and keeping safe in these tumultuous times.

Finally done! I ended up having a lot of fun with this one.

I recently picked up and worked through all of Drawing on the Right Side of the Brain. I've been wanting to essentially work on my skills to actually make drawings that I could show my friends and they'd go "Wow, neat." So I took two weeks off from DAB to do that. Working through that book ended up being extremely motivating to me (I put most my completed exercises in my sketchbook, if you're interested). If I am being honest, previously, I did not really follow the 50% rule because I couldn't really think of anything I wanted to draw. I felt too amateurish to even start doing what I wanted. But that book gave me the confidence to actually go and have fun with drawing and gave me baseline tools to work with. Now I do a drawing every night and genuinely have a ton of fun doing so.

One thing the book helped me think about was proportions. Previously with my DAB exercises, I just kind of didn't think about it. The limbs and bodies turned out how they turned out. But now, I think about them more even if it's just a simple "oh, this head is twice as long as it is wide" way. One thing I struggled with, though, was getting proportions right with the pen. When I am using pencil, I can easily compare and refine shapes and angles. With pen, I find that to be impossible because once one line is down, it's down for good. What I started doing was a few "studies" in pencil first to get the spacing and proportions right and then do a real drawing in pen once I knew what I wanted it to look like. Do you have any thoughts on that process? I started doing that from my rhino onwards and I think you can really see a significant difference in terms of how my shapes look in proportion to each other and how they fit into each other.

Another little "hack" that I started doing was drawing my horizon line into my pictures. I think this also helped me tremendously with keeping my shapes consistent and is a tip I would recommend to all DAB students for stuff like the plants onwards.

After finishing that last book, I started then working through Andrew Loomis's Drawing the Head and Hands. I'm having a blast with that because his book is very much constructional based. I feel like I can apply my Drawabox skills directly to his lessons. It's quite gratifying. I feel like my work in the fundamentals is actually paying off. If any DAB students are looking for something to flex your skills on after you finish this program, I would look to that book as well.

This is getting long, sorry. I also have a suggestion for the site. I really like the Sketchbook feature and like posting my stuff to it. But if I go to the Sketchbook feed to find other people's drawings, I think literally nineteen in twenty posts are 3/10 Lesson 1 submissions. Is there any future where these are filtered out? In my best life, I would be gracious enough to critique some of these people... But there is just simply too many. I want to easily be able to find other people who are posting sketches and drawings. And not that I mind other people asking for partial lesson feedback! I've tried giving some feedback on here myself (tough stuff, don't know how you do it). But if even just partial submission are filtered out from Lesson 1 to 2, that would help tremendously to keep that feature active, I think.

Just my two cents. I know there's a reason they are there too. But the volume is just staggering.

Anyways, looking forward to hearing what you have to say about my submissions! Thanks for all your hardwork!

0 users agree
2:08 AM, Thursday April 2nd 2020

Hahaha, the point you raised about the sketchbook section made me chuckle. Reason being, that section largely exists because we needed somewhere to stuff the partial submissions where they wouldn't draw attention from the completed work, and reduce the chances of the folks who actually put all the time in to get things finished getting feedback on their hard work. To that point, I certainly agree that those posts can be quite annoying to have to dodge around. I do have plans to add filtering to the completed homework section, and I will certainly do the same to the sketchbook section. I'm not currently adding new features to the website and won't be for a bit yet (still thoroughly burnt out from the many months I spent getting it ready for release), but filters are on the to-do list for when I get back on that.

I am glad you were able to find something to push you into drawing for fun more. At the end of the day, that feeling of being too amateurish is exactly why we need to do it. I flipped through your exercises as well, and I especially liked the side-profile portraits.

About proportion - we do actually introduce proportional studies (quick drawings on the side that break up an object in orthographic views) when we get into vehicles, as they tend to be quite important there. With organic subject matter however, I generally let proportion slide. In fact, I often celebrate when students manage to pull off a drawing with proportions that are off, but where the construction is so strong that it makes it seem as though the fault is with whatever the student was drawing. Basically that the subject was a freak of nature, and the drawing was accurate. It's a sign of very strong constructional skills. Proportion itself is as such not a huge priority for me, as I know it develops steadily as one continues to do drawing studies from photographs and from life.

Anyway! Onto the work for this exercise. You're my last critique of 8 today - it seems a lot of people submitted as soon as they had the credits to do so.

Starting with your organic intersections, you're largely doing a pretty good job with these, and you're successfully conveying the sense that these forms are each three dimensional, and that they're interacting in 3D space, slumping and sagging against one another without sacrificing the illusion of their solidity and volume. One point about the second page though - it seems your bottom sausage isn't casting any shadows, which seems a bit jarring. Remember to be consistent with your cast shadows.

Moving onto your animal constructions, overall you're demonstrating a pretty good grasp of the material, specifically in how you leverage your forms and focus heavily on establishing the relationships between those forms in order to create more solid, cohesive constructions. There are however some issues I'd like to point out that should help you as you continue to move forwards.

First off, you have a pretty strong tendency to use a lot of contour lines. Contour lines are great, and effective tools, but that effectiveness only tends to go so far, as they suffer from diminishing returns. One contour line can certainly help quite a bit - the one to follow might help less so, and the third even less than that. Eventually we end up with a lot of lines where most of them are not really contributing. This comes back to the importance of the ghosting method, where our first step (planning) involves determining the nature of the line we want to draw, and with it deciding what its job is to be and whether or not that line will be the best one for the given task.

There are in fact different kinds of contour lines. There are the ones we're very familiar with - those that sit along the surface of a single form and help describe how that one form exists in 3D space on its own. Because they focus on the form in isolation, their actual usefulness is somewhat limited. But there is another, more effective type when it comes to construction, and you've already used this several times. Back in Lesson 4, we introduced the sausage method. This second type of contour line is what we use to reinforce the joint between two sausage forms - it's a contour line that establishes the relationship between two forms in 3D space, and in doing so, it creates a cyclic connection between them. In our brains, we see this and understand that if one form is three dimensional, then so too is the other one. But in turn, if that second form is 3D, then so too is the first. On and on, it creates a loop that perpetually reinforces itself.

This kinds of contour lines are extremely effective, and we can see them in how your head constructions generally do a good job of establishing how the muzzle connects to the cranial sphere. This reinforces both forms as being three dimensional, eliminating any benefit of further contour lines on those forms.

This leads to our second point, however - there are a number of cases where you attempt to add additional masses, but when drawing them you largely focus on how that mass itself is to be made three dimensional, and neglect to think about how it relates to the underlying structure to which it is being added. For example, we see this on the egret, specifically up along the peak of its back, and to an extent along its head above the beak. Here you use the first kind of contour line a great deal, but when actually drawing these forms, you did not consider how its silhouette would integrate with that underlying structure.

You did a somewhat better job of this for the additional forms on this squirrel's back and chest. That said, these additional forms can be pushed much further, as you can see in this drawing demo where I use them all over to capture the nuance of a puma's musculature.

Lastly, I want to circle back to that sausage method. Currently you're somewhat haphazard in terms of what elements of this method you apply, and more often than not you tackle each animal's legs on a case-by-case basis. This is likely because you don't necessarily see these animals' legs as matching the appearance of a chain of sausages. The thing to keep in mind is that the sausage method is not about drawing a specific kind of leg - it's about creating an underlying structure or armature that maintains an illusion both of solidity and of fluidity. Generally the approaches we use when drawing legs will either focus on making things feel solid (but stiff), or fluid/gestural (but flat). The sausage method achieves both. Once this armature is established, we can then add bulk to it the same way we always do - by wrapping additional masses to that structure.

So! I've outlined a number of areas where we can definitely achieve some further growth. I think you are doing a pretty good job as it is, but before I mark this lesson as complete, I'd like to ensure that these points are taken to heart. As such, I'll be assigning just a few more pages of animal drawings.

Next Steps:

I'd like you to do 3 more animal drawings of your choosing. Take what I've said here to heart, and be sure to go over some of the informal demos on this page (especially the donkey and puma ones).

When finished, reply to this critique with your revisions.
1:02 AM, Friday April 17th 2020

Here are my drawings! Did them last week, but was just exceptionally lazy about uploading them...

https://imgur.com/a/6wQEZUI

7:16 PM, Friday April 17th 2020

There is definitely progress here, especially in how I can see signs that you're thinking more about how forms wrap around one another. There are however signs that you're being somewhat sloppy when it comes to the actual execution of your lines, which suggests to me that you have it in you to do far better.

I've put some notes on top of your moose. As you can see, there are a number of issues that come from sloppiness, for instance:

  • You're not employing the sausage method entirely correctly. You're close, but you're sometimes drawing stretched ellipses instead of sausages, sometimes the ends of your sausages are of different sizes, and pretty much across the board the contour curves you add at the joints don't wrap around the forms properly. Refer back to these notes from the contour line exercise from lesson 2.

  • You have a tendency to square off one end of your additional masses, instead of continuing to round them off. Remember that these masses are like water balloons that you're piling up over one another. They don't get sharp corners.

  • With the legs especially, you're vastly oversimplifying things. Rather, you're putting down a basic sausage chain, but not much more. Moose legs have plenty more going on with them form-wise, but you're largely overlooking it. Remember that once you've got your sausage structure in place, you can add further masses to it as shown here.

Now your constructions are getting better in a big way, but there are a lot of places where I think you're just allowing yourself not to put in 100% of what you can into each and every stroke. Remember that you should be applying the ghosting method to every line, taking the time to think about the specific job every mark is meant to accomplish before preparing and executing with confidence.

I suspect that if you're tackling all of these drawings in a single sitting, that you may be focusing on getting all of them done during a set period, rationing your time between them. So, to that end, I'm going to ask for one more drawing - draw another moose, and invest as much time into each and every mark, each and every component, as you can. Furthermore, keep looking back at your reference - construction starts out simple, and breaks down into greater levels of complexity. You understand this, based on the bulk of your torso and head, but you need to be able to break down that complexity across the entire body, legs included.

Next Steps:

One more drawing of a moose. Antlers not required.

When finished, reply to this critique with your revisions.
11:14 PM, Monday April 20th 2020

https://imgur.com/a/LX8SlcQ

Here it is! I re-read all your feedbacks, practiced my sausages, practiced my organic forms, and went for another go at the moose. I did the antlers anyways, for fun. Took my time with it like you said. You're right, those last three I did all in one sitting. Which is normally not what I do! Normally only did one or two drawings an evening, so it was funny that you picked up on that.

One thing I struggle with is that I find it hard to maintain the overall perspective of the picture in mind when I am rotating the paper to draw a line or ellipses or whatever. i.e. I want to ghost some ellipses on a sausage to get the feel of the shape before I add some more form to that. But in rotating the page, I kind of lose in my mind's eye the overall effect I am going for and it becomes more "line" and less "form", if that makes sense. Any advice?

View more comments in this thread
The recommendation below is an advertisement. Most of the links here are part of Amazon's affiliate program (unless otherwise stated), which helps support this website. It's also more than that - it's a hand-picked recommendation of something I've used myself. If you're interested, here is a full list.
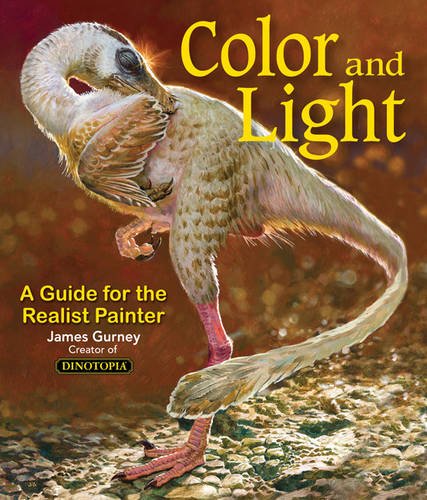
Color and Light by James Gurney

Color and Light by James Gurney

Some of you may remember James Gurney's breathtaking work in the Dinotopia series. This is easily my favourite book on the topic of colour and light, and comes highly recommended by any artist worth their salt. While it speaks from the perspective of a traditional painter, the information in this book is invaluable for work in any medium.

This website uses cookies. You can read more about what we do with them, read our privacy policy.