


8:10 PM, Tuesday August 17th 2021
Starting with your arrows, you're doing a great job of drawing these with a good deal of confidence, which emphasizes how each one moves fluidly through the world. One thing to keep remembering to focus on however is how the gaps between the zigzagging sections compress as we look farther back, due to perspective, as shown here.
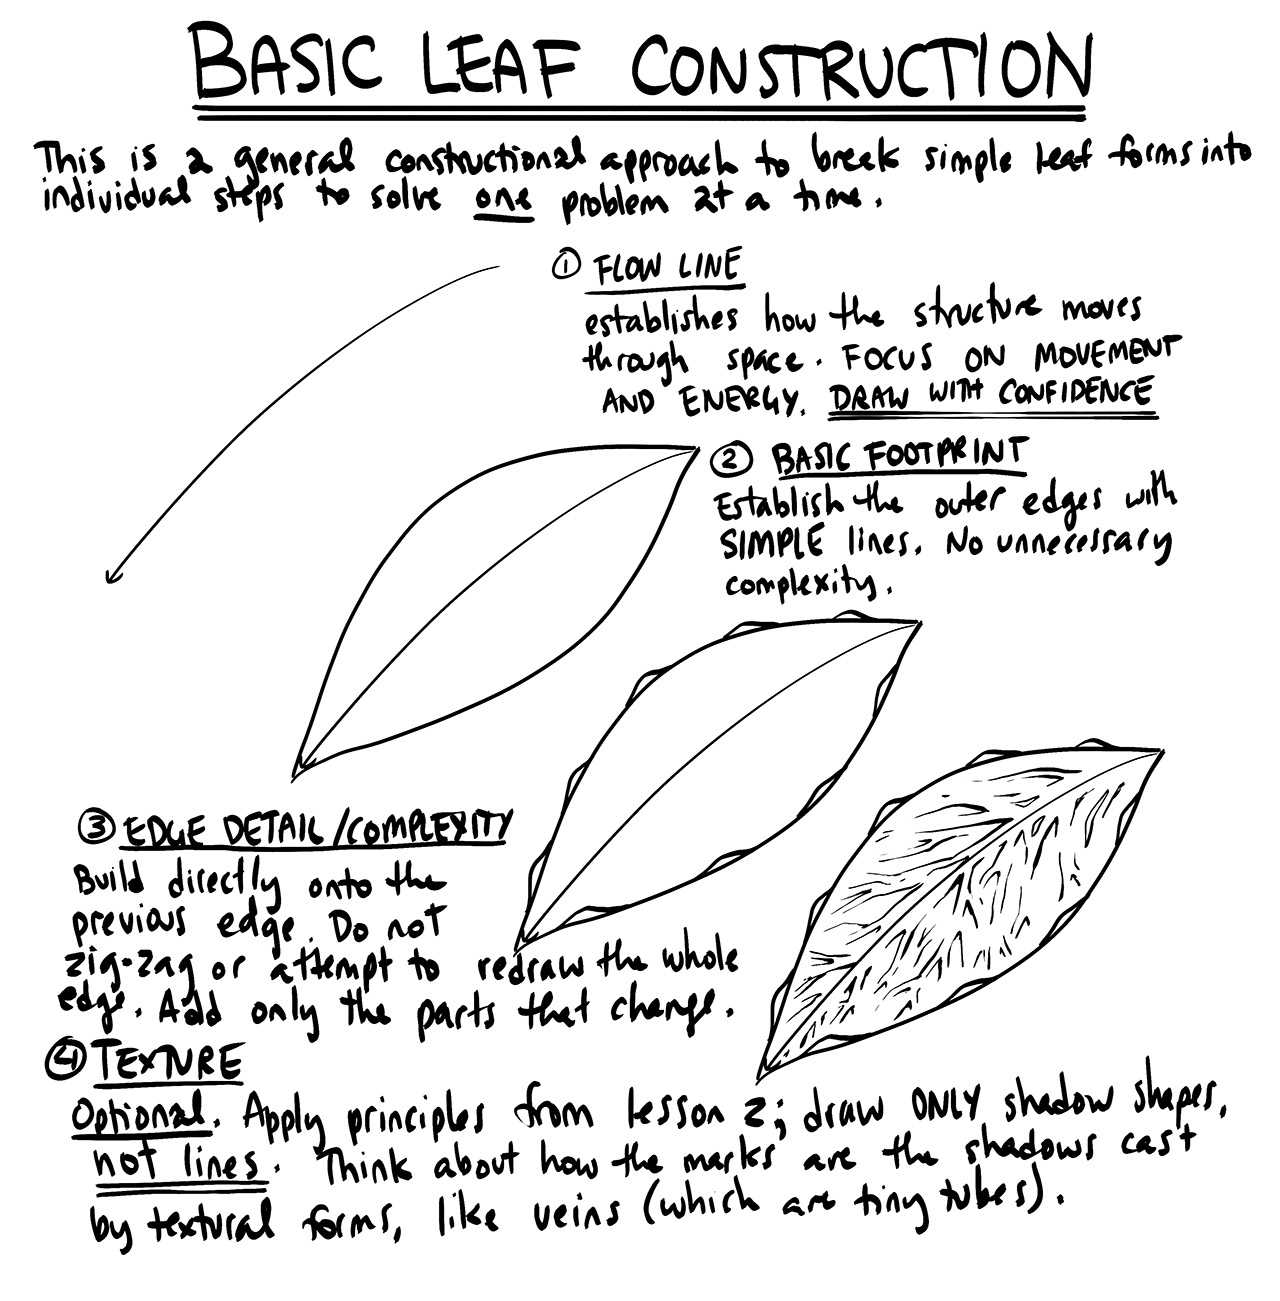
This carries over nicely into the leaves, where you've done a good job of capturing not only how the leaves sit statically in space, but also how they move through the space they occupy. Your addition of edge detail, building upon the existing structure, is also coming along well
When it comes to texture, always remember the principles raised in Lesson 2 - texture is not just about putting down as many marks as you can, but rather about implying the presence of the textural forms themselves. The veins that run along our leaves' surfaces are themselves tubes - rather than drawing a complicated network of branching lines along the surface (which can sometimes get confused with just drawing simple contour lines which themselves are not detail/texture), focus on capturing the shadows such tube forms would cast. You can see an example of this in the leaves exercise instructions.
Continuing onto your branches, here it does appear that while you're doing a good job of keeping the width of your branches fairly consistent throughout their lengths (which helps us achieve a greater illusion of solidity), you're not actually following the instructions in regards to how the different edge segments are meant to interact. As explained here from the lesson, each segment is meant to start at an ellipse, continue past the next ellipse, and stop halfway to the third. So the next segment would also start at the second ellipse, go past the third, and stop halfway to the fourth. You are currently starting the next segment around where the previous one ends, allowing for a limited overlap rather than the longer overlap that allows for a smoother, more seamless transition from one segment to the next.
Moving onto your plant constructions your work here is in many ways well done, except when it comes to the detail phase of your drawings. Here it's very clear that when you get into detail, your focus shifts to the idea of decorating your drawings, to make them prettier and more impressive. Decoration, however, is not a very useful goal to pursue - it's vague and undefined, with there being no clear point at which one has added "enough decoration".
What we're doing in this course can be broken into two distinct sections - construction and texture - and they both focus on the same concept. With construction we're communicating to the viewer what they need to know to understand how they might manipulate this object with their hands, were it in front of them. With texture, we're communicating to the viewer what they need to know to understand what it'd feel like to run their fingers over the object's various surfaces. Both of these focus on communicating three dimensional information. Both sections have specific jobs to accomplish, and none of it has to do with making the drawing look nice.
Having an actual purpose and goal to achieve with detail will help you avoid overdoing it, and will ensure that you're only adding as much as is actually necessary. Lastly, remember that detail/texture is not about drawing what you see in your reference image - it's about understanding what you see (in terms of the 3D forms), and then drawing them in a manner in which they are conveyed to the viewer. It's really no different from construction, except that instead of outlining these forms as we do with the bigger constructed ones, here we are implying them through the use of cast shadows. Also, being sure to stick only to using filled areas of solid black for cast shadows will help ensure a more consistent manner of communication with the viewer.
Despite this issue, you are still handling construction itself pretty well, and I'm glad to see that you're building things up with solid forms first, before worrying about detail. Many students who overfocus on detail will sacrifice construction as a result, but that is not the case here.
So, I'll go ahead and mark this lesson as complete, and leave you to address those detail issues in the next one. You can also address the branches issue in your regular warmups.
Next Steps:
Feel free to move onto lesson 4.


