Lesson 5: Applying Construction to Animals

1:40 PM, Wednesday December 16th 2020

Imgur: The magic of the Internet

Direct Link: https://i.imgur.com/VeNyUid.jpg

Discover the magic of the internet at Imgur, a community powered enterta...

A couple things I noticed I was doing wrong:

  • sometimes there are bulges on limbs should wrap around the whole form, but instead of wrapping it all the way around, I often attached two bulges to the side.

  • foot/paw/hoof design was difficult

Thanks for checking! It's always helpful

0 users agree
1:18 AM, Friday December 18th 2020

Starting with your organic intersections, these are largely done pretty well, aside from some of your contour lines being a touch shallow (overshooting those curves and hooking them around more dramatically will help with this). As a whole you're establishing the relationships between forms pretty well.

Your animal constructions do have a number of issues I'd like to point out.

Starting with your ostrich, a few things came up, which I marked out here:

  • First and foremost, I'm not entirely sure what's going on around the neck, but it is incredibly important to focus on keeping thing simple to start, and drilling down to your basic, major forms and pinning them down. A ball for the head, a ball for the torso, a tube connecting them for the neck. You can then build up additional forms (something I'm going to touch upon in a bit) after that, but it appears like you tried to sort through all of these steps all at the same time, instead of dealing with one spatial problem at a time.

  • For head construction - again something I'll touch on in a bit in greater detail - think of the head as a 3D puzzle. All the pieces - eye socket, muzzle/beak, etc. connect to one another. Don't draw them such that they float arbitrarily relative to one another.

  • When drawing your legs on the side, you appear to have constructed them with ellipses rather than sausages. This is an issue called out as something to be aware of in the sausage method diagram.

  • I'm seeing some places where you're doubling up your lines for some reason, and there's no logical explanation as to why. It doesn't appear that you were adding line weight (and the areas I pointed out didn't feature any overlaps that needed clarification, so line weight wouldn't be of much use here), so it just looks like you went back over those parts for no particular reason. That is definitely something to avoid, and it goes somewhat hand-in-hand with a general need to think through your marks more and consider what each one is meant to contribute before executing them. The ghosting method helps with this, due to it splitting the process into planning, preparation and execution. You can think about each mark in its planning phase and determine whether it is actually something that should be drawn.

The next one I want to look at is this bear construction. Again, I've put some notes directly on the page, and I've marked them with letters so I can expand upon them below:

  • A. This is actually something I've started developing more recently, and while it'll be some time before I incorporate it into the lesson material proper, the students I critique are effectively the lab where I find how to best improve the explanation of certain concepts. For our additional masses, the actual silhouette of that mass - how and where it curves, where the corners sit, etc. - is the primary way in which we can establish that form's relationships with the structure to which it is attached. When a mass floats in the void on its own, it basically exists as a soft ball of meat, in its simplest form, made only of outward curves. When it presses up against something else however, it curves inward in the area of contact in response, developing more complexity (inward curves are more complex than outward curves). Here's a diagram demonstrating this concept. What this means however is that whenever you incorporate any complexity (any inward curves, like the one I marked out on your bear), there should be a reason for it. You should be precisely aware of the nature of any form pushing against your mass. Don't just add them at random. You actually did a good job of showing how the shoulder mass presses up against the mass along the bear's neck, for example. Where nothing is touching the masses however, it should be staying simple, with outward curves only.

  • B. This is actually an extension of the previous point - don't be frivolous with your contour lines. The ones we learn about initially, those that sit on the surface of a single form, can be quite useful, but don't just slap them on wherever because you feel that it'll help. Every mark you draw should contribute in some specific, planned manner. In the case of these additional masses, they're actually not super useful, since they only establish how those forms exist in 3D space on their own, and don't help establish the relationship between that mass and the structure around it. Instead, being more mindful of how you shape the form's silhouette will help make it feel far more solid and believable, even without additional contour lines.

  • C. Head construction is another area where I'm exploring new ways to explain these principles. For now, I'll point you to this explanation on the informal demos page. Read through the text while following along with the diagram. At its core, the head is a bunch of pieces that fit together snugly - in your drawings you tend to draw them like stickers, floating independently of one another. You need to be more intentional and clear with the shape of your eye sockets, and draw your eye balls much larger before wrapping eyelids around them.

  • D. As mentioned previously, you're not drawing sausages for the leg segments, you're drawing ellipses. In my critique of your lesson 4 work, I mentioned that you weren't applying the sausage method consistently, and provided examples. I can see some ways in which you've applied parts of those examples (using some additional masses), though like with all additional masses, try and remember that each one has thickness to it. It's a piece of meat you're sticking on there. Always try and make them feel like they're not just clay you're smoothly incorporating into the construction. Each one is going to stand out on its own, contribute its own personality and be its own little puzzle to solve as you work towards this structure you're trying to build.

  • E. For all forms that connect to one another, define how they intersect with a contour line. Don't leave any of them open-ended, all additions to your construction should be their own enclosed forms.

  • You drew a bunch of pebbles on the ground. Setting aside the fact that they were pretty sloppily drawn, you also used explicit drawing techniques here. Given that these are just forms sitting on the ground, we can very easily consider it to be a texture - and so it should be captured using the implicit drawing techniques explored back in lesson 2's texture section. That means focusing on capturing the shadows they cast, not their individual outlines.

I've laid out a lot for you to process here, so I'm going to leave you to that and assign some revisions below. When working through these revisions, I want you to hold to the following restrictions:

  • Do not draw any contour lines that sit along the surface of a single form. You're still encouraged to draw those that define the intersection/relationship between separate forms (like in the sausage method), just not the kind you were adding to a lot of your additional masses.

  • Do not work on more than one animal construction in a single day. This is specifically to force you to invest more time into every mark you draw, every form you construct, etc. I think there's a lot more time you can be putting into planning and thinking through each move you make, and instead you're jumping into them too soon, leaving you with unintended mistakes to work around. Mistakes are fine - but remember that once you draw a mark or a form, you've committed to it. There's no correcting or changing it. And that is fine too, since we're not attempting to perfectly reproduce our reference images - we're just using them as something to help inform our choices as we construct something similar.

Next Steps:

Please submit 5 additional animal constructions.

When finished, reply to this critique with your revisions.
2:21 AM, Sunday December 27th 2020

https://imgur.com/a/paWOk4W

Thank you!

Here are five additional pages. Still plenty of mistakes, but I tried to be conscious of the things you mentioned. I think one reason I was doubling up on leg lines was that I was still thinking of them as ellipses instead of sausages, leading me to draw through them.

5:49 PM, Monday December 28th 2020

Much better! Overall you're showing far more thought towards how the additional masses interact with the existing structure, and how they all fit together. As a whole your constructions feel more solid and three dimensional. I have just two small recommendations.

First, when it comes to the mass along the animals' backs, you often opt to use a larger mass that stretches from the rear to the base of the neck. Sometimes this is appropriate, but often times it smooths over a lot of the more subtle, nuanced layering of forms we can achieve by breaking it into a few different masses (one over the back near the shoulders, one on the hips, another between, etc). Opting to have each individual mass do just one specific job, representing on specific area of musculature, can help achieve more complexity in your structure while maintaining its overall illusion of solidity.

Secondly, you have a tendency to oversimplify your feet. Remember that construction is all about building up complexity in successive stages. Always think about the fact that you're trying to convey information about what you're drawing to the viewer - if you leave the feet as simple blobs, then there's information there that is not being conveyed. If, as is often the case, the feet are missing from a reference image, don't be afraid to grab another to fill in the gaps.

Anyway, I'll go ahead and mark this lesson as complete.

Next Steps:

Move onto the 250 cylinder challenge, which is a prerequisite for lesson 6.

This critique marks this lesson as complete.
The recommendation below is an advertisement. Most of the links here are part of Amazon's affiliate program (unless otherwise stated), which helps support this website. It's also more than that - it's a hand-picked recommendation of something I've used myself. If you're interested, here is a full list.
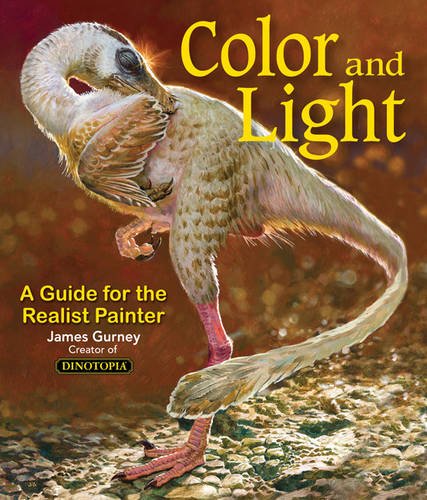
Color and Light by James Gurney

Color and Light by James Gurney

Some of you may remember James Gurney's breathtaking work in the Dinotopia series. This is easily my favourite book on the topic of colour and light, and comes highly recommended by any artist worth their salt. While it speaks from the perspective of a traditional painter, the information in this book is invaluable for work in any medium.

This website uses cookies. You can read more about what we do with them, read our privacy policy.