Lesson 5: Applying Construction to Animals

3:22 AM, Saturday April 2nd 2022

Draw-a-box Lesson 5 Homework - Album on Imgur

Direct Link: https://i.imgur.com/hIswgId.jpg

Find, rate and share the best memes and images. Discover the magic of th...

Here are my animals! I tried to give myself a little more room this time around, per Uncomfortable's advice, as well as focusing more on adding 3D shapes rather than 2D contours when building out my forms.

The results are... okay. Kind of a mixed bag. For instance, sometimes I failed at the construction (e.g. that first racoon), sometimes I failed at detail/texture/fur (also that first racoon, the bison, etc), and sometimes it kinda came together (I like both my deer).

I struggled throughout with adding fur. I tried a handful of different approaches, but often I would screw it up, then try to fix it and wind up with a big mess. I tried to be deliberate in adding tufts of fur, but it's really hard to do in a way that looks... furry. And hard not to OVER-do it. I think I improved a bit throughout, but need more practice for sure. (Same with feathers.)

One lesson I learned the hard way: usually better to leave a small mistake as-is rather than try to fix it and turn it into a big mistake, or just draw more attention to it...

0 users agree
9:41 PM, Monday April 4th 2022

Starting with your organic intersections, you've done a great job of drawing these such that they slump and sag over one another in a believable fashion. One thing you may want to work on however are your cast shadows - right now you're being pretty timid with them, only really drawing them where they make direct contact with the surface beneath them - but forms cast shadows regardless of how far the surface is. Try to apply these more boldly, and keep a consistent light source in mind when doing so, so you know whether to cast them to the left, to the right, or in whichever direction is appropriate.

Before we get into your animal constructions, I want to take a moment to talk about how you've approached the detail phase here, once your construction is completed. At the moment it appears that your focus comes primarily to a goal of 'decoration' - that is, to add marks to make the drawing feel more impressive and visually pleasing, and finding reasons to put more ink down on the page. This unfortunately gives us a fairly vague, unclear goal to work towards, as there's no clear point at which one has added enough decoration.

What we're doing in this course can be broken into two distinct sections - construction and texture - and they both focus on the same concept. With construction we're communicating to the viewer what they need to know to understand how they might manipulate this object with their hands, were it in front of them. With texture, we're communicating to the viewer what they need to know to understand what it'd feel like to run their fingers over the object's various surfaces. Both of these focus on communicating three dimensional information. Both sections have specific jobs to accomplish, and none of it has to do with making the drawing look nice.

Instead of focusing on decoration, what we draw here comes down to what is actually physically present in our construction, just on a smaller scale. As discussed back in Lesson 2's texture section, we focus on each individual textural form, focusing on them one at a time and using the information present in the reference image to help identify and understand how every such textural form sits in 3D space, and how it relates within that space to its neighbours. Once we understand how the textural form sits in the world, we then design the appropriate shadow shape that it would cast on its surroundings. The shadow shape is important, because it's that specific shape which helps define the relationship between the form casting it, and the surface receiving it.

As a result of this approach, you'll find yourself thinking less about excuses to add more ink, and instead you'll be working in the opposite - trying to get the information across while putting as little ink down as is strictly needed, and using those implicit markmaking techniques from Lesson 2 to help you with that.

Continuing onto your constructions, let's start out with a few things I raised back in Lesson 4's critique that you haven't fully addressed just yet:

  • Working strictly in 3D, avoiding actions that occur in 2D space alone, without defining enough information to understand how a mark or shape is meant to alter the 3D forms being represented. I saw a lot of this issue on this deer (I marked out in red where you were cutting into the silhouttes of your forms and in blue where you were expanding out those silhouettes through the use of individual strokes, but without defining how these new additions actually exist in 3D space and how they attach to the existing structure). This was definitely where it was most prevalent, with it appearing in other small ways across your other drawings. We talked about this at length your Lesson 4 critique, so I'll leave you to review it. Of course you can ask questions if you're unsure of anything there.

  • Also in the Lesson 4 critique, I pointed out that you were using a variety of leg construction methods, and that you should be using the sausage method. This continues to be an issue here, so again - review the Lesson 4 critique, and the demos/diagrams I included there.

When it comes to the use of additional masses, I am pleased to see that you're using the tool in a variety of places in your animals, although I do have some advice in how you can employ this technique more effectively. Firstly - I'm noticing a lot of contour lines being slapped on your additional masses, but it's important to note that these aren't actually contributing to the drawing. These kinds of contour lines - specifically the ones like those introduced in the organic forms with contour lines exercise - can be useful in the right place, but in limited quantity, and only when we specifically know what we're trying to achieve in their use. It's very easy to fall into the trap of slapping them everywhere without thinking about it, but every mark we execute must first come from an understanding of what it's meant to contribute. We can best consider this in the planning phase of the ghosting method (where we ask ourselves, what is this mark supposed to achieve, how can we execute it to achieve that goal best, and are any other marks accomplishing the same task).

That said, adding these kinds of contour lines can actually have a negative impact, rather than just a negligible one. By convincing us that we're doing something to make the form feel more solid and three dimensional, we feel that we can put the form down without as much thought or planning, and then "fix" the issue later. When in fact, everything about how an additional mass works comes down to the way in which its silhouette is designed.

One thing that helps with the shape here is to think about how the mass would behave when existing first in the void of empty space, on its own. It all comes down to the silhouette of the mass - here, with nothing else to touch it, our mass would exist like a soft ball of meat or clay, made up only of outward curves. A simple circle for a silhouette.

Then, as it presses against an existing structure, the silhouette starts to get more complex. It forms inward curves wherever it makes contact, responding directly to the forms that are present. The silhouette is never random, of course - always changing in response to clear, defined structure. You can see this demonstrated in this diagram.

You can also see this approach demonstrated here on one of your drawings. Note how I'm not using any additional contour lines - it's all about the silhouette of each individual mass, using inward curves, outward curves, sharp corners and gradual corners in specific places corresponding to how and where the different masses are pressing up against other structures, and where they're not.

Now that's not to say contour lines aren't useful - they are, and where we use the silhouette design to establish how a form can wrap around an existing structure, we do use contour lines in the case that one form interpenetrates the other, to define the joint between them (as introduced in Lesson 2's form intersections exercise - though we also use it as part of the sausage method). It all comes down to understanding what you're trying to achieve in specific terms, and picking the right tool for the job.

Also note in my example that I blocked out the big masses at the hip and shoulder, as these can give us some structure to press our additional masses against, so they can feel more tightly integrated with the rest of the construction.

Now, before I let you go, there's one last thing I want to take a moment to discuss - head construction. Lesson 5 has a lot of different strategies for constructing heads, between the various demos. Given how the course has developed, and how I'm finding new, more effective ways for students to tackle certain problems. So not all the approaches shown are equal, but they do have their uses. As it stands, as explained at the top of the tiger demo page (here), the current approach that is the most generally useful, as well as the most meaningful in terms of these drawings all being exercises in spatial reasoning, is what you'll find here on the informal demos page.

There are a few key points to this approach:

  • The specific shape of the eyesockets - the specific pentagonal shape allows for a nice wedge in which the muzzle can fit in between the sockets, as well as a flat edge across which we can lay the forehead area.

  • This approach focuses heavily on everything fitting together - no arbitrary gaps or floating elements. This allows us to ensure all of the different pieces feel grounded against one another, like a three dimensional puzzle.

  • We have to be mindful of how the marks we make are cuts along the curving surface of the cranial ball - working in individual strokes like this (rather than, say, drawing the eyesocket with an ellipse) helps a lot in reinforcing this idea of engaging with a 3D structure.

Try your best to employ this method when doing constructional drawing exercises using animals in the future, as closely as you can. Sometimes it seems like it's not a good fit for certain heads, but with a bit of finagling it can still apply pretty well. To demonstrate this for another student, I found the most banana-headed rhinoceros I could, and threw together this demo.

Now, there are definitely issues here for you to address, so I'm going to assign some revisions below to help you demonstrate your understanding.

Next Steps:

Please submit 4 additional pages of animal constructions - though be sure to review my feedback from your Lesson 4 work beforehand.

When finished, reply to this critique with your revisions.
9:41 PM, Friday April 8th 2022

Thank you again, Uncomfortable! I really appreciate your patience and the detail of your explanations.

Here are my 4 additional pages: https://imgur.com/a/My2Aj2C

It's funny -- I read the feedback, I read the lessons, I watch the videos and I think I've got the concepts down, but then I go to make a mark and... well, you can see. I just short-circuit occasionally and take the easy way out.

With these 4 additional pages, I stopped and thought before putting down any mark, really tried to force myself to think of it as sculpting, basically -- slapping additional masses of meat onto what I've got. (Gross.) And trying to fit all the pieces together, as you say, like a puzzle. I don't think I always succeeded in creating that illusion, but I think I've gotten closer than I was.

I also made sure to follow the instructions for head construction and to start with sausages for all my legs here, then wrap other forms around to build out the "real" shapes. (To the detriment of my proportions and accuracy, in many cases, haha. I need more practice with this for sure!)

Anyway, I hope I'm on the right track!

10:02 PM, Friday April 8th 2022

Overall this is definitely a big step in the right direction, with one main issue I want to call to your attention. Right now you're drawing legs by starting with fairly skinny sausages all the way through, then you wrap another mass around them to make each of them thicker.

In this case, it kind of defeats the purpose of having started with skinnier sausages in the first place. We use the sausages to represent what we see, insofar as we can capture it while adhering to the aspects of the sausage method (in this case, sticking closely to the characteristics of simple sausages). Then, in order to add further bulk where it's required - meaning, the specific bumps and in some cases, visible muscle definition some animals may feature - we build up further masses upon them, as shown in the various diagrams I provided in your Lesson 4 critique.

Anyway, I'll leave you to address that in your own practice, as you have been provided with the relevant demos for it. As for the rest, your work is progressing pretty well, just remember to draw each additional mass as its own complete, self-enclosed structure, and avoid cutting them off as you did with the middle one here. Remember that every addition exists in 3D space, so if you're adding a mass there and it overlaps another, then it should overlap in three dimensions - meaning, that new mass should pile atop the old one.

You can consider this lesson complete.

Next Steps:

Move onto the 250 cylinder challenge, which is a prerequisite for lesson 6.

This critique marks this lesson as complete.
The recommendation below is an advertisement. Most of the links here are part of Amazon's affiliate program (unless otherwise stated), which helps support this website. It's also more than that - it's a hand-picked recommendation of something I've used myself. If you're interested, here is a full list.
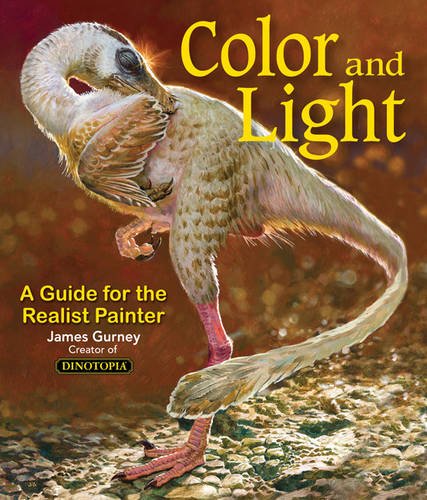
Color and Light by James Gurney

Color and Light by James Gurney

Some of you may remember James Gurney's breathtaking work in the Dinotopia series. This is easily my favourite book on the topic of colour and light, and comes highly recommended by any artist worth their salt. While it speaks from the perspective of a traditional painter, the information in this book is invaluable for work in any medium.

This website uses cookies. You can read more about what we do with them, read our privacy policy.