Lesson 4: Applying Construction to Insects and Arachnids

4:49 PM, Thursday November 12th 2020

Imgur: The magic of the Internet

Direct Link: https://i.imgur.com/toioluG.jpg

Post with 14 views.

Hi there!

Here is my lesson 4 submission. About two weeks ago on my submission of lesson 3 I mentioned that I had gone ahead and done lesson 4 without yet getting feedback on lesson 3. Uncomfortable told me to redo lesson 4 (as I had not followed the rules). I am happy to announce the following:

  • I am now strictly following the 50% rule - (I thought I didn't need to do it, but I was wrong - it makes way more sense).

  • I redid lesson 4 and it was a lot better than my first attempt. (which I include a link to not for critique but for demonstrating the value of, you know, following the rules and whatnot).

Cheers!

0 users agree
8:55 PM, Monday November 16th 2020

Your work here is indeed much better than the first attempt! Fortunately I still have some advice to offer in regards to certain issues that should help you continue to improve.

Starting with your organic forms with contour lines, you're generally doing a good job of sticking to the characteristics of simple sausage forms, aside from one or two that had one end a little larger than the other. There are a couple other things to keep an eye on though:

  • In a lot of these, the degree of your contour lines remains the same. Sometimes you'll invert them, which is good, but you don't appear to push the degree of your contour lines beyond a certain width.

  • The contour ellipses we place on an end of the sausage form tells the viewer that the particular end is facing towards the viewer - you appear not to be fully aware of that, and sometimes add the ellipse when the other contour curves suggest that the given tip is actually pointing away from the viewer, leading to a contradiction. Here are some examples of how the contour ellipse can be used and what it tells us about the form.

Moving onto your insect constructions, overall you're moving in the right direction and I can see clear progress in how you approach piecing these together from simple forms. There are however a number of issues I'd like to point out:

Firstly, a minor point. Earlier on (like with this one), you approach texture as being more about decorating the object and making it look better, but this isn't actually correct.

What we're doing in this course can be broken into two distinct sections - construction and texture - and they both focus on the same concept. With construction we're communicating to the viewer what they need to know to understand how they might manipulate this object with their hands, were it in front of them. With texture, we're communicating to the viewer what they need to know to understand what it'd feel like to run their fingers over the object's various surfaces. Both of these focus on communicating three dimensional information. Both sections have specific jobs to accomplish, and none of it has to do with making the drawing look nice.

To help with that, one thing I want you to keep in mind is that the filled areas of solid black should be reserved only for drawing cast shadow shapes. If you see part of the object you're drawing is black in colour, that should be ignored. Treat the object like it is entirely the same white colour. This will help you use the shadow shapes to a single, more refined purpose without letting it get muddy.

Next, because we're drawing on a piece of paper, this gives us a lot of control. While that sounds like a good thing, it isn't. All that control gives us a lot of freedom to draw in a way that undermines or contradicts the illusion we're attempting to create - the illusion that what the viewer is looking at is a three dimensional object, not just a flat drawing. Throughout every drawing within this course, we need to force ourselves to think of every little piece we add or introduce to our drawings as being individual, solid, three dimensional forms, because of how easy it is to slip up and draw in a way that reveals the fact that it is all a big lie.

One common way students undermine that illusion is by manipulating the silhouette of a form they've already drawn. Sometimes they do this by extending it out (like maybe to add a little spike), but the most egregious example is when students cut back into that silhouette, interacting with it in two dimensions instead of three. When doing so, students are usually trying to cut back into the construction, applying something called "subtractive construction", but because they're interacting with the silhouette (which is the 2D representation of the form), rather than the 3D form itself, it ends up flattening out the drawing as a result. You can see this principle explained here.

There were a number of smaller, subtler examples of this in your drawings, but the most notable was with the head of this fly, where you decided that the initial ball form you'd started with wasn't the right size, so you redrew it on top, cutting across the original form's silhouette and asking the viewer to ignore a form you'd previously introduced.

It is critically important that we avoid this kind of approach. Instead, especially when working with organic objects, build things up steadily by introducing every new addition as a new solid, three dimensional form, and defining how it either connects, intersects or wraps around the existing structure. This WILL result in situations where your drawing doesn't match your reference perfectly because you maybe drew something too big early on. That's fine - the goal is first and foremost to draw something that looks real and convincing in how it exists in 3D space, rather than to create a perfect reproduction of your reference image.

To this point, remember that you should always work using simple forms, and gradually build up the level of complexity rather than trying to jump into that complexity early on. For example, if we look at this beetle's horns, your first step was to construct a rather complex form. Because of its complexity, it read as being quite flat right from the beginning. Instead, constructing it as shown in this demo I'd done for another student starts with a very simple structure and gradually introduces new complete, 3D forms, while defining how they intersect or fit together with the structure that is already present.

Lastly, I noticed that you seem to have employed a lot of different strategies for capturing the legs of your insects. It's not uncommon for students to be aware of the sausage method as introduced here, but to decide that the legs they're looking at don't actually seem to look like a chain of sausages, so they use some other strategy. The key to keep in mind here is that the sausage method is not about capturing the legs precisely as they are - it is about laying in a base structure or armature that captures both the solidity and the gestural flow of a limb in equal measure, where the majority of other techniques lean too far to one side, either looking solid and stiff or gestural but flat. Once in place, we can then build on top of this base structure with more additional forms as shown here, here, this ant leg, and even here in the context of a dog's leg (because this technique is still to be used throughout the next lesson as well). Just make sure you start out with the sausages, precisely as the steps are laid out in that diagram - don't throw the technique out just because it doesn't immediately look like what you're trying to construct.

Now, with those points laid out, I do think you're ready to move onto the next lesson, but there is still plenty of room for improvement and growth. I hope to see you working on these points as you move into the next one.

Next Steps:

Move onto lesson 5.

This critique marks this lesson as complete.
9:58 PM, Monday November 16th 2020

Thanks Uncomfortable! This was all really helpful and I will return to re-read it as I practice.

Until next lesson...

The recommendation below is an advertisement. Most of the links here are part of Amazon's affiliate program (unless otherwise stated), which helps support this website. It's also more than that - it's a hand-picked recommendation of something I've used myself. If you're interested, here is a full list.
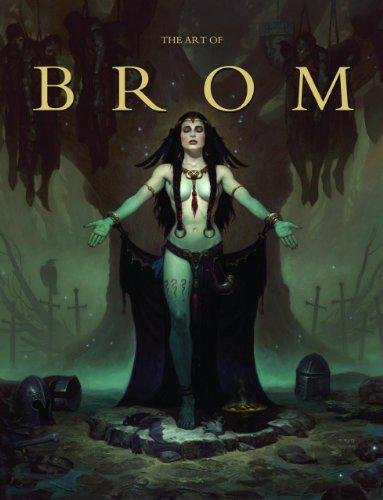
The Art of Brom

The Art of Brom

Here we're getting into the subjective - Gerald Brom is one of my favourite artists (and a pretty fantastic novelist!). That said, if I recommended art books just for the beautiful images contained therein, my list of recommendations would be miles long.

The reason this book is close to my heart is because of its introduction, where Brom goes explains in detail just how he went from being an army brat to one of the most highly respected dark fantasy artists in the world today. I believe that one's work is flavoured by their life's experiences, and discovering the roots from which other artists hail can help give one perspective on their own beginnings, and perhaps their eventual destination as well.

This website uses cookies. You can read more about what we do with them, read our privacy policy.