Lesson 5: Applying Construction to Animals

6:33 PM, Tuesday November 16th 2021

Drawabox lesson 5 - Album on Imgur

Direct Link: https://i.imgur.com/bh6TywL.jpg

Discover the magic of the internet at Imgur, a community powered enterta...

Hi Uncomfortable,

It was a challenging lesson! I struggled at times, especially in the beginning (you can see that my bird pictures are a bit worse than the others), but then I got a bit more comfortable :).

Sorry for occassional too thick outlines (especially in the frog) - I'm working on avoiding too thick lines, but sometimes I forget myself. Hope I'll improve it soon.

I added the references as the last picture (hope it's okay!)

Looking forward to the feedback! Thank you so much and have a great rest of the week.

0 users agree
8:45 PM, Wednesday November 17th 2021

Starting with your organic intersections, these are coming along quite well. There are a couple things I want to call to your attention though:

  • On your first page, you did a great job of laying each sausage across the one beneath it, in a manner that would result in more overall stability - and therefore a more believable pile of sausages. On the second page, specifically the two bottom forms, you've got one laid out along the length of the one beneath it, which makes it seem generally more precarious. It's obviously a minor issue, but considering the way in which the forms we place on top "grip" the underlying structure, and how solid and believable it comes off, is all of significance in the long run.

  • Make sure that you're drawing through all the ellipses you freehand two full times before lifting your pen, as discussed back in Lesson 1 - even the smaller ones.

Continuing onto your animal constructions, as a whole I think you are progressing, but there are a handful of things I want to call out to help you continue to develop in the right direction. I've laid out the first two issues on this page - I've labelled the individual bits of writing with letters, but it's basically two distinct issues. The first is "A" and the rest are B through E.

Starting with A, this is something I actually called out in my critique of your Lesson 4 work, which you don't appear to have fully grasped, or at least didn't apply here as consistently as you should have. The little sections I filled in with red hatching are all flat, two dimensional shapes that are not defined as existing in the 3D space of the wolf itself. They're just shapes and marks that exist only on the flat piece of paper. I'm not going to spend too much time on this one (be sure to reread my feedback from Lesson 4, both the sections talking about not altering silhouettes and the section touching on building upon your leg structures), but the just of it is that everything you add to your construction must be a complete, enclosed 3D form. If you remove everything else, that new mass should still be fully closed off, and should still have the potential to feel as though it exists in 3D space. If part of it is open-ended however, then it's going to be completely flat from the get-go.

To that point, I should also point out that in this horse head, you quite freely cut back across the initial cranial ball, rather than respecting the fact that it is a solid, three dimensional form. Similar issues can be seen on this leopard's head as well.

Jumping into B through E, here we're touching on areas where you have constructed complete, enclosed 3D forms for your additional masses - so that's good. The issue is more that you have a tendency to include somewhat random corners to the design of your new mass's silhouette, which makes them less impactful than they could be. One thing that helps with the shape here is to think about how the mass would behave when existing first in the void of empty space, on its own. It all comes down to the silhouette of the mass - here, with nothing else to touch it, our mass would exist like a soft ball of meat or clay, made up only of outward curves. A simple circle for a silhouette.

Then, as it presses against an existing structure, the silhouette starts to get more complex. It forms inward curves wherever it makes contact, responding directly to the forms that are present. The silhouette is never random, of course - always changing in response to clear, defined structure. You can see this demonstrated in this diagram.

Along the neck (pointed to in D and E) I've redrawn your mass there such that it wraps around the shoulder mass on one side, and so it transitions more smoothly along the other (rather than using a sharp corner). Shoulder and hip masses can be really useful for providing us with some additional structure to push our mass against and make it feel more grounded. They're not always going to be really obvious in your reference images, but if you know to look for them they can be very useful - and they're always present, simply because those animals need more muscle in those areas to let them walk and run around.

For the smoother transition (instead of the corner on the left), since I don't have any defined structure I can press it against, I instead just let it swoop more smoothly from one curve to the other - an inward curve where it's hugging against the torso structure, then an outward curve as it comes back around to the shoulder. This avoids "arbitrary" complexity, and reinforces the presence of the main torso. Ultimately that's what all this is - each mass reinforces the others around it, creating a grounded, believable 'puzzle' of 3D forms.

This leads me into the next point I wanted to draw to your attention - head construction. Your approaches vary, but overall you have a strong tendency to, at least in many cases, leave your different facial components floating apart from one another. Just as with the rest of the body, the head benefits immensely from having all of these different pieces - the eye sockets, the muzzle, the forehead/brow ridge, etc. - all wedged together firmly, creating a solid puzzle structure.

Based on how you've approached your head constructions here, it seems to me that you may have missed this demo from the informal demos page. Since Drawabox is continually evolving as a resource, I often find better ways to explain certain concepts to students, and until I have the time to reintegrate them into the course material proper, they get tucked into the informal demos section, as explained here on the tiger head demo this one more or less replaces.

When applying that approach, try to do it directly - down to even the specific eye socket shape of a pentagon with a point facing downwards. This allows for the muzzle to fit in the resulting wedge between the sockets, and for the brow ridge/forehead to rest on the flat surface along the top.

In addition to this, I'd also recommend that when you actually draw your eyes, try to draw the upper and lower lids as separate additional masses, as shown here. This can help a lot when it comes to focusing more on how each lid wraps around the spherical eyeball.

Before I call this critique done, there are a couple additional things I wanted to call out:

  • A quick reminder that working in sketchbooks isn't recommended, as mentioned back here. While there are no rules against it, it is definitely something that can interfere in a number of ways - not least of which by limiting how much space you have to work with (even if the page is the same, having to deal with the spine can really mess with one's brain while drawing). There's really no good reason to do anything that's going to make these exercises more difficult - every additional struggle takes resources away from your brain that could be invested into markmaking, or solving spatial problems, or even just remembering the instructions.

  • I'm noticing a tendency for you to draw your rib cage way too small in some drawings, like your leopards and your horses. Remember that as explained here, the ribcage occupies half of the torso length.

  • Follow the specific elements of the sausage method directly, without deviation - stick to the characteristics of simple sausages for each segment, and reinforce their joints with a simple contour curve. Then, of course, build upon those structures as needed with additional masses. These are all things you do correctly in some places, but it's inconsistent in a way that suggests that you need to be thinking about this consciously throughout your drawings.

Given the number of things I've pointed out, I do think it's in your best interest to assign some revisions (you'll find them listed below). You really aren't far off. Part of it is the somewhat disorganized interim state of the lesson (which will be fixed, as I steadily work on revising videos and lesson content starting from earlier in the course), but a lot of it is simply a matter of making sure that you're absorbing the information that is available both in the existing lesson material, and in the critiques I've provided before. Both are always dense, so processing all of the information inevitably takes time, and needs to be done repeatedly at different times, rather than all at once.

Next Steps:

Please submit an additional 4 pages of animal constructions.

When finished, reply to this critique with your revisions.
6:16 PM, Monday November 29th 2021

Hi Uncomfortable,

Thanks a million for the extensive feedback! I'm sorry to have taken so much of your time. I feel like I rushed this lesson too much and that's why I made many mistakes.

I took a step back and did more exercises and demos to tackle the points that you mentioned. It took a while, but here it is finally - the re-submission.

I realized that I struggled a lot with heads - especially with horse heads - so I included a page of these.

I tried my best to improve on all the points, but I still struggled, especially with adding the masses (like in the point D from your feedback). Sometimes I really couldn't figure how to draw it - most of the time I added some contour lines to help myself imagine these masses in 3D.

Link to the drawings: https://imgur.com/a/mS2vyd3

Thank you again,

Best,

Joanna

8:11 PM, Monday November 29th 2021

There is certainly progress here in a number of areas, and I can clearly see an effort being made to address the things I called out in my original critique. There are two areas of concern, however:

  • Head Construction

  • Additional Masses

Both of these are certainly better than before, but not quite there yet.

Starting with the head construction, in my original critique I explained what is essentially written out here on the top of the tiger head demo - that a more recent addition to the informal demos page (this head construction demo) is much more useful. Based on your work, what I can see is that you may have misunderstood - your head constructions here show signs that you were following the tiger head demo (which is still of use, and still did result in improvements), but not that you were applying the more recent, more effective one.

It's possible that you may have read through that section of my critique a little too quickly, and may have just followed the link to the tiger head demo and carried on from there. When you do approach head construction, try to apply the steps from the informal demo as closely as you can, down to even matching the shape of the eye sockets.

As to the additional masses, you've fallen into a common pitfall here. In my original critique, we discussed the importance of thinking through the specific design of each additional mass's silhouette. This can be quite challenging and daunting, and it looks like in your struggles, you opted more towards trying to use a lot of contour lines to compensate for the areas where your silhouette designs didn't come out correctly.

The thing is, those contour lines will only serve to make a form feel three dimensional on its own, in isolation. They are therefore not a solution to our problem - which is, that we wish to define the way in which these new masses actually wrap around the existing structure.

When talking about defining relationships between different forms in 3D space, there are two ways we can do this, depending on the nature of the relationship:

  • If the forms in question actually intersect and interpenetrate, then we can use the kind of contour lines we introduced in Lesson 2's form intersections exercise to define the specific intersection that occurs.

  • If the forms do not interpenetrate, but rather wrap around one another - that's what we're dealing with here - then the only option is to purposefully design the silhouette of those existing masses to describe how they wrap around one another. In my previous critique, I talked to you about the strategic placement of "compelxity" (that is, both corners and inward curves along that silhouette) - ensuring that such areas of complexity are always added in response to specific existing forms pressing against our mass, and using simpler outward curves everywhere there is no such external contact being made.

In my original critique, I provided some additional diagrams to that effect, so you should definitely go back and reread the advice I offered you there.

I've also called out these issues (along with missing intersectional lines on your sausage structures) here.

The other thing to be aware of when it comes to your use of contour lines is that you're piling on a ton of them. Contour lines are just a tool, and no tool should be used without considering its purpose and intent. When we use a bunch of contour lines, we have a tendency of drawing them much more sloppily and haphazardly, rather than taking the time to actually consider how to best apply each one. Furthermore, this overuse of contour lines also doesn't really help - they suffer from diminishing returns, where each one is far less impactful than the one before it.

I'm going to assign some additional revisions below.

Next Steps:

Please submit an additional 4 pages of animal constructions. Be sure to review my original feedback more closely before working on them, as you do appear to have missed or misinterpreted some of it.

When finished, reply to this critique with your revisions.
5:49 PM, Thursday December 9th 2021

Hi Uncomfortable,

Sorry for misunderstanding your first critique. I feel like I got confused somewhere - perhaps it was really a lot for my brain to process. It might be also some communication issue - English is my second language. I went through everything again and I hope that I managed to do the homework correctly this time.

It took me very long to finish these. I think I drew all of these animals a couple of times before getting it (hopefully) kind of right (still made some mistakes though). I have a feeling that I see the construction more clearly now, so the revision helped for sure. Still, to be honest, I feel a bit scared to submit! Perhaps, if there are still many points to improve, I should maybe re-do the whole lesson... Please let me know. I really would like to improve, and I'm looking forward to your feedback :).

Here's the link: https://imgur.com/a/JG2Axuu

View more comments in this thread
The recommendation below is an advertisement. Most of the links here are part of Amazon's affiliate program (unless otherwise stated), which helps support this website. It's also more than that - it's a hand-picked recommendation of something I've used myself. If you're interested, here is a full list.
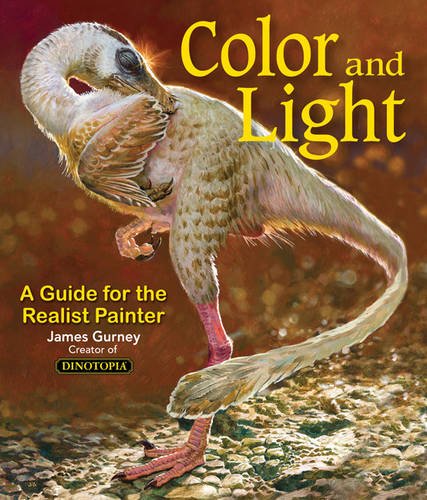
Color and Light by James Gurney

Color and Light by James Gurney

Some of you may remember James Gurney's breathtaking work in the Dinotopia series. This is easily my favourite book on the topic of colour and light, and comes highly recommended by any artist worth their salt. While it speaks from the perspective of a traditional painter, the information in this book is invaluable for work in any medium.

This website uses cookies. You can read more about what we do with them, read our privacy policy.