Lesson 4: Applying Construction to Insects and Arachnids

2:38 PM, Thursday December 23rd 2021

Drawabox lesson 4 - Google Photos

Drawabox lesson 4 - Google Photos: https://photos.app.goo.gl/JiAgCchfjoBYfs2R6

royally messed up detail around big leg of the grasshoper.

and on coachroach one hasnt been drawn out one of the leg and part of abdomen fully because it was hidden behind object. in hindsight, when i typping this, that i probably should improvise actually. Didnt occured to me.

1 users agree
12:02 AM, Saturday December 25th 2021

Starting with your organic forms with contour lines, these are coming along well - you're sticking to the characteristics of simple sausages quite well, and your contour lines are executed confidently. One thing I am noticing however is that at times you're a little loose/sketchy with your linework - it's not to an overwhelming degree, but I can definitely see cases where there appear to be more lines than there ought to be in certain areas. For example, in this one we can see a lot of additional linework on the perimeter of the sausage.

Sometimes students will feel that because sausages and ellipses are similar, that the same "draw through your ellipses" rule applies there - it doesn't, since doing so tends to push our hand towards producing evenly shaped ellipses (which would be bad for drawing sausages) - but in your case, I think it's more a matter of simply being too loose and unintentional with the specific lines you put down. Be sure to use the ghosting method for every mark, investing your time in the planning and preparation phases to help pin down precisely what mark you want to make, before your pen touches the page.

Continuing on, this looseness/sketchiness actually does become a lot more apparent in your insect constructions. Throughout these, you actually demonstrate a solid grasp of how to approach construction, through the introduction of simple forms, considering how they're meant to relate to, intersect with, and/or wrap around the existing structure to build up complexity - but you're simply rushing through the linework a little too much, and it's undermining what is otherwise among the best work I've seen for this lesson.

I really cannot stress this enough - what we do here is not sketching. Every mark we put down is the result of forethought and planning, and needs to exhibit both confidence and control. That's what the ghosting method embodies - the planning phase ensures that we know exactly what mark we're intending to execute ahead of time. The distinction between that and sketching is that individual marks do not matter in the latter case - it's the totality of it, that one stroke of many falls where it needs to. But what we're doing here is meant to be a purposeful way to help improve how we draw when we sketch. By being purposeful and conscious of every choice made, by being aware of precisely what it is we're aiming to achieve, and then judging the accuracy with which we executed it. Mistakes are inevitable, but we have to know what we aimed for in order to judge the nature of a mistake, so we can address its cause moving forward.

That aside, the rest is quite good. You're demonstrating a consistent respect for how every new addition to the construction is its own solid, three dimensional form. You're sticking to the idea that every form introduced must be drawn as its own complete, enclosed shape (rather than jumping back and forth between adding complete forms and partial shapes/individual lines) - which makes the difference between engaging with a construction in 3D space, and merely interacting with a flat drawing on a flat page. Many students make the mistake of trying to modify the silhouettes of forms they've already constructed - but doing so is an operation on a 2D shape (the silhouette is a 2D shape that represents the 3D form, after all), and so it breaks the connection between the form being represented, and what's on the page.

One thing to keep an eye on is that the sausage method does require us to stick to the characteristics of simple sausages. You often do, but there are some cases - for example here on the praying mantis drawing where you ended up with more of a stretched ellipse.

Now, while your work is good, I cannot in good conscience mark this lesson as complete. I'm going to ask for a very limited revision below, just for you to demonstrate that you can pull off the same level of structural integrity, but while executing your marks in a manner that continues to reinforce the solidity of your forms, rather than undermining it with all of the extra marks flying around. You'll find the revisions assigned below.

Next Steps:

Please submit 2 additional pages of insect constructions. I have full confidence that you'll knock this out of the park - just be sure to take your time with each and every mark.

When finished, reply to this critique with your revisions.
3:29 PM, Sunday January 23rd 2022
6:01 PM, Monday January 24th 2022

Solid work overall! I have just a few quick things to call out:

  • You should probably get a new pen - your marks are rather faint, which suggests that the pen is probably drying out. You can always save those for later, but when working through this course we do want our linework to be rich and dark, in order to help us avoid drawing in a sketchy manner, without adequate planning/forethought.

  • Speaking of which, there are definitely some spots where you do get visibly sketchy (as shown here). You may want to review the principles of markmaking from Lesson 1, as well as the ghosted lines methodology.

  • Your use of individual forms, building things up, etc. is coming along well, but there are definitely areas where you get sloppy and haphazard in your approach, as shown here. On the right side, I pointed out where you basically cut off your sausage structure, falling back to sketchy behaviour rather than working methodically, building things up in a step by step manner. As to why the second example is "even better", when we break up our masses into separate pieces (as shown here), we can have each individual one's silhouette make as much contact to the existing silhouette, creating a stronger relationship in 3D space between them. On the left side, I was pointing out where you could stand to be more mindful of the silhouette design of each mass, as explained here.

Anyway, you do have some things to keep in mind - and I do hope that you'll avoid that sketchy approach and work with a fresher pen for the next one. I'll go ahead and mark this lesson as complete.

Next Steps:

Move onto lesson 5.

This critique marks this lesson as complete.
The recommendation below is an advertisement. Most of the links here are part of Amazon's affiliate program (unless otherwise stated), which helps support this website. It's also more than that - it's a hand-picked recommendation of something I've used myself. If you're interested, here is a full list.
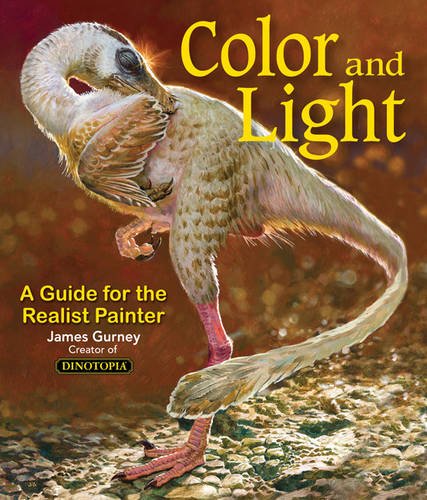
Color and Light by James Gurney

Color and Light by James Gurney

Some of you may remember James Gurney's breathtaking work in the Dinotopia series. This is easily my favourite book on the topic of colour and light, and comes highly recommended by any artist worth their salt. While it speaks from the perspective of a traditional painter, the information in this book is invaluable for work in any medium.

This website uses cookies. You can read more about what we do with them, read our privacy policy.