Uncomfortable in the post "Dealing with off-topic posts, spam, etc."
2019-10-11 16:40
The main issue here is that people have been able to post really offensive material and it's been visible in the subreddit for a few hours. So if it just takes a person understanding how the subreddit works to be able to have their post visible to everyone, that's too big a risk to take.
Uncomfortable in the post "Dealing with off-topic posts, spam, etc."
2019-10-11 16:34
That's certainly something to consider, but in my experience when it comes to communicating to people that they need to use a specific tag or keyword on their post, they're more than likely not to have read that instruction, then get frustrated when things don't work as intended. I have to flair posts anyway to mark them as questions/full submissions/partial submissions/single exercises anyway (and I don't really trust users to do this correctly on their own, especially since the intent is to draw more attention to full submissions over singles), so this isn't actually any extra work. In some ways it makes it easier, since it all goes to the spam filter.
Uncomfortable in the post "Dealing with off-topic posts, spam, etc."
2019-10-11 16:31
You're right about it being too late, though I do have a more elaborate explanation as to all the reasons this is the case in my response to deskportal
Uncomfortable in the post "Dealing with off-topic posts, spam, etc."
2019-10-11 16:30
Yes, this'll help me avoid any off-topic posts from getting out and accidentally encouraging others to make more off-topic posts.
As to your question about why this subreddit is called ArtFundamentals, it's because this subreddit came first. Back in August 2014, I wanted to create somewhere I could share what I had learned regarding the fundamentals with others. Those fundamentals were more narrow and focused than those others might consider, though the only reason at the time was because they were the elements I had learned in a particular class that had a huge impact on my skills.
It wasn't until March 2015 that I created drawabox.com, and you can't rename subreddits once they've been created. All this time, the subreddit didn't allow others to submit posts, and all the interaction was based on students posting their homework to the individual lesson threads, and me responding with critiques.
Once I finally was no longer able to do free critiques for everyone due to the workload and had to put up something of a small paywall in October 2016, I decided to open the subreddit up to posts so people could view and critique each other without being restricted just to seeking critiques from me. Additionally, at this point the focus of Drawabox was more cemented in terms of the topics we were covering - no longer just because that's how I had learned, but because there were concrete reasons as to why it was a good subset to focus upon. We were sitting at 27,000 subscribers at this point, so creating a new subreddit just for the sake of the name would have been a very bad idea for the growth of the community.
As the lessons and my grasp of what I've been sharing has developed, I've come somewhat full circle. That is to say, /r/ArtFundamentals is a fairly suitable name for what we're doing here. It's true that we're foregoing a lot of the common things people treat as the fundamentals - especially rendering/shading, colour, etc. What we do focus on however, specifically confident and accurate mark making, capturing the illusion of solid form and building up complex objects from simple components (constructional drawing) are truly at the core of what someone looking to draw, or communicate visually, should learn. It comes before all the others.
Though I suppose it's fair to say that maybe DrawingFundamentals would have been a better choice - but when it comes to off-topic conversation, people don't tend to come here talking about composition and colour, the former of which is something I intend to cover in a future drawabox lesson (and have actually covered in a past lesson that has since been set aside for the time being).
Uncomfortable in the post "Dealing with off-topic posts, spam, etc."
2019-10-11 16:20
Haha, no worries. This doesn't actually increase what I've had to do thus far.
Uncomfortable in the post "Dealing with off-topic posts, spam, etc."
2019-10-11 16:18
I appreciate the offer! For now though it doesn't actually increase my workload since I've been going through and tagging posts anyways. When required, I'll probably deputize my discord server chat mods as subreddit moderators, but I don't think that'll be necessary.
Uncomfortable in the post "New? Lost? Read this intro to /r/ArtFundamentals and Drawabox.com before you post anything"
2019-10-05 17:47
You are indeed correct. When I initially glanced at the beginning of your question, I assumed that you didn't read the lessons thoroughly enough (since how the homework should be approached is covered early on in lesson 0's How should Drawabox be Used section). It turns out you're among those who read and followed those instructions closely.
The issue is that there are a lot more people who don't read instructions as carefully as they ought to, resulting in a lot of people posting their work section by section (first lines, then ellipses, then boxes), or even a few that post page by page. I do my best to actively discourage the latter, and further encourage completing the full lesson before submitting (in the submission rules and on the submission page, as well as in various places in the lessons), but ultimately it's an uphill battle.
Now, the flipside is to heavily moderate the subreddit and delete partial/single posts, but I feel that this too would go against the spirit of what we're trying to do here. It's not that these students haven't put effort and work into completing the exercises, and so throwing away their submission can be intensely discouraging.
What I am currently doing is working on a completely separate community platform that will be built into the drawabox website, that will give me considerably more control over what students see as they try to submit work - but that won't be ready for some time.
As it stands, trust that the way you've read the instructions on the website is how the community is meant to be used. Complete a full lesson before submitting your work. Not only is this better for the community (resulting in fewer submissions, less clutter, and greater longevity for each post as it sits on the front page), but it also makes it more likely that you will get a response from those willing to give critiques. They appreciate seeing a greater investment of time and effort, and also being given a fuller body of work on which to base their critique makes the process of offering feedback much easier for them.
Uncomfortable in the post "Lesson 5: Drawing Animals (Patreon Critique Thread)"
2019-10-04 21:40
I get a lot of homework submissions that have work that is quite similar to how you started out here. Work where the student is clearly trying to apply the lessons, but has some issues with proportions, sometimes is a little too loose or vague, but is definitely trying. And while they'll show improvement over the set, the core issues will still remain until I point them out.
In your case however, what you've done here is... pretty remarkable. You've improved immensely over the course of this set, and from the looks of the dates on each drawing, in a matter of only a couple weeks.
From the looks of it, your biggest shift happened immediately after going through the organic intersections exercise (which were done very well, and captured a great sense of how those forms pile up over one another as a set of 3D forms, rather than as a bunch of flat shapes stamped on top of one another).
The concepts you seem to have reinforced in doing those exercises (which admittedly should have been done at the beginning, but maybe being able to work through some of the animals first helped you put the organic intersections to better use) really had a major impact. For example, if we look at the kiwi, the way you built that mass wrapping along its back with clear, confident volume to it was fantastic. Admittedly the bird head to the right of it was much more vague and much looser than it ought to have been, but it too conveyed a much better grasp of how forms fit together in 3D space.
Onwards from that point you do still display a great deal of loose and vague marks rather than solidly constructed forms - for example, the bear head on this page has a lot of open gaps in the forms which make it feel a lot more flimsy. That said, the relationships between the forms are being established well. It just doesn't carry any weight.
Once you start hitting your camels, you start making your constructions a lot more sturdy - drawing lines to completion, not being as vague (although your head studies on the right sides of these pages are still much sketchier, and suffer for it).
Jumping ahead to the hybrid, this is something I'll usually use as a test to establish just whether or not a student really understands how their drawings exist in three dimensions. It really pushes one's capacity to leverage reference images, and even students who can do stellar replications from photographs struggle with it immensely unless they properly grasp construction.
Yours here however was very well done. The body itself is very believable and tangible, and well constructed as a whole. Admittedly there are smaller elements of sloppiness - for example:
-
The additional forms used to pad the joints of the legs, they're a bit more 2D rather than wrapping around the main segments of the forms
-
You're using stretched ellipses for the legs rather than following the sausage method. Stretched ellipses tend to be much stiffer and less malleable, which limits the amount of gesture that can be conveyed there.
-
The head - specifically the eye socket and all - is a bit lazily constructed. Remember how the head should be thought of as a 3D puzzle. Notice how in this stage of the tiger head demo the parts start to fit into one another, from the muzzle to the eye socket to the brow ridge, etc.
So all in all, you've improved by huge leaps and bounds over the course of the last two weeks, though I think slowing down just a little bit as you execute your marks, thinking about what each form is meant to accomplish (especially the small ones) and how they're meant to relate to those around them, and being more assertive with your lines to keep the shapes closed will help a great deal. So, I'll go ahead and mark this lesson as complete. Feel free to move onto the next step, which will be the 250 cylinder challenge as that a prerequisite for lesson 6.
Uncomfortable in the post "Lesson 5: Drawing Animals (Patreon Critique Thread)"
2019-10-04 20:54
Very nice work! I think overall you're done conveys a well developing grasp of how your forms can fit together and be built up to create convincing, three dimensional creatures that exist in space in a believable manner. As far as critique goes, there are a few specific things I want to pick at, but they're mostly nitpicking, or touching upon issues that aren't always present throughout your drawings, but where you may be somewhat inconsistent in how you handle them.
I figured rather than typing it all out, writing it alongside the images would be more effective, so I've done so here.
Starting with your camel:
-
I noticed that you had a form that stuck out amongst the rest, seeming like an artifact that had been abandoned. In general when it comes to construction, once a form has been placed in the world, we can't erase it or ignore it - so we have to build off it even if this leads us down a path that does not entirely match our reference image. Our goal is ultimately to have a drawing that feels believable and tangible, not necessarily to match the reference perfectly. This also relates back to the idea that our drawings are very much like lies - how every mark we put down is an assertion, and the more of those marks that start to contradict each other, the more we erode the viewer's suspension of disbelief.
-
I did notice that the hooves were a little sloppy, in that the way those forms existed in 3D space and how they related to one another was a bit vague. Some smaller forms, like feet/hooves won't have as much room as elsewhere to get into fully developed construction, so one thing you can do is consider how your silhouette implies the presence of different planes (front/side/top/etc). This usually means taking a form we might rough in with a curve, and carving it with more straight segments instead. This is something we delve into much deeper in lesson 6, as explained here.
I noticed that your elephant had a bit of a tendency to be very heavily outlined in a manner that flattened the drawing out somewhat. This tends to happen when we get too focused on how we're tracing over the lines themselves as they exist on the page, rather than following along the edges of the forms in 3D space. This can simplify the silhouette and eliminate important nuances that help sell the illusion. Additionally, I pointed to the particularly thick weight near the belly/back leg, saying that you should treat it more as a cast shadow. The difference is that line weight by its nature is always going to adhere to the form itself, whereas cast shadows are projected onto the forms surrounding it. This is explained further here.
For the antelope, don't forget that the shoulder muscle is generally quite bulky. If you think of the torso of these animals as a puzzle of muscles, the shoulder is one that often gets overlooked when drawn from the side, and plays an important role in how the muscles along the back integrate with the rest of the body. Where in your drawing that back muscle cut further down and didn't quite wrap around, it would have come out better if there had been greater awareness of the shoulder's presence.
A bit more nitpicking on the last antelopes - they're actually very well drawn and generally capture an excellent sense of form, for the most part:
-
I didn't actually mention this one in the drawing itself, but along the standing one's back, you've got some additional muscle forms that overlap one another without actually interacting - instead of getting one piling up on top of the other, it's stamped on top of it, which somewhat undermines the sense of form here.
-
For the sleeping one, that form closer to its rump that is pointed out ends up a little too flush with the underlying torso's structure along its left side. The forms have volume, as though you're placing lumps of putty on top of your construction. Even if this doesn't line up with your reference entirely, for the sake of making things believable, we need to respect how these different forms will interact in space.
-
Of course, always draw through your forms (rather than allowing their edges to stop when they're overlapped by another), and don't jump too far ahead when it comes to constructing more complex forms. They always require an underlying structure to support them, and if that's missing, they will end up coming out more flat - at least for now, as you continue to get used to applying these principles. Eventually you'll be able to do more of this in your head, but I want students to go through all the steps fully as they work through these lessons.
Anyway! All in all you're doing a great job, and are more than ready to move on. I'll go ahead and mark this lesson as complete, so feel free to move onto the next step - which it seems will be the 250 cylinder challenge, which is a prerequisite for lesson 6.
Uncomfortable in the post "Lesson 5: Drawing Animals (Patreon Critique Thread)"
2019-10-03 17:15
No worries- it seems the payment's gone through before I was even able to sit down to respond to your submission, though I was planning on taking care of it anyway. I only wait when there's reason to be unsure about a student, and your track record is solid.
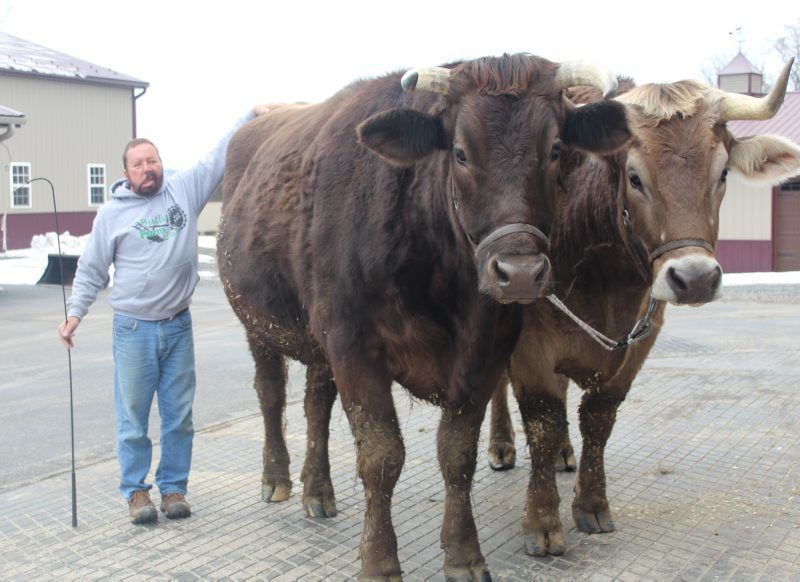
So starting with your question about #5 in those notes, I was referring to the shoulder muscle that was missing. Take a look at this quick doodle on top of a picture of an ox. Because you're generally drawing these animals from the side, you're largely ignoring the fact that they have masses on them that make them physically broader (like big shoulder muscles that bulge out). Remember that these animals are not flat, and that being aware of these muscle structures will help you interlock other masses together, making the whole structure more believable. For another example, look at just how broad these guys are.
Now, admittedly I always get a little concerned when a student comes back with revision work in less than 24 hours after getting a critique. This is largely because it tells me that the student didn't necessarily have the opportunity to think and ruminate over the critique they were given. Our brains don't just work through things as we draw - the time in between drawing also helps us digest what we've read. It also helps a great deal to take the critique and reread parts of the lesson to try and see where they line up.
That said, there is some improvement here, though a few issues as well. Here are some notes. Your wolf was generally well done, though its body was simple enough not to require too much in the way of additional forms. In your tiger, and in those on the other pages, you had a tendency to try and use one additional mass that extends from one end of the body to the other. This contradicts the fundamental principle of construction - that is, building things up from simple forms, and developing complexity through the addition of more simple components and through their interactions. Here you tried to accomplish too much with one form, and that ended up falling flat.
Breaking them down into smaller groups will help sell the illusion you're creating, as you'll be able to focus on how each one wraps around those muscle groups beneath it, creating a puzzle with many pieces rather than just consisting of a few.
Now, what I want you to do next will likely introduce a lot more difficulty to the problem, so you're going to have to take your time. I want you to do 6 drawings of animals where they are not seen from the side. I want you to draw them at an angle more similar to the ox references I linked earlier, where you can see both the length and breadth of their bodies. This is specifically to help you pay more attention to all of the muscle forms that are present.
I don't want you to do more than one of these in a day. This is to ensure that you take as much time as is needed with each one, as there is going to be a lot of difficulty in thinking of how those same constructional concepts work as the forms are turned towards you.
Uncomfortable in the post "Lesson 5: Drawing Animals (Patreon Critique Thread)"
2019-10-02 17:59
To start with, this you're demonstrating a lot more patience and focus here than you did previously, so that's a big step in the right direction. You're also demonstrating a much better grasp of 3D space overall, but are still skipping steps when it comes to defining the relationships between forms in space.
I'm going to focus my critique on two main drawings, as I've done some redline notes for both.
First is the lorikeet. You were definitely starting to think of it more in terms of how to build it out from individual components, though your drawing did still maintain a somewhat flatter appearance especially towards the head. Here are my notes on this one. One of the key things that is missing is what's pointed out at point #4 - you're not properly wrapping your forms around one another, so they can easily be taken for flat shapes pasted one on top of the other. It's important to always think about how the forms interconnect - that's the greatest strength of contour lines as a whole, in placing one at a joint between two forms can define the relationship between them and thus communicate to the viewer that both exist in 3D space, rather than as shapes or lines on a page. You'll also find there other tips on how I would approach the neck in particular.
Second is your first ox. I actually felt that the head, though you clearly skipped steps in its construction, demonstrates an improving grasp of how it exists in three dimensions. It has to do with the subtleties of how the silhouette itself is shaped. That said, these kinds of small successes will continue to be hit-and-miss until you're able to pin it down to a specific process of how you think about it. In order to do that, we have to adhere to every step of the constructional method.
Here are my notes for this drawing. What stood out most was how you employed the additional forms - the one along the top of the shoulder had some effort placed towards how it wraps around the forms beneath it, but still ended up feeling quite flat. Note how you can use a contour line to convey the volume of that form (specifically how it's got thickness towards where it meets the torso). The flap coming down from the ox's throat however came out entirely flat, because there's no clear relationship in three dimensions between it and the rest of the body. While some parts of an animal are certainly going to be flatter than others (especially loose, hanging skin like this), nothing is truly paper-thin, and so you still need to define those relationships in order to make them feel plausible.
Lastly, look carefully at your reference. There's a lot of muscular structure that you're missing. Even the big shoulder muscle that I pointed out in my redline notes would have helped you a great deal when executing the bump along the back, because it'd give it something clear to wrap around and integrate with. These 3D constructions can be thought of as puzzles where all the pieces fit together.
Another thing I noticed throughout a lot of your quadrupedal animals was that you had a tendency to build the torso sausage to be quite straight, and then add the sag of its belly separately. I actually talk about this in the notes (second paragraph of that section). Adding additional masses is a lot easier when you're working with gravity - that is, conveying how those masses wrap around the forms underneath them due to how they're being pushed down by that natural force. Hanging masses are considerably more difficult however, so I find it easier to sell that illusion by building the sag into the torso sausage itself (adding a bit more of a curve to it), and then building up along its back/spine with additional masses.
Lastly, you definitely get into detail a lot, and I think that to a degree this may be distracting you from just how much more you can push construction (in terms of those muscle masses/structures you're neglecting. Remember that you should not be thinking about detail or texture at all until you've taken construction as far as it can possibly go.
So, I want you to do 4 more animal drawings with no detail/texture whatsoever for me, demonstrating your understanding of what I've outlined here. You've definitely improved a great deal since your last submission, but there are a few things I want to nail down before I send you onwards.
Uncomfortable in the post "Inktober is Coming! So it's a good time to remind you guys that in order to make tools for Drawabox more accessible, we sell high quality 0.5mm fineliners in packs of 10 for just $16.50 USD (with free, fast shipping in the continental US)"
2019-09-27 18:38
That's great news! I'm glad you like e'm.
Uncomfortable in the post "Lesson 5: Drawing Animals (Patreon Critique Thread)"
2019-09-24 20:45
This is definitely an improvement. You're showing a much greater mindfulness towards the particular concepts we're exploring here. I'm especially pleased with how well you've followed the donkey demo. There are a couple things I want to point out however:
-
Since your drawings tend to get very cluttered with a lot of different forms (which is by no means a mistake or a problem - in fact, it's fantastic), coming back over top of it to add additional line weight in key areas to help clarify how different forms overlap would be a good use of your time. I actually believe I mentioned this in my previous critique as well.
-
Your whale construction definitely is the weakest of the bunch - comparing it to the dinosaur, where everything is very clearly defined in relation to its neighbouring forms, most of the whale ends up feeling vague and ill-defined. This is understandable, since they're pretty far off from the kinds of animals we tackle throughout the lesson and demonstrations.
-
I'm very pleased to see that you're defining the intersections between many of your forms - I did notice however that in your gorilla, many of those contour curves at the joints ended up being somewhat shallow, rather than properly capturing how it would hook back around and wrap around the other side. For example, we can see this here. These contour lines carry a lot of weight, and can make your forms feel solid and three dimensional, but can equally make them appear flat if they're not used correctly.
Anyway! I'm going to go ahead and mark this lesson as complete. Feel free to move onto lesson 6.
Uncomfortable in the post "Inktober is Coming! So it's a good time to remind you guys that in order to make tools for Drawabox more accessible, we sell high quality 0.5mm fineliners in packs of 10 for just $16.50 USD (with free, fast shipping in the continental US)"
2019-09-21 16:02
That's fortunate - seems the prices in Israel are much more reasonable than those in North America.
Uncomfortable in the post "Inktober is Coming! So it's a good time to remind you guys that in order to make tools for Drawabox more accessible, we sell high quality 0.5mm fineliners in packs of 10 for just $16.50 USD (with free, fast shipping in the continental US)"
2019-09-21 15:39
I think.. I think dinovember ended up beiong people taking their children's dinosaur toys and posing them in amusing ways. So... I guess it did? At least somewhat.
Uncomfortable in the post "Inktober is Coming! So it's a good time to remind you guys that in order to make tools for Drawabox more accessible, we sell high quality 0.5mm fineliners in packs of 10 for just $16.50 USD (with free, fast shipping in the continental US)"
2019-09-21 15:38
I'm sorry to hear that! How much do fineliners usually cost in Israel, if you don't mind my asking? Things like Staedtler Pigment Liners and Faber Castell PITT Artist pens?
Uncomfortable in the post "Inktober is Coming! So it's a good time to remind you guys that in order to make tools for Drawabox more accessible, we sell high quality 0.5mm fineliners in packs of 10 for just $16.50 USD (with free, fast shipping in the continental US)"
2019-09-21 12:00
Hah, no, we're not selling them at a loss. Drawabox is a business after all. I've just always leaned towards pricing things for accessibility first and foremost. Companies seem to sell fineliners at an absurd markup, so undercutting them substantially isn't that hard.
The only tricky part is that it requires us to purchase in considerable bulk, taking on a high up-front cost of several thousands of dollars based on an estimate of how many we'd be able to sell.
Uncomfortable in the post "Inktober is Coming! So it's a good time to remind you guys that in order to make tools for Drawabox more accessible, we sell high quality 0.5mm fineliners in packs of 10 for just $16.50 USD (with free, fast shipping in the continental US)"
2019-09-21 05:29
I suppose ordering from us does simplify things - though in the future, don't let a lack of the perfect tool paralyze you. Both a 0.4 or 0.7 would be okay (the 0.4 is what I'd pick of the two). Don't think of it as needing the perfect tool - get as close to what we recommend as you can, and get started.
Uncomfortable in the post "Inktober is Coming! So it's a good time to remind you guys that in order to make tools for Drawabox more accessible, we sell high quality 0.5mm fineliners in packs of 10 for just $16.50 USD (with free, fast shipping in the continental US)"
2019-09-21 04:52
Shipping itself is around $14 USD, so it doesn't end up being an effective option unless you're ordering two packs at once. Even then, I can't say what your country's import taxes would be, so I wouldn't go that route unless you were entirely unable to find a more local option. With companies like Staedtler being based in Germany, many European countries can often get much better prices on fineliners than those in North America.
Uncomfortable in the post "Inktober is Coming! So it's a good time to remind you guys that in order to make tools for Drawabox more accessible, we sell high quality 0.5mm fineliners in packs of 10 for just $16.50 USD (with free, fast shipping in the continental US)"
2019-09-21 04:48
Hahaha, well perhaps one day - but for now we're focusing purely on selling ones that can be used for drawabox in order to keep prices as low as we can.
Uncomfortable in the post "Inktober is Coming! So it's a good time to remind you guys that in order to make tools for Drawabox more accessible, we sell high quality 0.5mm fineliners in packs of 10 for just $16.50 USD (with free, fast shipping in the continental US)"
2019-09-21 04:47
I can't really say! I know Orctober's a thing, as I've seen whispers of it on tumblr and such, but Gnomevember's just something I came up with off the top of my head.
Uncomfortable in the post "Inktober is Coming! So it's a good time to remind you guys that in order to make tools for Drawabox more accessible, we sell high quality 0.5mm fineliners in packs of 10 for just $16.50 USD (with free, fast shipping in the continental US)"
2019-09-21 02:38
That's great to hear! Though might I suggest other great things about October:
-
Halloween and related spooky themed things
-
Orctober (which personally I believe should be followed by Gnomevember, but I am biased due to my own web comic, "Orc and Gnome's Mild Adventures")
-
It's likely when the cafe near my work starts selling hot chocolate again, unless they decide to do it in November which would be absurd and bothersome
Uncomfortable in the post "Inktober is Coming! So it's a good time to remind you guys that in order to make tools for Drawabox more accessible, we sell high quality 0.5mm fineliners in packs of 10 for just $16.50 USD (with free, fast shipping in the continental US)"
2019-09-21 01:52
Glad you like e'm!
Uncomfortable in the post "Inktober is Coming! So it's a good time to remind you guys that in order to make tools for Drawabox more accessible, we sell high quality 0.5mm fineliners in packs of 10 for just $16.50 USD (with free, fast shipping in the continental US)"
2019-09-21 01:12
We've had much bigger bursts of purchases than this in the past, so I don't think that's the issue. What happens when you try to place an order?
Uncomfortable in the post "Inktober is Coming! So it's a good time to remind you guys that in order to make tools for Drawabox more accessible, we sell high quality 0.5mm fineliners in packs of 10 for just $16.50 USD (with free, fast shipping in the continental US)"
2019-09-20 21:39
Lol well at least they're not children's pens - though when we're tested different suppliers when sourcing ours, we based out choice on resilience, quality, longevity, etc. There are a lot of cheap pens out there but they're usually not going to compare to the more respected brands.
Uncomfortable in the post "Inktober is Coming! So it's a good time to remind you guys that in order to make tools for Drawabox more accessible, we sell high quality 0.5mm fineliners in packs of 10 for just $16.50 USD (with free, fast shipping in the continental US)"
2019-09-20 21:22
Do you mean these scented pens?
Uncomfortable in the post "Inktober is Coming! So it's a good time to remind you guys that in order to make tools for Drawabox more accessible, we sell high quality 0.5mm fineliners in packs of 10 for just $16.50 USD (with free, fast shipping in the continental US)"
2019-09-20 18:53
Awesome! I'm sure you'll love them.
Uncomfortable in the post "Inktober is Coming! So it's a good time to remind you guys that in order to make tools for Drawabox more accessible, we sell high quality 0.5mm fineliners in packs of 10 for just $16.50 USD (with free, fast shipping in the continental US)"
2019-09-20 17:27
To continue my blatant advertising campaign, we've sold somewhere in the realm of 700 packs thus far, and the consensus is that they last a long time (in our own tests, ScyllaStew was able to complete all of lesson 1 on a single pen without it showing any signs of diminishing), and they're resilient. They also don't bleed when exposed to water (for example, if you're going to paint over them).
Generally they compare to Staedtler Pigment Liners, which sell for almost twice as much.
Uncomfortable in the post "Lesson 5: Drawing Animals (Patreon Critique Thread)"
2019-09-18 13:34
It is something that has crossed my mind - my girlfriend's suggested it before, to do something like a biweekly scheduled stream where I can take questions for a few hours and answer them. I probably wouldn't tie it to the patreon tiers though.
That said, I simply don't have the time for it right now. I'm still balancing a day job, drawabox critiques, working on a webcomic - and at the moment, developing a community platform for drawabox to help improve the community critique situation on the subreddit. Once that's finished, I should be able to set aside a few hours every couple weeks to do a live stream of that nature, but I won't be committing to it any time soon.
Uncomfortable in the post "Lesson 5: Drawing Animals (Patreon Critique Thread)"
2019-09-17 23:45
The aardvark is vastly improved. Your kangaroo seems unbalanced however (due to the positioning of its legs), and the mass you added to its belly doesn't really maintain a believable connection with the rest of its torso, which makes it feel rather flat.
Uncomfortable in the post "Lesson 5: Drawing Animals (Patreon Critique Thread)"
2019-09-17 21:35
Overall you clearly are doing much better, and you've got a number of pages with solid results. I am admittedly a little concerned by the pages where you showed your process - not because showing your process is bad, or because the looser sketches are a problem, but because there are cases where I've seen some of that looser sketching and thinking on the paper bleeding into your actual constructions as well. Working fluidly in this manner isn't wrong by any stretch, but it isn't entirely in line with the specific concepts we're learning here - which is a matter of constructing forms that are solid.
For example, looking at that platypus construction, I can see a lot more contour lines that don't really do a whole lot (like along the tail, and some along the torso), but you've missed opportunities like putting a single contour line where the neck and torso connect that would have helped sell the construction much more effectively even without all the extra linework.
In general, even if you use looser sketches to get accustomed to the nature of a creature, don't carry that process into your construction - and if you can't help it, then it would be better just to focus on construction alone, at least within the context of these lessons.
A couple additional notes:
-
I really liked this mountain goat, especially its head/horns and torso. The legs would have benefitted from using the sausage method, and the sag of its belly should have been built into its torso sausage to begin with, but overall it still came out well. It's also a great example of the clearly defined connection between neck and torso that was missing in the platypus.
-
Your aardvark's head was definitely pretty flat and simplistic, as it was drawn more as a simple shape. I can see some thought to how that extension connected to the cranial ball, and that did help, but I'd definitely recommend pushing that further to really sell how the head has clearly defined side/top planes.
-
The kangaroo is a good example of being way too loose and forgetting about what these exercises are meant to focus on.
Anyway, you're moving in the right direction for the most part, so I'll go ahead and mark this lesson as complete. It seems the next step for you is the 250 cylinder challenge, which is a prerequisite for lesson 6.
Uncomfortable in the post "Lesson 5: Drawing Animals (Patreon Critique Thread)"
2019-09-17 19:12
Focusing on details (difficult as they may be) is an common distraction that keeps one from paying due attention to the underlying structure and construction of what they are drawing. The awareness that you're going to get into detail and texture often causes us to look ahead to it instead of focusing on what we're doing at this very moment (ie: constructing our objects from simple forms).
As far as distractions go, your work has many. You're preoccupied with detail, you're frequently getting caught up in adding elements to entertain yourself (speech bubbles, drawing scenes instead of individual animals, etc). While drawing for fun is an important part of one's development, it should not be fixed with the concrete exercises that are assigned here. That's one of the major reasons why it's encouraged as something separate - to ensure that while you are working on drawabox material that you're giving it your full focus and not allowing your mind to drift. Every drawing should be the result of you focusing fully on applying the instructions, rereading them as needed in order to make sure that you're approaching them correctly.
Starting with your organic intersections, these are alright, but there are a few key issues. Firstly, towards the left side you have a few forms that get somewhat "wiggly" through their midsection. This makes the form itself more complex than it ought to be, breaking the basic principles of the organic forms with contour lines. When drawing your sausage forms for this exercise, they should be flexible enough to wrap around the forms beneath them, but not so limp that they convey no sense of their own weight. Think of a filled waterballoon, rather than a balloon only half-filled with air.
Secondly, you do on occasion leave gaps between your forms which further undermines the illusion that they're solid and have weight to them. With each form you add, you need to think about how it rests firmly on the form(s) beneath it, how it presses down upon them.
When you last submitted this exercise as part of lesson 2, there was room for improvement, but it was considerably better. All the evidence points to this being because you were distracted, unfocused, and likely rushing this time around.
Moving onto your animal constructions, you do a pretty good job when following along with some of the demonstrations (like the wolf on the top left of this page), but I can see a number of places where you altogether skip steps and ignore instructions. For example, with the kangaroo you entirely skipped the step of drawing the torso sausage, and didn't apply the sausage method at all to its limbs. I can see in a number of places throughout the submission that you apply techniques partially, but cutting a lot of corners. Additionally, looking at this lion, it looks like you were more interested in drawing all the tufts of fur of the mane than constructing the head out of actual forms using the techniques covered in the tiger head demo.
Ultimately, you haven't really put in your best into this submission. Looking back on your work for lesson 4, where you demonstrated a solid grasp of form and space, this is not a representation of what you can do, and so critiquing it any further wouldn't make any sense. I also can't help but notice that you submitted as soon as the 2 weeks between submissions was up, which along with everything else, suggests that you were inclined to rush.
I'd like you to try the full lesson again. Take your time, read through the instructions and notes carefully and don't be afraid to read through them again whenever you need to. Apply the techniques and processes outlined in the demonstrations completely, don't cut corners and skip steps. If I don't see what you are fully capable of, then my critiques are a waste of both mine time and yours.
Uncomfortable in the post "Lesson 5: Drawing Animals (Patreon Critique Thread)"
2019-09-17 18:08
Honestly this is a significant step forward. I can see a much clearer grasp of 3D space and form throughout many of these. There are some that are weaker, but all in all this is a considerable improvement.
I'll offer a few observations in point-form to keep things succinct:
-
Pigeon - don't rough in the construction/masses so faintly. If your pen's dying, put it out to pasture and grab a fresh one. Don't end up in a situation where your marks don't come out confidently and cleanly.
-
Rabbit - your additional mass is drawn here as a flat shape. You've made it clear that you are totally capable of drawing those additional forms as strong, 3D volumes (as shown here and along the elephant's back) - always think about what you're drawing as 3D forms being added to a world to interact with solid forms that are already present.
-
Oryx - similar problem to the rabbit, but I also wanted to mention that adding your forms to the belly usually doesn't work super well (or at least it's notably more difficult) because instead of benefitting from the illusion of gravity when piling one form on top of another, here you have to work against it. It's generally better to build the sag into the original sausage form of the torso as explained here, and build up the back muscles with additional forms.
Keep up the great work, and while you do have things to work on, you're making a lot of progress. I'll go ahead and mark this lesson as complete, so feel free to move onto lesson 6.
Uncomfortable in the post "Did a quick demonstration for a student on how to apply additive constructional drawing to a claw"
2019-09-15 01:51
Ahhh, I see your point. I thought you were talking about the teeth themselves, but yes, you're definitely right on your call that the claw could definitely be made to look more 3D by further fleshing out the planes of the inside of the claw.
Uncomfortable in the post "Check out this review of Drawabox that was just released by a former student, Rebecca Rand!"
2019-09-14 17:09
I'll definitely check that book out when I get a chance. I'm honestly not sure how I feel about babysitting students so directly, though. I'll have to give it some thought.
Uncomfortable in the post "Did a quick demonstration for a student on how to apply additive constructional drawing to a claw"
2019-09-14 17:06
Well you've gotten a few upvotes, so it seems some people do agree with you. I admittedly did rush through the demo, so the teeth are a touch sloppy. How do you feel about the little example along the left there, with the two forms connecting to the simple sausage? Does the one with the check mark feel more 3D to you, or are you not able to buy into the illusion?
Uncomfortable in the post "Did a quick demonstration for a student on how to apply additive constructional drawing to a claw"
2019-09-14 00:51
To be more accurate, it's about breaking things into simple forms, and understanding how they fit together in 3D space. Shapes are two dimensional, forms are three dimensional.
Uncomfortable in the post "Lesson 4: Applying Construction to Insects and Arachnids (Patreon Critique Thread)"
2019-09-08 23:21
Lovely work! You're definitely nailing many of the major concepts. There are a few things I want to address, but by and large you're doing a great job.
Starting with your organic forms with contour lines, these are solidly done. Your sausage forms match the two-equal-spheres-connected-by-a-tube-of-consistent-width definition nicely, with no swelling or pinching through their midsection. Your contour lines wrap nicely around the forms as well, and align nicely to the central minor axis line. There's just one issue I'm seeing, and that's that your contour curves generally maintain the same degree throughout, rather than shifting naturally along the length as they should. I can actually see this done a little better in some areas of the second page, although it's somewhat inconsistent.
For your insect constructions, as far as the use of simple forms and combining them to create more complex objects, you're doing a great job. You've got excellent, tangible volumes in each of these, and you're generally respecting the volumes and solidity of your forms and avoiding situations where you might introduce contradictions to your drawings.
There are a few exceptions however. Most notably, cases like mr snippy snap (though admittedly this is somewhat my fault because I approached this a little sloppily in the video demo). In this drawing, you drew big balls for the claw sections, and then drew a new form overtop of each ball to create the top claw. The solid, 3D ball that you started with ended up being ignored and overridden, in favour of this newly introduced component. This is the kind of thing we want to avoid at all costs when applying constructional drawing, largely because it breaks the core premise of construction. You've added a 3D form, and then gone on to treat it as though it were just a flat shape that could be ignored.
Generally what should be done here is starting with a smaller ball that the top part of the claw would be extended off of (this is what was done in the demo, although the ball was a little loosely drawn so it wasn't as clear), integrating this initial form into the construction rather than tossing it away. This is an example of additive construction - where everything builds up on the previous forms that were put down - rather than subtractive construction. Subtractive construction is valid, but it's considerably more difficult to achieve because it requires a student to already have a very strong understanding of how their forms exist in 3D space. Instead of cutting into the shape as it exists on the page, we cut along the surface of the form, as though we were drawing with a scalpel. Additive construction, which I recommend students stick to whenever possible, actually helps build one's understanding of 3D space, making it an excellent part of the overall exercise, whereas subtractive construction requires us to already understand those concepts, and makes it very easy to do things wrong. As you continue to work additively (which you generally do), you'll increase your capacity to work subtractively when it is actually necessary.
Another thing I noticed was that your drawings tend not to take full advantage of the space afforded to you on the page. Even when drawing just a single insect to a page, you'll limit yourself to a smaller fraction of it. I can certainly understand not knowing fully how much space you'll need and leaning a little smaller to make sure you don't spill over the edge, but I think you'll benefit from drawing a little bigger so as to give yourself more room to think through spatial problems.
This also relates to the last issue I wanted to mention, and that's your current approach to texture and detail. Since your construction is quite strong, your use of texture and detail being somewhat on the weaker side actually isn't a big deal - which makes it easy to miss as an issue with room for improvement. That said, with a closer inspection I did notice that your details and texture are drawn to be somewhat scratchier, and more based on seeing certain marks in your reference image and drawing them directly without considering what they actually represent.
This actually makes a lot of sense, as you last crossed lesson 2 back before the major updates to drawabox. The texture section has undergone some significant updates, so I recommend that you give it a read (along with the notes for the individual exercises - you don't have to do them, just make sure you read through the notes).
To summarize, what we're doing here with our drawings is describing the nature of the forms present in our object. The large forms, we establish through construction, bounding their volumes with outlines and describing their surfaces with contour lines. The smaller forms - those that exist along the surfaces of the larger ones - are too densely packed and too small to properly apply the same techniques to, so instead we capture them by drawing the shadows they cast on their surrounding areas. Every single mark we perceive as part of a texture, everything we think of as a 'line' is really just a shadow being cast by some little form - a bump, a raised section, a ridge, a divot, etc.
So what's important when it comes to capturing these textures successfully, is that when you see a mark you want to carry over into your drawing, you don't simply draw it as it is. You pause, think about the nature of the form that casts that particular shadow, and then think about what kind of shadow that form would cast in your drawing. This additional step of relating it to the form itself will help make your textures more developed and more convincing. It is the same principle as construction, where we stop to think about the simple form that exists in part of a photograph, rather than simply drawing what we see.
Reading through those notes, especially this section of the texture analysis exercise should help clarify this a lot more.
Anyway! You're doing very well as it is, so I'll go ahead and mark this lesson as complete. Feel free to move onto lesson 5.
Edit: I actually realized you're meant to be at the $10 tier for this lesson, but you've been supporting for so long without submitting homework that it's not really an issue. You're welcome to stay at your current tier (though I expect I'll forget and remember many times for all of your future submissions).
Uncomfortable in the post "Lesson 5: Drawing Animals (Patreon Critique Thread)"
2019-09-08 18:06
I'm glad you've been getting such longevity out of our pens! We definitely found that the pain wears out as well - it's too bad, though fortunate that it's our only issue.
So, moving onto your work, you've clearly invested a great deal of time and effort into these - not only in drawing, but also in following the instructions and reading through them thoroughly. As such, there's definitely a lot of improvement over the set, along with a few things that still need work. Overall however, you are demonstrating a well developing grasp of constructional drawing and how it can be applied to animals.
Starting with your organic intersections, these are very well done. You're doing a great job of wrapping those forms around one another, and conveying a sense that they exist in three dimensions, as a growing pile rather than just a bunch of flat shapes pasted one over the other on a page.
The first thing that jumps out at me is a definite struggle with proportions. This is actually pretty normal, and it's the sort of thing that one improves on with time, as you have done here. Still, one area where it does continue to throw you off is with your head constructions. To start with, you have a tendency of drawing your initial cranial masses too large (or as the case may be, the forms that follow too small in relation to it). This results in the muzzle feeling awkwardly flat against it, especially in your attempts to follow along with the tiger demo.
You also tend to draw your eye sockets much too small, and the edges you use to define those eye sockets feel more as lines along the flat page, rather than marks resting along the surface of the cranial ball. Remember that everything we're drawing exists in 3D space, and we need to constantly push ourselves to hold onto a belief in that lie in order to convince others of it. Think of it as though you're cutting along that sphere with a scalpel, rather than drawing on a page with a pen. The same thing applies when wrapping the eyelids around the eyeballs - you're getting some success here, but it varies.
Earlier on in the set, I can see you trying to make use of the sausage method, specifically when following along with the wolf demo, though your use of it does fall away as you move through the set. When you do attempt to apply it, I can see a few issues:
-
Here you're not properly overlapping the ends of the sausages - they're kind of misaligned, and you've "enveloped" them in a flat shape to cover the gap. Don't use flat shapes - instead, if you want to add mass where there isn't any, you should be doing so by adding additional forms to your construction. You also didn't draw a contour line here to clearly define how those two forms intersect and relate to one another, leaving this more as two flat shapes rather than solid 3D forms.
-
Here you've reinforced that intersection, but if you look closely the actual "ends" of the sausages aren't well defined at all. You need to put more care into each and every mark or shape you put down on the page, making sure you're clearly aware of what you're trying to achieve with it.
While I'm not against students straying from the sausage method when constructing their legs, I do want to see them demonstrate a clear understanding of how to apply it and its particular advantages first. One of the great things about the sausage method is that it pushes the importance of keeping our base constructional components simple, which keeps our forms solid. One example of this is how the sausages maintain a consistent width through their lengths, not tapering, pinching or swelling through their midsections. If you look at this section of this page you'll see that this back leg tapers through its midsection, which undermines the illusion that it is a solid form. The foreleg is actually very well done, but there's an inconsistency in your approach that makes your legs hit-and-miss, so I think you should continue to apply the sausage method more stringently to all of your constructions without deviating until you understand it better.
Another issue I wanted to touch upon was that of adding additional forms to build out muscle masses and other volumes in your construction. Early on you do a good job of thinking about how those forms are going to wrap around the forms beneath them (like on this page, at the neck/shoulder and the rump. Later on however, you stop thinking about how the forms are actually fitting together, and instead just dropping basic round shapes onto your construction, as you do here.
Even towards the beginning however, your 'additional masses' still feel fairly flat, and fail to maintain their own volumes. If you look at the notes on this subject from the lesson, you'll see how in the demonstration, we're actually imbuing those masses with clear volume, both using contour lines and through how their silhouettes are shaped. Again, it comes back to the importance of understanding how these things we draw are all solid, three dimensional forms. Right now you're still, at least to a point, thinking in terms of putting marks on a page to fool someone else into thinking it's three dimensional. That you're using tricks. Tricks only get us so far, and as explained back in lesson 2, we only really succeed once we fully believe in the lie ourselves. You are almost there, and you've got a lot of excellent constructions here that are moving further towards that end, but it's these little things that give it away.
One last point that I want to make does relate to this - and it's the fact that when constructing your animals' torsos, you generally have the sausage flow straight across, rather than incorporating the belly sag as explained here. Unfortunately, incorporating the belly sag as an additional mass after the fact doesn't work quite as well - the illusion of those masses works best when we can work with gravity, thinking about how those forms are going to rest on top of those beneath them. With the underbelly, we don't have the benefit of gravity, and end up having to work against it, which weakens the illusion as a whole. As such, it's better to incorporate those sections into the original form, at least to an extent.
All in all, I think you're making excellent progress, and despite the issues I pointed out, I really like this deer. The chameleon was also very well done, and your hybrid actually demonstrates an overall solid understanding of 3D form and space. Where you're falling behind however is I think in a tendency to read through the notes thoroughly, apply them initially, and then start straying more loosely from them, finding your own way along rather than applying the techniques and methodologies that have been described here to the letter.
You're absolutely ready to move onto the next lesson, but have a lot more room to grow as far as organic construction goes, so be sure to continue practicing this on your own. I think the lesson 6 will help you continue to develop your grasp of 3D space and that whole illusion we're creating as well, but before that you'll have to complete the 250 cylinder challenge. So that's your next stop.
I'll go ahead and mark this lesson as complete. Keep up the good work.
Uncomfortable in the post "Lesson 5: Drawing Animals (Patreon Critique Thread)"
2019-09-04 18:17
There's definitely a lot of strengths here, although I can see a few issues I would definitely like to address. The issues I'm seeing all come down to what you're focusing on as the goal of your work with this lesson. From what I can see, you have a tendency at times - not all the time, but definitely frequently enough - to focus overmuch on the end result and not enough on the actual process used to get there. You make choices and use approaches that focus on creating a prettier drawing at the end, rather than focusing on each of these drawings as being an exercise in learning how to apply construction to better understand how these complex objects are made up of a series of simple forms that relate to one another in a particular fashion.
Now, I'll give credit where it is due - you're not all the way on that end of the spectrum, and in fact you've got a great deal of construction here where you're drawing through a lot of your forms, and working towards applying what is covered in the lessons. As you move further along however, and as your overall confidence with this material improves, you tend to get somewhat sloppy. You're definitely showing improvement over the set, but it's being counteracted by a quickened pace and a need to get things done quicker than you are currently capable.
So, let's look at some specific issues:
-
From the beginning, you don't seem to use the sausage method when constructing your legs. Experimenting with different techniques and approaches is great, but you should still be familiarizing yourself with the techniques provided in the instructions first, so you understand what you should be aiming for. The sausage technique is extremely effective in its ability to convey both gesture alongside the solidity of form.
-
From the looks of it, you jump ahead into texture and detail way too quickly, and show the same signs as other students who have their minds looking ahead to all the detail they're going to add when they should be focusing on the construction they're working out at that moment.
-
As you push through the set, I can see you relying more on more on a separation between construction and your "final" drawing, where the underlying construction has been drawn more faintly, with you coming back afterwards to draw your detailed version on top of it in a darker hand. There are a number of reasons why I discourage students from doing this as they work through these lessons, the biggest of which is that it causes students to focus more on tracing over the lines of the drawing as it exists on the page - as collection of 2D lines - without focusing on how the actual edges they're drawing exist in three dimensions.
-
On this horse you've stopped drawing through your forms altogether, instead shifting back to drawing more from observation certain parts (like the legs) from observation. Remember that the end result is irrelevant - the focus is on how you apply constructional techniques. I have had students who produced beautiful drawings for this lesson, but who did so largely using pure observation. They were asked to redo the lesson.
-
From the looks of your heads, I think you have a habit of drawing the cranial ball too large. Making it somewhat smaller should help you keep the face from getting smushed against it.
Now, all that said, you are demonstrating a well developing grasp of 3D space, and where you've cut corners you have still held things together reasonably well because of that underlying understanding. While this is not the place nor time to demonstrate that to me, it is commendable none the less.
There are just two other things I wanted to touch upon:
-
You need to work on how you think about and draw the forms you add to your construction in order to build out additional masses. Right now while I can see signs that you're moving in the right direction, you're still not conveying a strong enough impression of how one form wraps around the form underneath it, as explained in these notes.
-
Your texture and detail can definitely get rather erratic and scribbly. You have some cases where you do much better, but drawings like this show a much more haphazard approach to conveying fur. I can see that you're moving towards thinking in terms of clumps of fur, but you're not putting a any time into designing the individual tufts, and as such they just look spiky. You did a great job on the monkey on the right, though again the fur of the one on the left is very haphazard. In general, you're just not putting enough time into observing your reference carefully and thinking through each individual stroke you put down. Don't let your arm or subconscious automate the process - draw with clear intent for every stroke.
As you've cut corners here, I'm going to ask you to do 5 more animal drawings, this time with no detail or texture whatsoever, instead focusing on taking the construction as far as you possibly can.
Uncomfortable in the post "Lesson 4: Applying Construction to Insects and Arachnids (Patreon Critique Thread)"
2019-09-03 21:01
Starting with your organic forms with contour ellipses and curves, these are doing fairly well. Your second page definitely is stronger as far as the actual sausage shapes goes - the first page was alright, but there was a little more irregularity towards the ends (either swelling out slightly or stretching instead of being properly spherical). Some of this is present in your second page as well, but to a much lesser degree.
I do want to point out however that sometimes you place that last little contour ellipse on the tip incorrectly. Many of them drift further into the form than the shape implies, which undermines the illusion and confuses the viewer. Make sure you think a little more about where you're putting the ellipse at the tip, to get the most out of that highly effective trick.
There are definitely a lot of major strengths throughout your drawings here - you're doing a great job of combining forms to create more complex objects that feel three dimensional - but there is a key set of issues that I want to address above all else.
I actually only see it in one place, but it's significant enough to make a big point of it. In this ant, if you take a look at its head, you'll see some bumps you added there that were effectively taking the silhouette of the forms you'd previously combined, and then manipulating it as a two dimensional shape on the page. None of our drawing process should ever be perceived as taking place "on the page". Everything we do needs to either be the result of adding explicit forms to our construction, or at least drawing with an awareness of how the marks we're putting down move in three dimensions.
Outlining of any sort is pretty dangerous, and it's one of the reasons I push students to only add line weight in limited sections - because it's very easy to get trapped in the mindset of "tracing" over the actual lines you've already drawn, rather than emphasizing edges that exist in 3D. We can also see this problem along the abdomen, where you've taken the existing boundaries of the forms that were present and then pushed them out to create segmentation. Instead, you should be thinking about how you can wrap new forms around the abdomen, with an awareness of how they're going to layer onto it (like lesson 2's organic intersections) and building things out in that manner.
Fortunately this was only an issue we saw in any significant fashion with this particular drawing, and your others look pretty solid. That first wasp demo you followed along with did have some more subtle cases of this kind of mindset (of drawing lines on the page) but most of it was still reasonably well done.
Moving onto a different topic altogether, it's good to see that you're experimenting a great deal with how to push your drawings further with detail and texture, but without decreasing the amount of attention that you pay during the constructional phases. There is still a lot to be figured out, especially with the use of those larger bolder marks, but the most important piece of advice I can offer here is that line weight's greatest advantage is that you can use it to clearly establish how different forms overlap. Right now I don't feel that this is something that you're achieving as effectively as you could, as your marks tend to jump between a reasonably uniform range to really heavy black shadows. Try thinking about creating a hierarchy in your drawings, ranging from the confident lines you drew during construction, gradually building up to make the different overlaps and relationships between your forms easier to understand before jumping in with really bold dark areas.
Also, on your tarantula you seem to have placed a fairly arbitrary black spot along its abdomen that is rather difficult to rationalize. It's likely that you drew a coloured spot you saw in your reference. Local colour of this sort should not be carried over into your drawing, for the same reason that we don't try to capture the browns, yellows, reds, greens, etc. Imagine that your drawing is all grey.
In the next lesson, there are some notes on how to tackle fur as clusters and tufts rather than individual hairs - pay particular attention there, as it'll help you better design the fur textures on your critters.
I'll go ahead and mark this lesson as complete, so feel free to move onto lesson 5.
Uncomfortable in the post "Lesson 4: Applying Construction to Insects and Arachnids (Patreon Critique Thread)"
2019-09-03 20:40
Starting with the organic forms with contour, these are quite well done. I am noticing some weirdness when it comes to the actual ends - they aren't quite shaped like spheres, and instead get a little pointed at times, or more tapered, or sometimes a little flat. Keep an eye on this and remember that the spherical ends is both about them being rounded, but also having that roundedness be limited to a certain section rather than stretching out along more of the overall sausage. You are doing a great job with the midsections however, and your contour ellipses and curves are coming along well.
You've done a pretty solid job of following along with the various demonstrations, with great uses of the sausage method to construct solid legs, and other successful combination of simple forms to build up greater complexity. Keep in mind that some of the informal demos are quite a bit older, and as such while they have some value to offer, following along with them exactly is not always a great idea. For example, with this one, the importance of drawing through your forms (like the legs) so we can understand how they exist in 3D space is critical. So if you do follow along with these, make sure you think about the concepts that have been taught to you thus far through drawabox, and try to apply them alongside whatever that demo focuses on.
Now I am definitely noticing some issues with proportion, though this is fairly normal, and it will improve as you continue to practice drawing from reference images and thinking about how the size of different forms relates to one another. For example, gauging how many heads would fit into the abdomen to better determine how big certain things should be drawn on the page.
Speaking of size, you definitely do have a tendency to draw your constructions fairly small on the page, with lots of empty space around them begging to be used. Drawing larger will help you both engage your shoulder to keep your lines fluid and smooth, and will also help give your brain what it needs to sort through these spatial problems.
While your use of the sausage method is coming along great - your sausages are well shaped and they've got healthy overlaps between them - there is one thing that is missing. That is, the actual step of reinforcing the intersection between them using a contour curve. as shown in the middle of this diagram. It's sometimes not easy to do so when those connection areas get especially small (another reason to push yourself to draw bigger), but it is critically important when conveying how any two forms relate to one another. These intersection areas give us the opportunity to really sell just how certain forms exist in 3D space, and can kick what appears to be a simple shape on a page into being seen as a solid, 3D form very effectively.
All in all, you are doing a pretty great job, and are employing the major concepts of the lesson very well. When you do delve into more detail, you also are moving in the direction of observing the actual textures that are present in your reference images, though I do think there's a lot more to be seen and carried over, so keep working on studying those references closely, and remembering that every textural mark you put down is a shadow cast by some bit of form information that exists along the surface of your object. This can help us to focus on what each mark truly represents, and can keep us from oversimplifying in a cartoony fashion.
I'll go ahead and mark this lesson as complete, so feel free to move onto lesson 5.
Uncomfortable in the post "Lesson 4: Applying Construction to Insects and Arachnids (Patreon Critique Thread)"
2019-09-01 21:57
This is looking considerably better - especially with the dragon fly. You definitely still have a lot more room for improvement with the particularly skinny sausages, but you're showing a lot of improvement. Keep working at it, but feel free to consider this lesson as complete and move onto lesson 5.
Uncomfortable in the post "Lesson 4: Applying Construction to Insects and Arachnids (Patreon Critique Thread)"
2019-08-31 14:13
Alrighty, this is in a lot of ways a big step forward. You did however neglect the whole "no detail or texture whatsoever" in a few areas - the spots on the back of this one, the hairs on this one's thorax, etc. It's important that you always remain fully aware of my isntructions so you don't accidentally stray from them.
I do have one other concern however, and that's how you're constructing your legs in some cases. A lot of these use the sausage method, which is good, but when you draw particularly narrow ones, you tend to stiffen up a fair bit. Furthermore, you're also showing this issue where you're "enveloping" forms in larger forms. We can see this, for example, on this page, specifically here where you're enveloping the whole sausage segment in a larger form and here where you're doing it just at the end of the segment.
The reason this is a problem is because in doing this you're just adding flat shapes to your construction with no regard for how they intersect with one another. Where the sausages generally have been mindful of those intersections and their relationships with other 3D forms in the construction, what you've drawn here are literally just flat, obliterating those good qualities in the inner forms.
Instead of enveloping your existing forms or adding flat shapes, if you want to bulk out part of an existing form, actually add another 3D mass to it, as we practiced in the organic intersections exercise from lesson 2. That's where we take a solid, three dimensional mass and attach it to an existing structure, having it wrap around the underlying form rather than just being pasted on top of it as though that other form doesn't matter. This is something we explore in greater depth in lesson 5, specifically in these notes.
Since that is tackled in the next lesson, I'm going to mark this lesson as complete and have you move forward. Just make sure you pay special attention to that aspect, and review the use of the sausage method as well, as it still plays a major role in constructing animals' limbs.
Uncomfortable in the post "Lesson 4: Applying Construction to Insects and Arachnids (Patreon Critique Thread)"
2019-08-30 02:27
Alrighty! So overall you're doing a pretty good job, but there are a few things I want to bring to your attention.
Firstly, for your organic forms with contour lines:
-
It seems you're using the same degree for all of your contour lines, rather than having them shift naturally along the length of the form to better represent the change in their orientation relative to the viewer. In your contour curves, you did have a bunch were the degree reversed, but it was a sudden jump rather than a gradual shift.
-
You neglected to include the minor axis line through the second page - this is still a very important part of the exercise and helps when aligning the contour ellipses and contour curves.
-
Generally your sausage forms are pretty simple, which is great - but keep an eye on those shapes. Sometimes you end up with ends smaller than others. You also have cases where one end ends up being stretched out, so instead of being a spherical nub (as explained here) it ends up being pointier.
-
I can see you trying to add little contour ellipses right at the tips of your sausage forms, which is great, but you're kind of timid and often not willing to place a full ellipse right on the tip (and in many you leave them out altogether). These are actually great and do an excellent job of really selling the illusion of form.
So looking at your actual insect constructions, many of these are very well done. Overall you're demonstrating a good use of form, you're combining them pretty well, and aside from some areas where you get distracted by detail, you build up the illusion of volume and structure very effectively.
There are just a few things to keep in mind:
-
One thing you're generally not doing is defining the relationships between forms. For example, if we look at this praying mantis, which generally came out quite well, you can see how if we look at the major masses (for example the two balls you set out for the abdomen), they're basically two ellipses that overlap. If however you define the actual intersection between them, the single contour line that runs along the surface of both at the same time, we can clearly define them as being three dimensional forms instead of just shapes. It's a cheap (in terms of number of lines required) and really impactful approach to establishing the illusion of form.
-
Also on the same praying mantis, if you look at its head, you'll notice that while you dropped a ball form in for its head, what you ultimately ended up doing with it involved pulling back from the bounds of that ball. You placed a head within its space, rather than building on top of it to create solid structure. This doesn't work well because it's a process that involves dropping a form into the world, and then promptly ignoring it in favour of other forms (without it ever truly going away). We generally prefer to work additively (building up forms on top of existing forms). When we do have to work subtractively (cutting back into forms), we need to do so in a very methodical fashion that involves cutting along the surface of the form so as to constantly reinforce the relationships between the piece that remains and the piece that is cut away. It's considerably more complicated. Furthermore, additive construction actually helps reinforce your own understanding of construction and 3D space (because of how you're forced to combine forms), while subtractive often leads to students forgetting about 3D space and just pasting shapes on top of each other.
Now the last thing I wanted to mention was that you definitely have a lot of experimenting with texture. This is good to see, but the most important thing is that you not even think about texture until your construction is completed. That's not a metaphor - I literally don't want you to think about it, because when we know we're going to add detail to a drawing, we immediately start approaching things a little differently, and splitting our mental faculties between construction and "how am I going to add all this really cool detail".
It's also important to keep in mind when adding detail that every mark we put down on the page is an assertion about what we're communicating to the viewer. It's very easy to end up with assertions that contradict one another. For example, maybe the construction suggests that a surface is rounded and voluminous, but the way the texture has been added to it suggests that the surface is more flat. Generally you haven't fallen into this trap too much, but this page and this one end up getting so heavy with noisy texture that it does start to become something of concern, especially with the nature of that stippling. Stippling will of course get much more dense as the surface it's on turns away from the viewer, and much more sparse when it is facing the viewer head on. Don't be afraid to let that stippling merge earlier into solid black areas, especially as those surfaces turn away.
All in all, you're doing a very good job. I've listed some things here to keep in mind, but keep up the great work all the same. I'll go ahead and mark this lesson as complete, so feel free to move onto lesson 5.
Uncomfortable in the post "Lesson 4: Applying Construction to Insects and Arachnids (Patreon Critique Thread)"
2019-08-27 21:04
Alright, that is moving in the right direction. There's still plenty of room for improvement, and watch the tendency to make your ends stretch out (like stretched spheres rather than properly round ones), so keep focusing your warmups on them in particular for now. Drawing from the shoulder is particularly critical for this kind of thing.
I'll go ahead and mark this lesson as complete. Feel free to move onto lesson 5, where you'll encounter plenty of places to apply the sausage method.
Uncomfortable in the post "Lesson 5: Drawing Animals (Patreon Critique Thread)"
2019-08-26 18:42
So just to keep things consistent, I'll start out by quoting the partial review I gave to your deleted submission:
- Over the set, I definitely see meaningful progress, especially with the dogs and wolves towards the end.
- The most critical thing to keep in mind when constructing things is that you need to define how your forms actually intersect in 3D space. If you look at the dog on the bottom of this page, it's generally constructed very well along its back, but the extension of its belly is actually just a flat shape with no three dimensional relationship to the main torso forms. Conversely, along the back we can start to see how these forms are wrapping around the underlying form (not super well done, but definitely in the right direction). You can read about how to wrap the forms around one another here. Also, the underbelly is particularly tricky because we can no longer take advantage of how gravity would cause forms to wrap around those beneath them (since here our form is hanging). As such, I usually try and avoid building the belly with an additional form, and instead build it into the original sag of the torso sausage, as shown here.
Overall you're totally headed in the right direction, but you're drawing a little small (making it harder for your brain to sort through the spatial problems), and you're often a bit vague in terms of the shapes and forms you're drawing, or even just in following the instructions to the letter. I'd recommend reviewing the first page of notes and trying to be more mindful of each and every mark you put down. When we get overwhelmed and stressed over a topic it's easy to lose track of things and draw more from instinct, but that is when we need to take a step back and think about every mark we put down most of all.
Instead of more text, I've decided to do the rest of this critique as redline notes directly on top of your work: https://i.imgur.com/bBXpdRR.png
Here are some links to notes relevant to the points I raised (some are repeats from the previous critique):
-
Major Masses (you sometimes drew the ribcage too small
-
Torso as a sausage form (you sometimes forget to sag the torso sausage downwards)
-
Additional masses - it's important that when you add any form to your construction, you think about how that form is going to wrap around those that already exist, and how they all interact with gravity (like the organic intersections exercise). These relationships need to be clearly defined in your drawing. If you don't think about it, you will just end up piling shapes on top of shapes, making those areas look flat.
-
The sausage method. Apply this more directly, and don't half-ass it. Defining the intersections between sausages with a single contour curve is going to be infinitely more effective than adding a dozen contour lines along the length of the sausages.
-
Fur - fur is not a bunch of scribbly lines, it should be drawn as individual, carefully designed tufts. Generally drawing less of this rather than more is going to be more effective, so don't respond to frustration or uncertainty by drawing more. Take a step back and assess the situation.
I'd like you to do 4 more animal drawings, taking everything I've said here into consideration. Do not get into any kind of detail or texture - focus only on construction, and draw larger. I'm noticing that you have a tendency not to use all the space that is available to you, which results in a lot of areas of that construction being crammed into a smaller space, where your brain is not able to think through the spatial problems. You may want to shift to doing one drawing per page.
Uncomfortable in the post "Lesson 4: Applying Construction to Insects and Arachnids (Patreon Critique Thread)"
2019-08-26 17:48
Alrighty, so as I was doing these redline notes of your your exercises, I think I may have figured out what is giving you so much trouble: you're probably not drawing from the shoulder as much as you should. You may have fallen out of that habit due to the hiatus.
When I draw sausage forms, I regularly have to force myself to engage the shoulder completely and draw with a slower (but still confident and unhesitant pace), in order to properly keep the ends spherical. Controlling curvature is considerably more difficult when relying on pivots with a smaller radius (elbow, wrist), and so the same difficulty hits us when wrapping contour curves around the forms.
As I've shown by drawing over your work, you've got a lot of sausages that have "pointier" ends - where it's like you've taken the sphere and stretched it out. This, right now, is the biggest problem you're encountering, so we need to get that under control.
Your sausages are moving in the right direction, but for some reason you kept making successive sausages smaller (despite never being told to). You may be trying to replicate the way insects' legs sometimes behave, but for now I want you to focus just on the process of getting those sausages to intersect - keep them the same size, and draw them fairly large so as to engage your shoulder more easily.
I want you to give it another shot - this time, with the quantity reversed. Two pages of organic forms with contour curves and one page of sausage chains. Don't rush, don't attempt to get this done at any particular pace - focus on each individual sausage and contour line, and on nailing it with a confident but measured pace.
Uncomfortable in the post "Lesson 4: Applying Construction to Insects and Arachnids (Patreon Critique Thread)"
2019-08-25 17:11
Keep in mind that the sausages are the underpinnings of the structure. You may see a form that is much larger on one end and smaller on the other, but we still start it out with a consistent sausage, then add a ball at one end to make it larger. This falls in line with the whole "start simple and build up complexity by adding more simple forms".
Uncomfortable in the post "Dealing with off-topic posts, spam, etc."
2019-10-11 16:49
Much appreciated! As it stands it doesn't actually increase my workload since I was tagging peoples' posts anyway, and when it does become a bit much I'll probably just tag in one of my existing discord chat server moderators.
It's very nice to see all the people willing to help out though.