[deleted]
2015-03-15 21:20
[deleted]
Pontmercy
2015-03-19 06:58
Here is my homework. These aren't getting easier that's for sure. I had a tough time drawing intricate textures, and I was exactly sure the best way to draw smooth surfaces.
Uncomfortable
2015-03-19 15:45
Textures really aren't the issue here. What's lacking is the attention paid to the lay-in stages of the drawing. Essentially, you're not carrying over any of the techniques we covered in the previous lessons. Instead, you're focusing on outlining your shapes, which doesn't tell us much about the volumes and forms themselves.
Take a look at this. The first step to creating a drawing that gives the illusion of existing in three dimensions to the viewer is being convinced of it yourself. That means putting in those contour lines to help reinforce that illusion while you're drawing it. You've also got to understand how the different forms connect to one another. They can't just be floating around. You need to understand how they join together in explicit terms.
I'd like to see 4 pages of lay-ins. By layins, I mean completed to this stage: 1, 2, 3.
Pontmercy
2015-03-22 06:02
Is this what you are looking for? Sometimes I gloss over instructions and do what I want...my bad. I'll finish the other three pages when I get the ok. The orchid in the bottom left was hard to draw because the petals are close to parallel with the drawing surface. And I think I can do better with the leaf on that berry-bush thing.
Uncomfortable
2015-03-22 17:12
Pontmercy
2015-03-26 03:13
Here are the 4 pages including the on I posted earlier. Thank you for your patience!
Uncomfortable
2015-03-26 22:08
You've definitely shown some improvement. Your forms are being conveyed much better, and the top of page 3 is very well done. The only critique I have for that one in particular is that you missed where I said in the last critique,
contours are good, but try and avoid making them so regular & equally spaced out. Wireframe-look is boring.
You've applied that wireframe-look to all of your drawings here, so work on breaking up that monotony.
Since you're getting a better grasp on the forms, I'd like to see two pages of plants taken to the detail stage. Remember to approach it as you did these last lay-ins first, and then apply the detail on top of it. Don't try and just cover the entire drawing with an equal amount of detail. Instead, work towards establishing a clear focal point. Also, spend a lot more time than you did before paying attention to your reference photos. Before it was clear that you were only spending a limited time observing your reference, and then worked off of what you remembered seeing for the bulk of the time. Don't trust your memory. Keep looking back and looking carefully at your reference.
Last of all, I noticed that when you applied detail, there were times when you applied textures to rounded surfaces as if those surfaces were flat. Always remember that the surface texture will warp with the surface. If you haven't already, watch this video on organic forms w/ contour lines. In there, I talk a bit about how those surfaces curve, and how the surface textures will be modified to communicate the turning of the form.
Pontmercy
2015-04-01 22:39
Ok well here is another go at it. Not sure if I did any better. Sometimes I feel like I need to do some shading but I am not very good at it. Like the leaves on the avocado plant. They are not perfectly flat and a little wrinkled around the lines so I tried to do a little shading around them to give them more texture but I don't think it really worked. Also I got lost trying to draw the buds on the weed plant.
Uncomfortable
2015-04-02 00:11
I'm very tired, so I'll be doing your critique tomorrow. In the mean time, could you show me the photo reference you used for the avacado plant? I'll probably do a quick demo of it.
Pontmercy
2015-04-02 02:01
Yea no worries! Your are already doing way more than I could have ever asked for. This is what I used for the avocado tree.
Uncomfortable
2015-04-02 22:24
So I am going to let you move forward. There are still some issues, but I think in general you'll benefit more from the next lesson, due to the shift in subject matter.
What stands out most about this one is the attempt at capturing those really minute details. Consider the fact that you had to look SUPER close to the plant to notice them. This tells us that the viewer looking at the plant from the distance at which you drew it isn't going to be able to see it.
Whenever you try and capture a pattern that seems somewhat random, look at it and try to spot the pattern. There are very few things that are truly random. Furthermore, try and treat the details as you treat the overall forms. Start capturing big overall shapes, and then break them down into smaller ones. At every stage, you should feel like you've got some kind of general scaffolding/framework to hang your next level of detail off of.
Here's how I tackled that avacado plant.
I did like the pseudotrillium rivale though - aside from the haphazard lines inside, you captured and broke down the forms quite well. Always remember that nothing should ever be scribbled or put down randomly. Things usually follow some kind of rhythm or pattern.
Pontmercy
2015-03-23 06:07
If anyone is looking for plant pictures I have been using r/botanicalporn and r/plants
[deleted]
2015-03-28 04:20
[deleted]
Uncomfortable
2015-03-28 16:36
I think you're ready to move forward, though there is definitely some room to grow. Here's a few areas where you can improve:
-
Your lay-ins look very much like wireframes to me. Try and avoid the regularly-spaced contour lines, as they'll quickly make your drawing look boring. One here, a couple there - just enough to start convincing you that you're drawing something 3D.
-
You do your lay-ins and your drawings completely differently. The lay-ins are the first step, and then you simply keep going to finish your drawing.
-
If you have trouble drawing a smooth curve to wrap around your form as a contour, don't be afraid of drawing a full ellipse.
frankensteeen
2015-03-29 08:14
Here's my homework for the plants!
I think I tried to add too much detail, and a lot of them ended up looking pretty busy. I tired to correct myself later on, but I don't know. I think I did okay.
Uncomfortable
2015-03-29 23:26
Pretty good! On a subjective level, I do think you've probably pushed your detail a little too far, but you still handled it pretty well. Even though you've got a lot of detail in there, you've done it in a way that does not create a lot of competing points of contrast.
There definitely are some issues with your underlying structure though. I generally see that from people who tend to push this far with their detail - the detail becomes the focus of their efforts, so the forms end up being left a little flat or misrepresented. It's not as big of a deal here, but I do notice a lot of areas where your contour lines do not wrap around forms very convincingly.
I think the best place to tackle this issue is in the next lesson, so I'm going to mark this one as complete. When you tackle the insects, don't push your details this far. Focus on the lay-ins, and make sure your forms are readable and recognizable before you apply any detail at all.
Tarrazan
2015-04-01 22:59
Uncomfortable
2015-04-01 23:02
Slow down there. I haven't even critiqued your homework from the first lesson yet. I have glanced at it, and there are some major issues. The way these lessons are structured, each one builds on the one before it - so if you've got issues on the early lessons and you've rushed ahead, you're going to end up having to redo a lot. Wait for me to finish critiquing the first lesson.
stonitrov
2015-04-02 16:42
Finally finished with the homework! Here it is: http://imgur.com/a/BvKlJ
Uncomfortable
2015-04-02 22:54
Great work, wrong thread. I'll mark the challenge as complete, of course, but keep an eye on where you're posting! :P
GeckoNinja
2015-04-06 01:30
so here i am, 5 days after sending u that message, it took some time xD
first page, b4 reading the new lessons, i remenbered the lesson so i did some sketches
while reading the new lesson i drew the examples (i did these during lectures so they are kinda simple :P)
http://imgur.com/a/SQKIK#1 pages 1,2,3
lay ins
http://imgur.com/a/SQKIK#4 pages 4,5
start of the plant studies
http://imgur.com/a/SQKIK#6 pages 6 +
these are all on the same album, but i just wanted to kinda explain the context of the first pages xD
Uncomfortable
2015-04-06 23:36
There's a few major issues here that are impeding you quite a bit.
-
Your work is very stiff - there's no organic flow to most of your lines. You should look at lesson 2 (which like everything else has been updated since you completed it) and try doing some of the arrow exercises.
-
Your contour ellipses don't vary at all in degree, so in terms of the perspective, it looks weird. Watch this video in full, it should explain some of those concepts.
-
Most of all, I'm really not seeing much lay-in in your plant studies. Sometimes I feel like I see traces of pencil drawings, which you should not be doing at all, though that might be something peeking through the page underneath. Your drawings shouldn't seem to jump in from nothing into full definition. I want to see you going from basic shapes and forms, into breaking those forms into smaller simple forms, then expanding into detail.
Since you've come back after a long time, I think it'd be in your best interest to at least look over the previous lessons. I think you're missing quite a bit of what is conveyed there.
Once you've done that, I'd like to see you try another four pages of plant studies - and don't do them when you're distracted (like sitting in class). Do them in an environment and situation where you can really focus on what you're doing.
GeckoNinja
2015-04-08 00:14
so did 9 pages of arrows (small pages tho, im starting to have a lack of empty paper to draw on :( )
and 1 with the shapes from the previous class to do the contours
is this going on the right path?? i noticed its easier to do contours taking into acount perspective if im the one doing the initial shape. having it from a picture makes me confused for some reason, in the drawing i redid some contours like 3 times :/.
Also, yeah it was pencil, i just like drawing in pencil so much :( but i wont use it anymore
Uncomfortable
2015-04-08 01:15
I'm not entirely sure what that is. Could you include the reference photo? Also, post to a new imgur album, it's hard to keep track of what's new and what isn't.
GeckoNinja
2015-04-08 01:31
reference : http://i.imgur.com/n4YPeyF.jpg
and k, posted here http://imgur.com/a/8D6Iu#0
sry and thnaks
Uncomfortable
2015-04-08 21:48
Definitely better. Don't forget to draw through your ellipses though to achieve the correct shape (which should be your top priority). Also, your shading flattens out your forms, as every individual hatching line works as a tiny contour curve.
GeckoNinja
2015-04-10 20:00
urggh i still dont feel happy with these
sry to be so annoying but could u, kinda review or something :/
ty
Uncomfortable
2015-04-11 01:44
Hm... There is a certain stiffness to them, but they are definitely better. They feel more solid, as if they exist in space. On the left of page 3, I can feel that some of those leaves are coming out towards me in space, while others sit behind it. It's certainly by no means perfect, but it's a big step in the right direction.
I'll mark this lesson as complete. Often I find that once people who are having trouble reach a certain point with the plants, they learn the remaining concepts better when applying them to the insects in the following lesson. So, go ahead and move onto lesson 4 and we'll see how things go.
GeckoNinja
2015-04-11 02:22
thanks, i will still do some more 4/5 plants anyway just to atleast get more confidence on them :) (should i post them? or no need ?)
stonitrov
2015-04-14 10:32
Here are my plant studies! http://imgur.com/a/BfNXS
Uncomfortable
2015-04-14 21:32
Nice forms and lay-ins. I did notice that when it comes to the cylindrical forms, your contour lines don't wrap around properly (as explained in the organic form video.
Generally though you did pretty well. A good hierarchy of forms, didn't get too bogged down with detail, etc. I am a little concerned about the left side of page 11, I'm not sure if that's supposed to be surface texture or sketchy lines. If it's surface texture, it's very random - texture usually carries some kind of rhythm or pattern which you'll notice if you look closely enough. If it's just rough sketchy lines, remember to try and think in terms of specific forms - which you do for the most part elsewhere.
Anyway, I'll mark this as complete, so feel free to move onto the next lesson. Also, I'm not sure if you're using a felt tip pen or a ballpoint - if it's the former, good work, and if it's the latter, make sure to use felt tip next time.
stonitrov
2015-04-15 10:05
Thank you for the constructive criticism. What do you mean by "contour lines don't wrap around properly" Can you be more specific about the problem area. The degree, the curve etc. About page 11 it was just some doodles. I am using this type of pen http://cdn.allshops.ro/files/clients/78/5128/p/79/schneider-topliner-934-04mm-negru-1558913.jpg
Uncomfortable
2015-04-15 12:54
The pen looks good.
As for the wrapping of contour lines, it's like how I explain it in this video. The problem lies where the contour curve hits the edge of the form - it's not turning enough to really give the impression that it's wrapping around. Instead, if you were to continue drawing the curve, it feels like it would just keep going off the form.
It's a pretty common issue that people have, and it usually stems from not visualizing what you're drawing as a cylinder. Try to remind yourself of the curvature of the surface you're drawing - your paper is flat, but the form itself is rounded, so try to convince yourself that you are in fact drawing on a rounded surface instead. What you perceive is often what will show through in the drawing.
aaphk
2015-04-18 04:27
Here is my plant homework http://imgur.com/a/LupPY#0 I had some trouble trying to understand the form of some of the leaves.
Uncomfortable
2015-04-18 19:25
As far as the silhouettes and forms go, you did well. What I don't like though is your tendency to be very scribbly and haphazard. You're laying down lines without much thought to what purpose they serve, which leads to a very 'sketchy' sort of aesthetic. While I absolutely support drawing through forms consciously when you need to reinforce your understanding of a form you've drawn, you need to reel yourself back and put more effort into thinking before you draw. Every line on the page must serve a purpose, whether to help convey something to the viewer, or to help you get a better grasp of what you're drawing.
For example, on page 11, there are a lot of crisscrossing lines that aren't really contributing anything. On top of that, since you didn't stop to think very much before putting them down, they don't always align correctly to your form.
Anyway, that's actually a pretty common issue, but I definitely want you to work hard to shake it off. I'll mark this lesson as complete because you nailed what I was most interested in seeing (the forms), so I'd like to see your work for lesson 4 show that you're putting much more thought and planning into your drawings. Remember, spend 90% of your time observing, visualizing and planning, and only 10% of your time drawing.
One last thing - your photos are a little blurry, so it makes it a little difficult to appreciate the smaller details you've put in.
Feorious
2015-04-21 11:27
It took a while but I got the rest done today. http://imgur.com/a/cKqPf
I imagine there is a whole lot I need to improve on. This really pushed my comfort zone which is good. Although I think I need a lot of practice. Honestly I've never drawn plants before ><
Uncomfortable
2015-04-21 23:08
Nice work! Good solid forms, strong detail (mostly). Feel free to move onto the next lesson, but here's a few things you can change as you move forward.
-
Try to break up your contour lines - right now everything is very evenly spaced out, resulting in a boring, wireframe/grid type look. I don't think you need to include quite so many to convince yourself and your viewer that you're dealing with a 3D form. Either way, just spacing them out a little less regularly will help make it more interesting to look at.
-
No scribbling like on page 4. Every texture has a rhythm to it, you just have to be able to find it. If you end up resorting to a somewhat random scribbly type of linework, chances are you just didn't spend enough time trying to find that rhythm.
stephanfx
2015-04-23 07:03
Hello again, here is my homework for the plant lesson.
Uncomfortable
2015-04-24 23:58
You definitely seem to get much more comfortable with the subject matter as you progress through the lesson. Generally, you've done quite well. You may want to draw on something bigger though - I get the feeling that you're being a little restricted by the size of the page. This is more the case early on, when you're not as comfortable, but it should help in general, since your drawings will come out bigger, and the tip of the pen in relation to the drawing will seem less thick and clunky.
Anyway, go ahead and move onto the next lesson - you did quite well.
tigermac
2015-05-05 01:01
Here is my homework for the lesson https://m.facebook.com/tony.mccrorey/albums/10153827584912785/
Uncomfortable
2015-05-05 03:36
I'm gonna be critiquing this tomorrow (I spent this evening doing my own art so I didn't have time to get to anyone's critiques) but in the mean time, could you try and take some better pictures? Some of these are kind of difficult to work with.
Kolloom
2015-05-06 23:01
Stuff I drew, still terrible at rendering. Don't think rendering with a .5mm is possible though, went with a .25mm.
Edit: link added
Uncomfortable
2015-05-09 15:00
This is quite well done. Earlier on in the lesson I noticed that a lot of the time your shapes are composed of broken line segments - rather than confident, continuous lines. Broken lines will often undermine the solidity of a form, so I'm glad to see that you did that less and less throughout the homework.
The only other concern that I have is that your particular method of shading has a tendency to generate a lot of contrast, because you've got a lot of white/black points right next to each other. It creates noise, which draws the eye, and undermines any focal point you might be trying to produce. That is definitely something you'll want to keep in mind in the long run.
One last thing - rendering with a 0.5mm is definitely possible. You're free to approach that as you see fit, but I do want to make you aware that the reason you're having trouble putting in fine detail with the 0.5mm is because your pressure control hasn't developed entirely yet. Relying on the thinner tip won't help fix that in the long run, so you'll be missing out on some of the training these lessons provide.
In general though, you did quite well. Feel free to move onto the next lesson.
Kolloom
2015-05-10 05:51
"Broken lines will often undermine the solidity of a form",what if with an edge that is facing the light, or things that has no definite edge like a dandelion. I do think that the boldness of edges are relative, like thick edges with thin edges vs. thin edges with broken edges.
"because you've got a lot of white/black points right next to each other", can you be more specific on this one? I did use white gel pen, could that be the "white points" you talked about?
And yes I do have trouble dealing with pressure control, will do more practice.
Thanks for the critics.
Uncomfortable
2015-05-10 05:57
On the point about broken lines, what I'm talking about comes before rendering. I'm talking about the lay-in, just putting down the forms themselves, before we start worrying about the fact that in the real world there are no outlines. Ultimately, once you solidify your understanding of form, you'll be able to rely more on your ability to visualize and understand what you intend to draw. First and foremost, we want to make sure that your shapes and forms are coming in accurately, and when you break a line, the shape will become irregular and uneven - simply because the second you lift that pen, your muscle memory resets.
About the white/black points, it's not about the use of a white gel pen. Consider if you had a square on a page, and you crosshatched the inside of it completely. You hit it with a bunch of horizontal lines, and then a bunch of vertical lines. Now you've got a very fine grid with a lot of black lines and a lot of white spots in between them. It's that juxtaposition of black and white that causes a lot of noise - the texture itself vibrates and calls the viewer's eye to look at it. This can work well for you in a focal point, but if you don't reduce that contrast everywhere else, you will quickly lose control of your composition.
Ciumix
2015-05-09 09:56
I kept forgetting to post Lesson 2 so I ended up with lesson 2&3 at the same time. If there is a problem with L2 I'l do that before anything else.
[Lesson 3] (http://imgur.com/a/aofMv)
I also switched from 0.5 to 0.05 is it ok? Should I use the 0.5 all the way? EDIT: nvm it ran out :|
TY:D
Uncomfortable
2015-05-09 15:47
Generally I don't accept homework that's been completed before I had the chance to critique the previous one, unless the previous one is done very well. So, I'm not going to be critiquing this one in depth. I did want to point out though that I rather like the drawing and the detail studies on page 2, though the crazy hatching on the outside of the plant makes it look sloppier than it would have looked without it.
Ciumix
2015-06-10 13:40
Hello,
I did the homework for lesson 3 again: http://imgur.com/a/Qe3D8
I think they are better than last time.
Thank you:D
Uncomfortable
2015-06-10 20:07
Generally well done. I think my favourite is on page 5. In the future, try not to cover every surface just for the sake of covering the surfaces. Often times the most successful drawing will balance empty space with heavy contrasty detail. It gives your eye a place to rest, along with a place of interest.
Feel free to move onto the next lesson.
Ciumix
2015-06-10 20:19
I will keep that in mind.
I have a small request: at what level am I?
I am trying to get to the level where I can make a living out of art, I know I have a long road ahead, but I don't know where I am now.
Thank you for your time, dedication and fast reply!:D
Uncomfortable
2015-06-10 20:23
uhh... That's not really a question that has an answer. You're fully capable of reaching your goal, but where you are now, your understanding is not fully developed. Your drawings are hit-and-miss, but you're getting there.
Ciumix
2015-06-10 20:34
hmm, ok, so I have to do my best to get more hit rating:-?
Uncomfortable
2015-06-10 20:37
Always. Don't worry about where you stand, just focus on doing the best you can.
B0BDigi
2015-05-13 04:24
Do I need to learn how to draw shadows to do this? This seems like such a huge step from lesson 2. I've gone through lessons 1 and 2, but this seems kind of overwhelming. It's probably because I'm pretty new to drawing, but I'm not really sure when to advance in the lessons.
Uncomfortable
2015-05-13 13:42
None of my lessons really directly deal with the concept of lighting - instead, I focus on understanding form, which is what lighting generally attempts to convey. Rather than relying on shading to define form, we focus on line and silhouette.
To be honest though, I'm not sure what to tell you. I let people submit their homework for that very reason - so they have a sense of whether or not they're approaching the exercises and understanding the concepts correctly, and so they know when they're ready to move forwards. Since I haven't seen any of the work you've done, I can't tell you whether you're ready or not.
That said, this lesson is intended to be your first introduction to drawing things from observation. I don't expect you to be able to do it perfectly, so you should not expect that of yourself. Instead, it is just the first step towards practicing skills that will be visited again and again through lessons 3-7.
[deleted]
2015-05-14 08:00
[deleted]
Uncomfortable
2015-05-14 21:48
There's some issues with how you're approaching your lay-ins, and it's affecting the rest of your process. Lay-ins are definitely the most important, and you're not really taking the time to focus on the basic forms before diving into detail.
Here's some notes. A really good example is the serrated edges on one of your plants. You're including those in your lay-in. What you should be doing is blocking in solid forms, making sure that you understand the volumes each one conveys and dropping in contour lines here and there where necessary.
When you break up the edge like that, you're immediately compromising the solidity of the form before you had a chance to establish it. The resulting final drawing will end up looking flatter.
Looking at your drawings, I think you're getting the hang of the other aspects of it, you just need to focus more on those lay-ins. Also, it would probably help to draw much larger. Trying to draw at such a small size tends to make things a lot more complicated and more difficult.
[deleted]
2015-05-17 16:20
[deleted]
Uncomfortable
2015-05-17 19:01
It's better. What I'm going to do is, I'm going to mark this lesson as complete, and let you move onto the next one. Lay-ins tend to be much easier to understand when dealing with insects, because they are made up of very obvious forms with clear, natural contour lines. A lot of people who struggled with plants really found their stride in lesson 4.
[deleted]
2015-05-14 15:01
that took a long time, but here's what I've done
Uncomfortable
2015-05-14 22:04
I feel like you're making things much harder for yourself than is necessary. Your potential is there, but by drawing things so small on the page, you're limiting and stifling yourself. Drawing small, especially when you don't have a lot of experience with drawing as a whole, is going to require you to have a much finer degree of control over your pressure and your movements, among other things. This only piles onto the challenges you're already facing, and that tends to result in flatter drawings with very little room for detail.
I'm having some trouble actually critiquing this stuff at such a small size, since it becomes much more difficult for me to pinpoint the root of the problem.
One thing I am noticing is that your lay-ins are not focusing enough on establishing your major forms. You're not closing your forms (especially cylinders) and you're using limited contour lines to establish that volume. On top of that, it feels like you're trying to work in too much detail into the lay-in phase.
I'd like you to read over the lesson again, follow the demos and try to separate in your mind what belongs in the lay-in stage, and what belongs in the detail stage. Then, I'd like you to do three pages of lay-ins, and three pages of final drawings - all of them MUCH larger on the page.
[deleted]
2015-05-15 03:54
thanks for the reply. I'm kinda confused on what you mean by establishing major forms.
Uncomfortable
2015-05-15 22:38
It's all about focusing on the simple masses. For example, the general form of the leaf is your major form, while the smaller serration detail along its edges are minor forms/shapes. You need to focus more on establishing a solid 'big picture' before you start getting into finer details.
[deleted]
2015-05-24 15:55
here's my second attempt
Uncomfortable
2015-05-24 19:21
There's still some room to grow, but these are definitely much more consistent. I'll mark this as complete - the next lesson tends to really drive these concepts home, so your best course of action is to move on to lesson 4.
citrusred
2015-05-17 18:46
Uncomfortable
2015-05-17 19:03
Early on your lay-ins are a little weaker, but it looks to me that you start to get the hang if it later on in the lesson. Your last few pages are looking much better. It would probably help, however, to observe your reference more carefully when it comes to drawing detail. Look for the patterns and rhythms in the surface textures, rather than just drawing somewhat erratic lines.
You'll be able to continue practicing your lay-ins and detailing in the next lesson, so I'll mark this one as complete and let you move forward.
tsak021
2015-05-26 01:41
I never wanna draw plants again... http://imgur.com/a/kwLly
These were definitely difficult and I spent way more time picking out plants than drawing :\ I definitely need to work on more shading/texture/and so on.. But, that will come with more drawing and more practice.
Uncomfortable
2015-05-26 21:49
Hahaha, it's pretty easy to get kind of burnt out when drawing so many pages of the same topic, especially when it's not a particularly interesting one to you. Taking breaks and pacing yourself is definitely important!
Unfortunately, you're not quite there yet. And the problem isn't so much shading or texturing - it's your lay-ins.
One major issue is with your contour lines. You draw a lot of them, but they generally don't tend to wrap around the forms properly. I know I've linked you to this video before, but you should watch it again. Your contour curves don't accelerate and wrap around the forms when they reach the edges. They almost do, but it still feels rather flat.
These plants are basically a combination of everything from lesson 2. You've got a bunch of voluminous forms (mostly organic) that are intersecting with one another, and you've also got some flatter forms that are twisting through 3D space, like your arrows. I feel like you have a tendency to jump into more complex forms too early. Focus on breaking things down into their core components.
One area I believe you did well was page 6. A very good example of where you did poorly was page 8. Notice how it's got virtually no lay-in, aside from those center lines? You don't block in the shapes of those leaves at all, you just rush straight in.
I want you to do three more pages, though I strongly recommend that you take a nice, well deserved break, and then maybe go back and warm up with some of the lesson 2 stuff. It's important to keep up with the exercises you've learned in the past.
tsak021
2015-06-03 21:17
Took a bit of time, then took some more time for each plant. Worked a bit on trying to do some texture/shading and really feel out the organic side of the plants before jumping into the complex shapes. Hope I succeeded :D
Uncomfortable
2015-06-03 22:29
Very nice. There's definitely room to grow, but you're back on the correct path and at this point it's just a matter of practice. Your forms are looking much better, and you seem to be thinking through your lines a lot more. The only thing I want to point out is the cylinder of the flower pot on page 1 isn't technically correct - the bottom ellipse of the cylinder, which is further away from the viewer, will always have a wider degree than the one that is closer (and visible). That's just a minor point though.
Go ahead and move onto the next lesson.
tsak021
2015-06-03 23:37
After I drew it, I was like 'shit'.. Sounds like I will have to do the 250 cylinder challenge soon so I don't make that mistake again.
On to the creepy crawlers!
Tarrazan
2015-05-29 15:48
Here it is : http://imgur.com/a/RvW8U
I'm frustrated as f*** that i can't seem too figure out drawing details, but i like my mushrooms, i think they look somewhat decent
Uncomfortable
2015-05-30 17:56
Details really, really aren't the problem here. The issue is that you're not spending enough time on your lay-ins, and thinking them through enough. Great details on top of a quick and rough lay-in is going to look bad, but quick and rough details on top of a solid lay-in is going to still look good.
Your mushrooms (page 12) are actually really well done, and that's because they're composed of very simple forms, so the lay-in is simple. With the others, you've got all sorts of details that can very easily overwhelm you.
I'd like you to go back and do four more pages of lay-ins only. Don't start getting into any sort of detail, just establish the forms themselves. Consider what contributes to the form (like in your palm trees, you drew every little bit of foliage, rather than capturing the overall form of each branch. I actually did an example a while back with a palm tree that might help you understand better.
Also, draw solid, complete shapes and forms. No broken edges, nothing rough, timid or faint. What you draw should be confident, and it should either contribute to the overall drawing or to your understanding of the forms you're using (like drawing through your forms, or using contour lines). If the line itself does neither of these things, it is not necessary and should not be drawn.
Tarrazan
2015-06-04 18:21
here you go http://imgur.com/a/TAj22
Uncomfortable
2015-06-05 23:55
There's improvement in the solidity of your forms for sure, but there's still a whole lot of room to grow. The biggest things that I'm seeing are:
-
Your flat forms (leaves, petals, etc. - things that exist in 3D space but are flat themselves) are very stiff
-
You cover everything with very regularly spaced contour lines. This leads me to believe that you are not considering what purpose those contour lines serve and instead simply putting them everywhere. Kind of like haphazardly firing a machine gun at a single target in the hopes that one of the bullets will hit, instead of carefully aiming with a pistol.
-
Your tree-like forms, with many branches splitting off (page 6) are still lacking in lay-in. You did lay-in the initial spines (just simple lines), which was a good choice, but you jumped from there to drawing the outline of the complex form. What you need to do is identify the main limbs of the trees, draw them in their entirety - kind of like noodles, focusing on keeping them consistent, and then drawing more noodles coming off of those to make up to branches. Each noodle needs to be cylindrical, with consideration put towards their general volume and form. When I say 'keeping them consistent', I'm referring to keeping them parallel, in a sense. Each line needs to stay the same distance away from the spine down the middle.
That last point is usually pretty difficult for people at this stage, so it's not a subject I want you to focus on. The stiffness mentioned in the first point is far more important - this is very closely related to the arrow exercise, so that might help.
Overall, you did show improvement, but you need to think through the purpose of every step instead of simply doing it because I tell you to. At the end of the day, you need to understand what you're doing, and why you're doing it.
Instead of making you continue with these plants, I often find that people who struggle with this lesson have an easier time understanding the concepts in the next lesson, leading with insects. So, I'm going to mark this lesson as complete and send you onwards. Just keep in mind that these are still things you'll need to practice.
animusv
2015-05-30 18:08
Hey, here is my lesson. This took longer then I thought it would be it ended up being a lot of fun. I found out that I really like plants so that's nice. I included 2 pages of form layins and 8 pages of detailed studies. Overall the lesson went pretty well.
Thanks
Uncomfortable
2015-05-31 16:40
Not bad. There is definitely room to grow, but I think you're moving in the right direction. Your forms are pretty well laid out, which is the most important part. The biggest critique I have there is that in your lay-ins, you should be drawing 'complete' forms. That is to say, close off your forms.
Your contour lines could be improved. If you look at that same image I linked above, you'll see how closing off your forms will show how your contour lines have a tendency to bend in the wrong direction. Lower down the stem, they can be considered correct, but you have to have that curvature shift gradually from the top.
One thing I'd really like you to avoid is using dashed lines when drawing through forms or contour lines, as you did on the tree trunk/branches on page 1. Everything you put on the page should be drawn confidently. Either it contributes to the final drawing, or it helps you understand the forms that you are depicting, or it simply shouldn't be drawn at all. Generally you do a decent job of this but dashed lines are usually a bit of a red flag to me, so I felt it necessary to point this out.
When it comes to detail and shading, you could use some work. For example, your hatching lines (from your shading) consists of straight lines. These function as little contour lines of their own, and they flatten out the form.
In general though I think this is good enough to move onto the next lesson, where you can continue to practice these skills on another subject matter. So, I'll mark this lesson as complete.
animusv
2015-05-31 18:37
Thanks for the critique. I'll definitely start working on the things you pointed out. I have a quick question about what you said about my shading. Are you saying that my hatching was straight lined and instead it should have been countered around the forms to add shape?
Uncomfortable
2015-05-31 18:41
Pretty much, though not so much to add shape. Your form definition is already there. All the details/shading have to do is not contradict it. Since hatching lines have the same effect as contour lines, by having them go straight across like that, they're telling the viewer's eye that the surface is flat. Always keep in mind that the objects you are drawing are 3D and have volume - any detail applied to them needs to wrap around that form, not simply go across it as though you were drawing something flat.
MintGreenTeaLeaf
2015-05-30 21:12
Here is my homework
I really struggled a lot with the assignment and I feel like I didnt do my layins correctly and focused too much on the outline and shading of the plants which came out kind of messy and overly detailed. I definitely need to work on this.
Thanks for making these assignment I feel like they have really helped me improve. :)
Uncomfortable
2015-05-31 16:42
Nice work! Contrary to what you seem to believe, I think you did a pretty good job with your lay-ins. The forms do a good job of giving the illusion of volume and the impression that they flow through 3D space.
Your detailing's not bad either, though there's definitely room to grow there. I think this will continue to improve over the next few lessons, so feel free to move forward.
IdleRa
2015-06-04 15:13
Here are my plant sketches: http://imgur.com/a/XTCHG
It makes fun, when you see yourself improving. I'm quite happy with the last three ones.
Uncomfortable
2015-06-04 19:46
I often worry when people tell me how happy they are with their work - it makes telling them they have to go and redo some of it a little harder.
Thankfully, I agree with you. You did great! You did a fantastic job of establishing a hierarchy of information - you clearly focused heavily on capturing the forms, then went onto some of the smaller details, and finally hinted at enough minutia to create areas of interest without getting too busy.
Your homework reminds me of the notes of botanists in years gone by - and the notes in english and (I assume german?) add a very intriguing touch. I hope you save these pages and compile them with your future assignments. I feel like the final result would end up being something really special.
I'm definitely going to be saving this for example-purposes, once I get the drawabox.com website redesigned.
Anyway - onwards to the next lesson.
IdleRa
2015-06-08 15:12
Thank you! I have been drawing for years, but never approached it as purposefully as now. And yes, it's german. But I add english, so more people can read the notes.
shounenakuma
2015-06-05 17:55
well, here is my lesson 3
lay-ins: http://imgur.com/a/RwNSS
plant studies: http://imgur.com/a/wHXkj
this lesson was hard.. i struggled a lot with leafs and stuff, i guess i need more practice playing with ribbons. i also struggled making the roots come forward, especially when paradoxically they shrunk in size when they came closer to the camera and it kind of clashes with trying to make the ellipses more circular. i also think i was happier with some of the structures before i tried to add detail i don't really know how to texture and think i fell back on hasty hatching a bit too often instead.
i was really really unhappy with my first attempt at the buttress roots so i tried again at the end focusing more on the roots instead of the tree.
Uncomfortable
2015-06-06 01:28
Nicely done. I especially like the forms on the mangrove and mushroom. One thing that stands out to me though is on page 2, your Agave Havardaiana - there's no clear consideration for how those leaves connect to one another. They just sprout out of nowhere, floating on the page. In order to draw something convincingly, you yourself have to understand how those forms are anchored to one another in 3D space.
I also agree that you could spend a little more time studying the textures you see. Every texture has a specific rhythm and pattern to it, which you can identify if you slow down and study it carefully. You will have other opportunities to practice this in the next few lessons.
Anyway, generally you did well, so feel free to move onto the next lesson.
shounenakuma
2015-06-08 18:09
thanks for the great advice, i see what you mean now about page 2. lol i wasn't even thinking about the bottoms of them, i was so focused on the tops. just because i'm not looking at something doesn't mean it's not there XD It seems so obvious now that you say it :sweatdrop:
i wanted to say thanks again for making these, they are hard but i feel like i'm learning so much. and sorry for my late reply, i had no internet all weekend :(
Anipony
2015-06-09 06:44
It's me again, this is my lesson 3 homework, I spent roughly 1-2 hours per page. Something i noticed during the work that my bad shading is bad. And there were also some mistakes in contour lines. And one more obvious thing i noticed, i found it harder, but more interesting and effective, to draw from real life objects, it feels like it gives much more experience. I did so on pages 8 and 9, my home plants. And i would like to ask you, as an experienced artist, do you think drawing from photos has any disadvantages in terms of learning, or it is just a matter of one's understanding of 3d space?
shounenakuma
2015-06-09 17:43
i love the thorns on page 6 on the cylinder close-up. that is so cool.
Anipony
2015-06-09 19:12
I don't know if it was a sarcasm, but thank you. Now when you said it they look strange to me, and i don't know why i drew only 4...
shounenakuma
2015-06-09 20:23
it was not sarcasm :( i really like them. i like how you hinted at more than are there.
Uncomfortable
2015-06-09 21:32
Drawing from life always trumps drawing from photo reference, largely because of the fact that photos do a lot of the work for you. It's very easy to simply look at a photograph and then replicate what you see without understanding it. It's virtually impossible to properly replicate what you see in real life without understanding how the forms work in 3D space. So, forcing yourself to understand how the forms work together when working from photos does help, though ultimately you'll gain more from drawing from life.
As for your homework, what I'm seeing varies. Pages three and four are very well done, especially with your work on the aloe plant. I do notice however that in the bottom left of page 4, you are skipping steps of the lay-in process. You're drawing the little bumps and ridges and waves in the leaves - complex details - without ever laying in the simpler breakdown of the form. You should only be moving into detail once your basic shapes are fleshed out.
Another thing I noticed is that you have a tendency of being very messy and sloppy with your hatching. That's probably what you meant by 'shading is bad'. An example of this is the top right of page 7. You have hatching lines going in all different directions, as if you're just trying to cover the space rather than thinking through what direction those lines should flow. Every hatching line works like a mini contour line. It should flow with the curvature of the surface.
Generally I feel like you're just on the edge - you have a decent sense of form and shape, but you're being sloppy with some of your lay-ins, and you're not thinking enough when you put down your shading. The most important thing to consider when making a mark is whether or not it will contribute to your drawing. There are two kinds of meaningful marks - the ones that end up being a part of the final drawing, and the ones that help you understand your forms better. If a mark does neither, it should not be drawn.
I'd like to see two more pages of plants before I mark this lesson as complete.
Anipony
2015-06-10 13:28
Done. Well, i just suck at being subtile and tidy. If you would like me to do some more pages, i'm ok with it. Suddenly i encountered problems with ellipses again, but then i remembered the ghosting thing and to draw them slower.
Uncomfortable
2015-06-10 20:05
Generally good. I did want to point out that in the first page, you definitely jumped in too early with some of the leaf details. Here's what I mean. You draw the outer outline that I blocked in rather heavily first. Then you use that to mark in the finer, more specific details. The rest is fine, so go ahead and move onto the next lesson.
As for sucking at being subtle and tidy - of course you do! That's why we're doing these exercises, so you can improve.
[deleted]
2015-06-11 11:34
And here are mine.
I definitely got better at this as I did more, and I genuinely enjoyed analyzing these plants. Actually learned a buttload, and I feel like I could draw them from memory now. Will definitely continue doing this on my own.
Except for the orchid, each of them was from life reference. I sat next to the plants, looked at them, felt them, and tried to understand what I was drawing.
A question, though: I felt like it was tough to convey a concave leaf. It's something I struggled with. Could you give me some pointers there?
Uncomfortable
2015-06-12 22:47
These are alright. You seem to draw fairly confidently, but I do notice one major issue involving your contour lines - you don't take the time to make sure that they wrap around your forms, and instead, you compensate by drawing a lot more of them than would otherwise be necessary.
When you draw them everywhere, it becomes very much a pattern of its own - it starts looking like the wireframe of a 3D mesh. All we want to do is place a few here and there to reinforce that curvature. In order to do so, they need to wrap around the forms - often yours will simply stretch from one end to the other and stop suddenly. I discuss that in this video.
In general your plants aren't bad, so I am going to mark this as complete. The next lesson will give you the opportunity to show that you have better understood the use of contour lines.
I did also want to point out that your flower pot in page 4 isn't well done. It should be constructed from a series of cylinders, the ellipses of which should have been drawn-through (as I always stress). The crosshatching is also sloppy. It's important to give every part of your drawing the time it requires. It may not be fully detailed and fleshed out, but the construction needs to be solid, and whatever shading/texture it does receive should be applied with focus, attention and care.
As for your question about concave leaves, here's an example of concave/convex. It's all in the contour lines (which are supposed to follow the curvature of the surface), which you need to work on. On flat objects like petals and leaves, the contours will stop suddenly at the edge, so you only need to worry about their curvature in 3D space. With cylinders like stems, that curvature is a full 360 degrees, so it needs to wrap all the way around.
Go ahead and move onto the next lesson, but be sure to practice the things I've mentioned above.
[deleted]
2015-06-12 23:42
Thanks for the feedback. About the crosshatching, do you mean it's sloppy in general, or on the pot specifically?
onocean
2015-06-13 01:56
It's been a really really long time, but I've finally finished this lesson. It was definitely a challenge, especially since I haven't really drawn plants before, and I'm not sure how i did? But it was actually pretty fun, and I did learn a lot.
Anyway, here's my stuff: http://imgur.com/a/EIX5L
Uncomfortable
2015-06-13 20:41
Nicely done! Generally you've done a great job. I'm going to point out an area where you can improve in a second, but before I do I want to tell you that this is just something you should keep in mind as you move forward. Overall you've done a great job at establishing forms and working in detail where it was necessary without creating drawings that are too noisy.
So the main thing I wanted to talk about was the sketchiness of some of your drawings. In general, you could improve by exploring less on the page (with rough sketching) and try to rely more on visualization. It's a tough transition to make. It's all about identifying those rudimentary geometric and organic forms that exist in your subject, and drawing those in with forethought and a sense of purpose. Before you put down a mark, consider whether or not it contributes to:
-
The final drawing OR
-
More importantly, your understanding of the form. This one means that drawing through your form, adding contour lines, all that good stuff is perfectly fine and encouraged
What doesn't fall into these categories is drawing multiple lines where one will do just fine, or loose additional lines that don't really seem to serve any purpose. One good example of this is the bottom right of page 1. It's very loose and exploratory - try to move towards tightening things up, relying more on pausing and thinking rather than drawing lines on the page until something emerges.
I don't want you to suddenly change your whole approach to drawing - I just want you to think about this as you move forward, letting it gradually tweak your methods, hopefully resulting in work that continues to convey a nice sense of form, but starts coming out a little tidier.
Anyway, as I said before, great work. Feel free to move onto the next lesson.
onocean
2015-06-14 00:39
Thank you for the feedback! The sketchiness is something I've been noticing, but I wasn't really sure how to go about fixing it. Now that you've pointed out the "exploring on the page" vs visualization thing, I think I get it a lot more.
TheNinthFox
2015-06-17 15:54
I enjoyed this excercise. There's definitely some mistakes in my drawings, several of which I recognized the moment I made them - but by then it was too late, of course. In general I think one of my biggest problems is that I am drawing too small at times, which leads to me not having enough room to add proper details. At least that's the feeling I get when adding details every once in awhile.
Uncomfortable
2015-06-17 20:20
Very well done! Clean, purposeful, well structured. There's only one issue that I noticed that I'd like to point out, and it's with your lay-ins.
On page 2 and 4, you'll notice that the leaves aren't simple - they're fairly complex in their little waves and serrations and whatnot. Your lay-in should start off with a simpler curve that summarizes those little details. Then you can build up those smaller variations off the simpler curve. That way you maintain a very consistent direction and framework.
Everything else looks pretty good. Feel free to move onto the next lesson.
TheNinthFox
2015-06-17 21:14
Thanks a lot for the feedback! When drawing pages 2 and for 4 I "fell back" to the way I was drawing before I started your lessons - by simply drawing exactly what I was seeing (this often lead to skewed proportions btw). When reviewing my drawings I also noticed that I didn't really do any proper lay-ins with these drawings, so I tried to be more mindful about that in the drawings that followed.
jaimeiniesta
2015-06-21 15:30
This lesson was very interesting, thanks!
Here's my homework:
Lay-ins
https://www.flickr.com/photos/jaimeiniesta/sets/72157654854558172
Final renditions
https://www.flickr.com/photos/jaimeiniesta/sets/72157652538736154
Uncomfortable
2015-06-21 17:26
Pretty nicely done. There were a few issues that I noticed, though generally your final renders were fairly strong. You concentrated your details well, building up strong focal points, and put thought and consideration behind each mark you made, being sure only to draw what contributed to your drawing, or to your understanding of your forms.
Here's the two major issues I noticed.
On the left, I point out how sometimes you may not have put enough into your lay-ins. The 'dented' leaf details don't follow any clear flow, so it's difficult to start off with them. Doing so will risk drawing a leaf with little cohesive flow - the details will look independent of one another. If, on the other hand, you start with a much more general summary of the leaf's overall form, and then start building those dents and cuts in from there, your final complex details will feel more cohesive. They'll have a more unified sense of flow, which is important especially for organic shapes/forms like these.
On the right, there's a couple things - on one hand, I noticed that across the board you had a tendency to be a little too lax with your contour lines. It might be due to being slightly overwhelmed by the amount of information in your reference photos (which is perfectly normal) but the contour lines you drew did not wrap around the forms. You may have been momentarily unconvinced of the three-dimensionality of your own forms.
Secondly, make sure you close every form you draw. Consider how the forms connect to one another - the very act of closing off these forms at their connection points will help remind you that the objects exist in three dimensions.
Anyway, overall you still did fairly well. Go ahead and move onto the next lesson, but keep these few points in mind as you move forward.
jaimeiniesta
2015-06-21 17:47
Thank you!
I see what you mean and will keep this in mind.
About not putting enough into the lay-ins you're totally right, I think that I was too worried about not being able to erase them later, so the lay-in for the dented leaves would be confusing. But I was forgetting the fact that all these are supposed to be exercises, not final drawings.
About the contour lines, I'm aware that I have to work more on them, only in that case the depicted plant has flat, thick leaves, not so rounded as the lay-in might suggest:
https://fotosdeaquiydealla.files.wordpress.com/2010/12/chumbera1.jpg
http://www.aragonfoto.es/FOTOS/Flora/Chumberas.jpg
But definitely, I could have suggested their form better with contour lines.
[deleted]
2015-06-24 01:04
[deleted]
Uncomfortable
2015-06-24 19:54
You did well, but I only give critiques for those who have submitted homework for the prerequisite lessons (lessons 1 & 2).
Tordek
2015-06-25 03:12
Here's my attempt at this lesson... plus a bonus Cthulhu.
Uncomfortable
2015-06-25 19:25
Think more, draw less. There's a few major things that I notice here that are holding you back.
First off, you're focusing on a lot of small details. You do try to start off simple, but you're not yet identifying the major forms, and you're generally in a hurry to move onto the detail part of the process.
Secondly, you're drawing small. When you draw small, the tip of your pen ends up seeming much thicker in relation to the size of the drawing. This will result in your lines feeling heavier than they actually are, generally making your drawing feel clunky. Drawing bigger will alleviate some of this, and will give you some more breathing room.
Thirdly, your lines are very sketchy and rough. This tells me that you're very much thinking and exploring right on the page, rather than thinking first, then drawing. You need to spend much more time thinking through what you're planning, and considering what kind of mark you want to make next. It's also important to use the ghosting technique to apply those marks in single, smooth executions.
In your lay-in stage, you should be focusing on drawing complete, closed forms. Before you go into breaking down those forms, you need to make sure that you are convinced that what you have drawn is 3D - it's important that you yourself are convinced by the illusion of form, because it is your own belief that you are conveying onto the page. There is a clear difference between an artist whose pen moves along the flat surface of the paper, and the artist whose pen carves along the 3D surface of whatever they're drawing.
Contour lines come in handy with this, reinforcing the curvature of that surface. They're only effective however if you're aware of what you're doing - I've seen countless people here just cover their forms in contour lines with no clear understanding of why they're doing it.
Anyway, taking what I've said above into consideration, I'd like you to do another 6 pages of plant illustrations - but don't move into the detail phase. Establish your forms and convince yourself that you are drawing 3D forms. Consider where and how those forms connect to one another as a big, cohesive construction. And draw bigger.
Tordek
2015-06-26 06:24
You do try to start off simple, but you're not yet identifying the major forms
What do you mean by major forms?... basically, "more details in the lay-in, less details in the details"?
, and you're generally in a hurry to move onto the detail part of the process.
Guilty as charged...
Take this (which is the one I like the most out of what I've done)... should I be worrying more about contour lines and the like, and do less/no shading?
Thirdly, your lines are very sketchy and rough.
The camera no longer lies, I guess ;[... my phone definitely hides things, but the scanner kinda exaggerates things...
In your lay-in stage, you should be focusing on drawing complete, closed forms. Before you go into breaking down those forms,
What do you mean by "breaking down" the forms? (Sorry, I'm not familiar with the phrase, English is my second language).
And draw bigger.
How big is "bigger"? should I be filling a page with a single drawing?
Thank you for your comments, I really appreciate your help :)
Uncomfortable
2015-06-26 20:08
Take this (which is the one I like the most out of what I've done)... should I be worrying more about contour lines and the like, and do less/no shading?
Pretty much. It's not just about contour lines, but rather that you should have your forms communicated clearly before you move onto detail and lighting. Other people will teach you to define form by using lighting/shading, but I strongly believe that it should already be clear by that point. Techniques like contour lines come into play here, but how you define the silhouette of a form will also convey partially how it sits in three dimensions.
I don't want you to move into detail and lighting because that'll only distract you at this point.
What do you mean by "breaking down" the forms? (Sorry, I'm not familiar with the phrase, English is my second language).
The process of drawing objects that I teach basically starts off with a few general forms that capture the essence of what the object is. If you think of a tree, you might have a ball for the tree top, a cylinder for the trunk. I'm oversimplifying here, but it's for the sake of example. Then, you might break down that tree-top sphere into smaller spheres to represent the clusters/masses of leaves that make up the treetop. You continue doing this - always mindful of forms - working into smaller and finer elements and details.
The reason we do this is because you always want to have some sort of framework on which you can pin what you're drawing. If you try to draw a detailed tree from scratch on a page, you won't know where to start, and it becomes very easy to loose track of your proportions. When working with basic forms and then breaking them down into smaller forms, you always have a point of reference. You know that those smaller masses of leaves will still exist more or less within the space defined by your original tree-top ball form. It might sit a little further inside, or hang out of it a bit, but it's more or less in that space.
Bigger
You could do that. Since you're studying one plant at a time, I'd say try to draw fill the page with one drawing, and then squeeze in whatever extra study sketches/notes in the space that's left over on the page. Don't try and fit a bunch of different plants on the same page.
Tordek
2015-06-26 21:24
Alright, I see.
But if I draw lots of these elements, won't I end up with a drawing full of extraneous lines? I mean, say I want to do a simple flower, I'd start with a couple of circles: the inner and outer limits of the petals, then start filling in my petals; or with a fern, each "fractal" leaf will start as a flat leaf, then get broken down, right?
Or is it just because I'm doing it in ink here and it looks too obvious but it wouldn't be so much if I did it in pencil and inked later?
Uncomfortable
2015-06-27 14:56
But if I draw lots of these elements, won't I end up with a drawing full of extraneous lines?
Yup. Absolutely. And it doesn't matter. The drawings we're making here aren't intended to be works of art - the process is all devoted to adding confidence to your lines and helping you understand how the world is made up of simple, but concrete 3D forms.
There are of course people who have a tendency to draw far too many lines - not because they're necessary, but because they think on the page rather than thinking before they draw. I generally tell people that there are two kinds of lines that are acceptable:
-
Those that contribute to the final drawing
-
Those that contribute to your understanding of the forms you are drawing - like drawing through forms, lay-ins, etc.
If a line you are about to draw does not fall into those two categories, it's unnecessary. In this sense, we're not being rough, and we're not sketching. Those two terms tend to imply exploration and uncertainty, where a person doesn't know exactly what they're aiming for, but they'll find it as they draw it. Instead, every mark we make has thought and purpose behind it.
Tordek
2015-07-01 03:57
adding confidence to your lines
You know, this is line actually changed the way I thought of the whole exercise. I was doing the lines because they just were part of the exercise, so I was thinking of them not as structural guides but as elements of the picture... so I was doing them with the same uncertainty as the rest.
Starting with a bad foundation, the rest would be just as unstable... but thinking of them that way "freed" me, so to speak. I started to draw the flower again by first marking a big circle of where the flower exists, then splitting that into where the petals go... which in turn let me detail the curly edges of the petals without having to worry about where that tiny bit fit into the whole, because the tiny bit only needs to fit within a slightly larger bit...
We'll see if it actually worked as well as I think when I'm done :P
[deleted]
2015-06-25 03:29
I found this lesson really challenging, I've never tried to depict texture before using only a felt-tipped pen. I even fully gave up on a few pages (which are not included here, haha). Definitely was a new adventure for me.
Anyhow, here it is!
Uncomfortable
2015-06-25 19:28
Generally you did an OK job. I am noticing several instances where you're starting to wrap your head around the difference between believing yourself to be drawing something 3D, and simply seeing yourself as drawing on a 2D surface. With that comes a greater strength to the illusions you're drawing.
I'll mark the lesson as complete - you have plenty of room to grow, but I am pleased with the direction you're moving, and think you'll gain the most by moving onto the next lesson.
One thing I want you to avoid though is chicken-scratchy lines. I noticed in your lay-ins early on, I see a lot of lines that really should only be a single mark. Linework like that will undermine the solidity and weight of your forms.
[deleted]
2015-06-25 20:46
Great, thank you! I will definitely try to focus on my lines more.
troubun
2015-06-26 06:16
Hello Uncomfortable!
Here is my homework for this lesson. Discovering a lot of interesting plants in the process of doing this homework was a lot of fun. There are some really cool plants out there! Not looking forward to the creepy crawlies -shudder- but it should be an interesting challenge - if I did well enough to go on, that is.
Uncomfortable
2015-06-26 19:59
Very nicely done! Confident lines, decent use of form (a bit excessive on the contour lines in your initial lay-ins but you seem to relax and get the flow of things through the lesson), and nice details in your focal areas. You may want to think about how you might go about fading your details as well - the way you did it is totally fine, but you won't always want to have a stark border between the focal area and the rest, so it's good to practice having a smoother transition as well.
Overall, great work. I condemn thee to the creepy-crawlies.
SchwarzerRhobar
2015-06-27 17:18
Hello, I have done lesson 3. Thank you for your critique.
Uncomfortable
2015-06-28 16:46
Your drawings are quite nice, but ultimately you don't seem to have carried over very much of the lesson. I'm seeing no lay-ins in your process. Instead, you seem to jump right into the detail. As far as observational drawing goes, you're quite good. Unfortunately, since you jump straight into detail, your drawings have a much greater tendency to come out flat.
A good example of what I mean is with the stinging nettle. The leaves have serrated/jagged edges. To lay in the leaf, you'd still draw the leaf with smooth, continuous lines that define how that leaf flows through 3D space without the extra jagged detail. Then you would add that detail afterwards, using the initial smooth line as a framework/guide. It does result in extra lines, but we're not interested in creating super clean drawings at the moment. We're interested in learning about how to maintain the illusion of form in our work.
When laying things in, be sure to always use complete shapes and forms. Think back to the organic arrow and organic form exercises from the previous lesson, and how the former has you explore flat shapes that twist and turn through space, and how the latter has you use contour lines that wrap completely around forms to convey the illusion of form.
Lastly, on your scanner, don't use the 'drawing' setting. Use photo presets instead. 'Drawing' settings often boost the contrast on a scan, washing out the subtle nuance to the lines and rendering them with a very harsh look.
I'd like you to take another stab at this lesson - be sure to read over the lesson again, as it seems you missed a lot of core concepts.
Titan521
2015-06-30 12:05
So I'm having a hard time executing the lay ins of plants, because of which my drawings are looking flimsy and weak as I tried drawing them without any (the number one reason I'm not submitting them), I was hoping if you could give me an explanation of how they work especially for larger more complex subjects with more branches and leaves :)
Uncomfortable
2015-06-30 19:39
I'd have a much easier time if you showed me your attempts at lay-ins - I'd be able to point out what you're doing wrong, rather than give you a directionless explanation.
Titan521
2015-07-10 20:44
Sorry about the late response ( I tend to get lazy in the summer vacations, bit then who doesn't?)
Here's a couple of my drawings http://m.imgur.com/U94Bj1U,ukFub9u,1amuvOn,ENZU5sr,dZGFVv5,Z1vfLMH,xXuOXrU
I tried to pick out my own mistakes, so i noticed that I tend to draw really big, I also have trouble applying smaller details, they're still sketchy, though I think they' have gotten a bit better
Uncomfortable
2015-07-10 23:27
You should absolutely be drawing big. It gives you more room to move your arm, and it makes the lines of your drawing seem less thick and clunky.
Anyway, one thing I focused on was your Green Kohlrabi. I did a demo of how I would have tackled it. One thing that really jumped out at me on yours was that your contour lines did not at all wrap around the form convincingly. You definitely need to continue practicing that.
Another thing I noticed is that you were far too quick to jump into detail on the leaves. The thing to remember is that every piece of visual information needs to hinge on some prior framework you put down. Look at my first step - I start off with a simple circle and a few lines. Then, I hinge the simple leaf shapes on those gestural lines. When I get into detail, I add the frayed leaf edges to those simple shapes, but I follow them to maintain that illusion of 3D form.
Don't draw detail expecting to bury your lay-in. The information the lay-in presents is what is most important. We could have stopped at the third step (the end of the lay-in) and it would still read fairly well. Step 4 and 5 only add minor elements that do not at all bury or undermine the base forms captured for the lay-in.
I'd like to see you do more lay-ins, leave any and all detail aside for now. I think another 6 pages of lay-ins should do for now. Also, you should consider practicing some of the organic form exercises from lesson 2 to practice those contour lines. May also want to rewatch the video that was included with that exercise.
Titan521
2015-07-16 22:08
Are these any better?
http://m.imgur.com/QipXmIC,zDtllw4,FVLPrWH,BYi5Dyz,9tFAEN6,lAwgGIT,PRBbiAw
I redid the radish, cause I think I was too quick to jump into detail again, I think page 5, (the one with the pine tree ) is the worst, with the rest comparatively better......anyway I'll leave the critiquing to you :)
Uncomfortable
2015-07-17 19:35
Hm.. You're not quite there yet. It seems to me that you're still not really grasping the idea of 3D form. I'd like you to take a break from this lesson and do the 250 box challenge and the 250 cylinder challenge. Focusing strictly on simple, solid forms may help you begin to understand how to capture the illusion of three-dimensionality at a simpler level before tackling these plants again.
Titan521
2015-07-18 05:55
Damn, I was hoping I wouldn't have ro do those :D, .....well you don't get better overnight!
birbalthegreat
2015-07-03 06:35
I have been doing your lessons. Thanks for this great sub :)
Here is my submision :-
I know I have done very bad!!!
If it is need to be redone then tell me :)
Uncomfortable
2015-07-03 22:32
I'm glad you've been doing the lessons, but I require people to start from the beginning if they want to post their homework for critique. Each lesson is designed to bring certain bad habits or misunderstandings to the surface, so if I start critiquing you at this stage, there's a lot of things under the surface that I might not catch, or at least that would be significantly more difficult for me to catch.
Start at lesson 1, then once I give you the OK to move to the next one, tackle lesson 2, and so on.
[deleted]
2015-07-07 00:07
Alright. Here is my update/homework from the last month or so.
In the coming months, I will be spending a great deal drawing and won't really be able to hop on the net very often. I'm drawing a ton as it is. :D
http://imgur.com/a/949qJ -- Here is my homework and a few choice pages. It also seemed simpler to explain in the descriptions. Gonna try to get as much of these lessons as I can before I lose access in a month or so.
Uncomfortable
2015-07-07 19:53
I'm glad to see that you've returned to us.
I definitely want to point out that what you submitted really isn't.. complete. I see a few pages of loose sketches and notes, but even those aren't really reflecting much of what was covered in the lesson.
You're focusing a lot on the little things - the details and the specifics. What I want you to focus on are the major masses. The constructions, the shapes and forms. Draw a study of a single plant and dedicate an entire page to it. Then you can use whatever space is left over for minor notes and observations.
I really get the impression that you missed a great deal of what was discussed in the lesson and in the demos, so I'd like you to go back and read it over once again. Or maybe a couple times. Then, I'd like you to tackle the homework again. Remember to focus on constructing the lay-ins. Don't be loose and sketchy, draw complete forms and shapes.
Cafesoir
2015-07-12 11:20
My homework http://imgur.com/a/VzkZd
Tried to draw from life as much as possible, as drawing from photo not so much fun and doesn't fully give understanding of the subject.
Got eaten by mosquitoes while drawing outside though.
Uncomfortable
2015-07-12 15:23
Haha, I'm glad to hear that you ventured outside! My condolences for the mosquito bites though.
Generally you did a great job. There's only a couple things I want to point out, and in the scope of your entire lesson they're fairly minor.
The first thing is that when laying in your forms, you tend to be kind of loose. For example, on the second page, the smaller drawing on the top right, you've got a bunch of ellipses, and inside of those ellipses you have clusters of smaller ellipses. Those were drawn really quickly and loosely - you should be more deliberate with how you put those forms down.
The other issue relates to how quickly you move into complex forms. The whole idea of this approach to drawing is that you start off simple, and each layer serves as a framework for the next, slightly more complex layer. It's not a matter of drawing a box and then inside that box, drawing Michelangelo's David. You draw your box, then break it into more forms, and then hinge more detail on that, ultimately building up to something more complicated.
A strong example of this is in the bottom right of page 9. You've got some heavily serrated leaves, and from what I can see, the only lay-in you used for them was singular gestural lines. What you should have done is move onto general leaf shapes to capture how the forms move through 3D space, and then serrated their edges. Like this.
If we jump into complex detail too early, our drawings tend to flatten out, with too little consideration given to how things move through 3D space.
Anyway, your work was generally still quite well done, so I will mark this as complete. Just remember to spend more time on your lay-ins, rather than jumping right into detail too early on.
Cafesoir
2015-07-12 15:32
Yeah, I get so concentrated sometimes that it gets difficult to see general 3D forms rather than details.
Ajynn
2015-07-13 16:55
Hey again :) This lesson was really though for me, as I have a hard time sitting down and drawing from nature (and in the process of doing the homework, I started to enjoy it really). But finally, here is what I've done:
-
First, I've done the exercises you used as examples in the lesson, just to get the hang of it - here's the album!. I didn't copy your expalmes, I just followed them and drew from your photos.
-
And here are my studies, I did less houseplants and more trees, as I generally always hated to draw trees - figured ths would be a good chance to tackle that fear. Also, I did most of those from life, in my garden, in the park or looking at houseplants. Here's the album
Uncomfortable
2015-07-13 20:17
Your first set - using the images from the demos - are fantastic. Great forms, great confidence, great details. Your second set aren't necessarily bad, but the big difference is that there's a very obvious use of a timid hand. You become far more afraid to put complete, closed forms and shapes down on the page, and instead have a lot of broken lines all over the place, roughly approximating 2D shapes.
Broken, timid lay-ins won't convey the sense for weight and form that you need to convincingly capture your subject. Page 14 of the second set, the tree with the drooping branches - we don't get a clear sense of why those branches are drooping. I mean, we understand, because we know what we're looking at - branches that are heavy with leaves. But the drawing itself does not convey that to a person with no understanding at all of how trees work. The leaves look weightless, so there's little reason for the branches to droop. If you blocked those leaf-masses as complete 3D forms however, we'd have a better sense of something heavy dragging them down.
You still did great, especially in that first set, and I know you are fully capable of doing this well. You just took a bit of a wrong turn in experimenting, which is totally fine. I'm still going to mark this lesson as complete, because you've shown that you can do it as I expect.
Ajynn
2015-07-13 20:28
Thank you very much. I'll try and do more studies like the ones I did with the first exercises (I know I passed this lesson but i feel I have to put your comment into practice and at least do a few more). As for the broken lines - I found out that they help me convey a sense of "leafy contour line" I see when looking at trees, but you are right, this doesn't seem like 3d forms.
Again, thanks very much :)
[deleted]
2015-07-13 22:37
Hi I really enjoyed the new look of the lesson and the three examples, I tried to link my work back to previous lessons with my annotations. Some are from outside but most are from images, my garden is really hairy.
Here's my submission for Lesson 3.
Uncomfortable
2015-07-14 19:34
Generally not bad. I especially like the ones that consist of solid 3D forms over those with flatter elements (like leaves and petals). Your mushrooms are especially well done.
I did notice one significant issue however. When it comes to some kinds of forms and shapes, you start off very loose and then jump into detail too early.
Look at this. Some of your leaves were done somewhat properly (stepping from very simple, to slightly more complex, to more complex still, etc.) Others jumped right into the serrated edges, and then attempted to clean them up further.
All of them are loose and sketchy however. I want you to stop and think before you draw anything. You have a tendency to think more on the page as you draw, rather than planning and thinking before putting your pen to the page. Each mark you make should be the result of consideration and forethought, resulting in a very specific mark.
I'll mark this lesson as complete, because generally your forms are pretty good - I hope to see your next homework submission reflect what I've mentioned here.
[deleted]
2015-07-15 22:43
Thanks, I need to be more patient with my linework.
nolantan565
2015-07-16 15:40
Here my assignment for the plants
Uncomfortable
2015-07-16 19:51
So overall your observational skills are fantastic, and you're definitely coming into this with a lot of skill - however, I can fortunately tell you that there is something you can learn here!
The biggest thing that I noticed from your drawings is the lack of lay-ins. You did use them here and there, but much of the time you jumped into some higher levels of detail without putting in any sort of understructure. While it can often look pretty decent, the biggest issue there is that you'll find your drawings looking a little flatter and carrying less of the illusion of form.
Now, I'm only really saying this about your leaves - your more bulbous plants, the ones with concrete forms were great. I loved your fourth page especially.
The thing about the leaves is that they are flat objects that move through 3D space. When you dive into the complex visual detail without any sort of an underlying lay-in/framework for it, you basically have to try and figure out draw the detail and the twisting/turning of the form through space, simultaneously. It requires you to tackle two complicated things at once.
You're much better off dealing with them one at a time. Take a look at these leaves. First you establish the flow of that form through space, using a relatively simple form. Then you map your details onto that. Since your simpler form is already established, all you have to worry about is observing and carrying over the more complicated bits of information. In the end, you have all of the detail, while maintaining the illusion of an object flowing through 3D space.
The downside is that you have more lines in the way, but we're not focused on creating pretty, clean drawings. By practicing capturing the illusion of form, you're gradually changing how you perceive the world, and your drawings. You become more conscious of the three dimensions in which these objects exist.
Anyway, your homework was still great - though it would have been better had they not been upside down! Feel free to move onto the next lesson.
nolantan565
2015-07-20 14:58
Thank you so much for you critque! So sorry about the upside down drawings, I didnt notice I transfered them to the pc upside down.
CorenSV
2015-07-19 16:12
Here is my homework for this lesson.
Also, the link on your website that leads to usable images leads to a 404 error. You might want to check that out.
Thanks in advance for looking all of this over as well. I appreciate it.
Uncomfortable
2015-07-19 17:10
Thanks for catching that broken link.
I think with your homework, I'm seeing a somewhat common issue. Attempting to draw something real rather than abstract constructions can be very overwhelming. When a person gets overwhelmed, everything they've learned up until that point tends to fall away, and they revert to drawing the way they were used to drawing beforehand. Essentially, the wrong way.
So, that said, you totally reverted to the way you were used to drawing before any of these lessons. On top of being overwhelmed by the subject matter, it may also have a lot to do with the fact that it's been three months since you completed the last lesson, so you may well have forgotten a lot of that previous material. It's important to keep up with the exercises you learned in those previous lessons, so you can cement them into your mind.
The biggest thing that jumped out at me about your homework here is that all of your lines are chicken-scratchy. They're composed of small, individual lines (likely drawn from your wrist) rather than single, smooth, continuous lines. This breaks any sense of solidity and form.
Secondly, you don't seem to have paid all that much attention to this lesson - I'm not seeing a whole lot of lay-ins. It's important to start simple and build up levels of detail, rather than attempting to jump straight into higher levels of complexity. Kind of like this breakdown of how I approach a leaf.
I want you to go go back and read the previous lessons over again, and maybe do a bit of the exercises to refresh your memory. Then come back to this lesson, read the lesson carefully, follow the demo steps, and try again.
Shindel
2015-07-19 21:07
Here is my Lesson 3 for the plants.
I had a LOT of fun with this one. At first it was hard, but I feel I got the idea down and did a good job at it. Visualizing what I want on paper before I get it down is really coming to me now.
That last plant was a hard one >.<
Uncomfortable
2015-07-20 19:49
Not bad. Your forms and details are generally quite good. You may want to take a look at the 250 cylinder challenge, specifically the video on there (I'm not asking you to do the challenge, just look at the info posted there). The cactus in the pot on the second page is getting pretty distorted, because of how the orientation of the pot and the cactus differ.
Generally though you do seem to be following the process of breaking forms down from lay-in to gradually increasing levels of complexity. I am curious though about that last one - I can see that you definitely struggled with it. What did the reference photo for it look like?
Anyway, feel free to move onto the next lesson.
Shindel
2015-07-20 20:06
Thanks! I'll move on to the next lesson.
Here is the Queen Annes Lace Flower I tried drawing. If you had time, I would love to see your take on it, but completely understand you being busy for that.
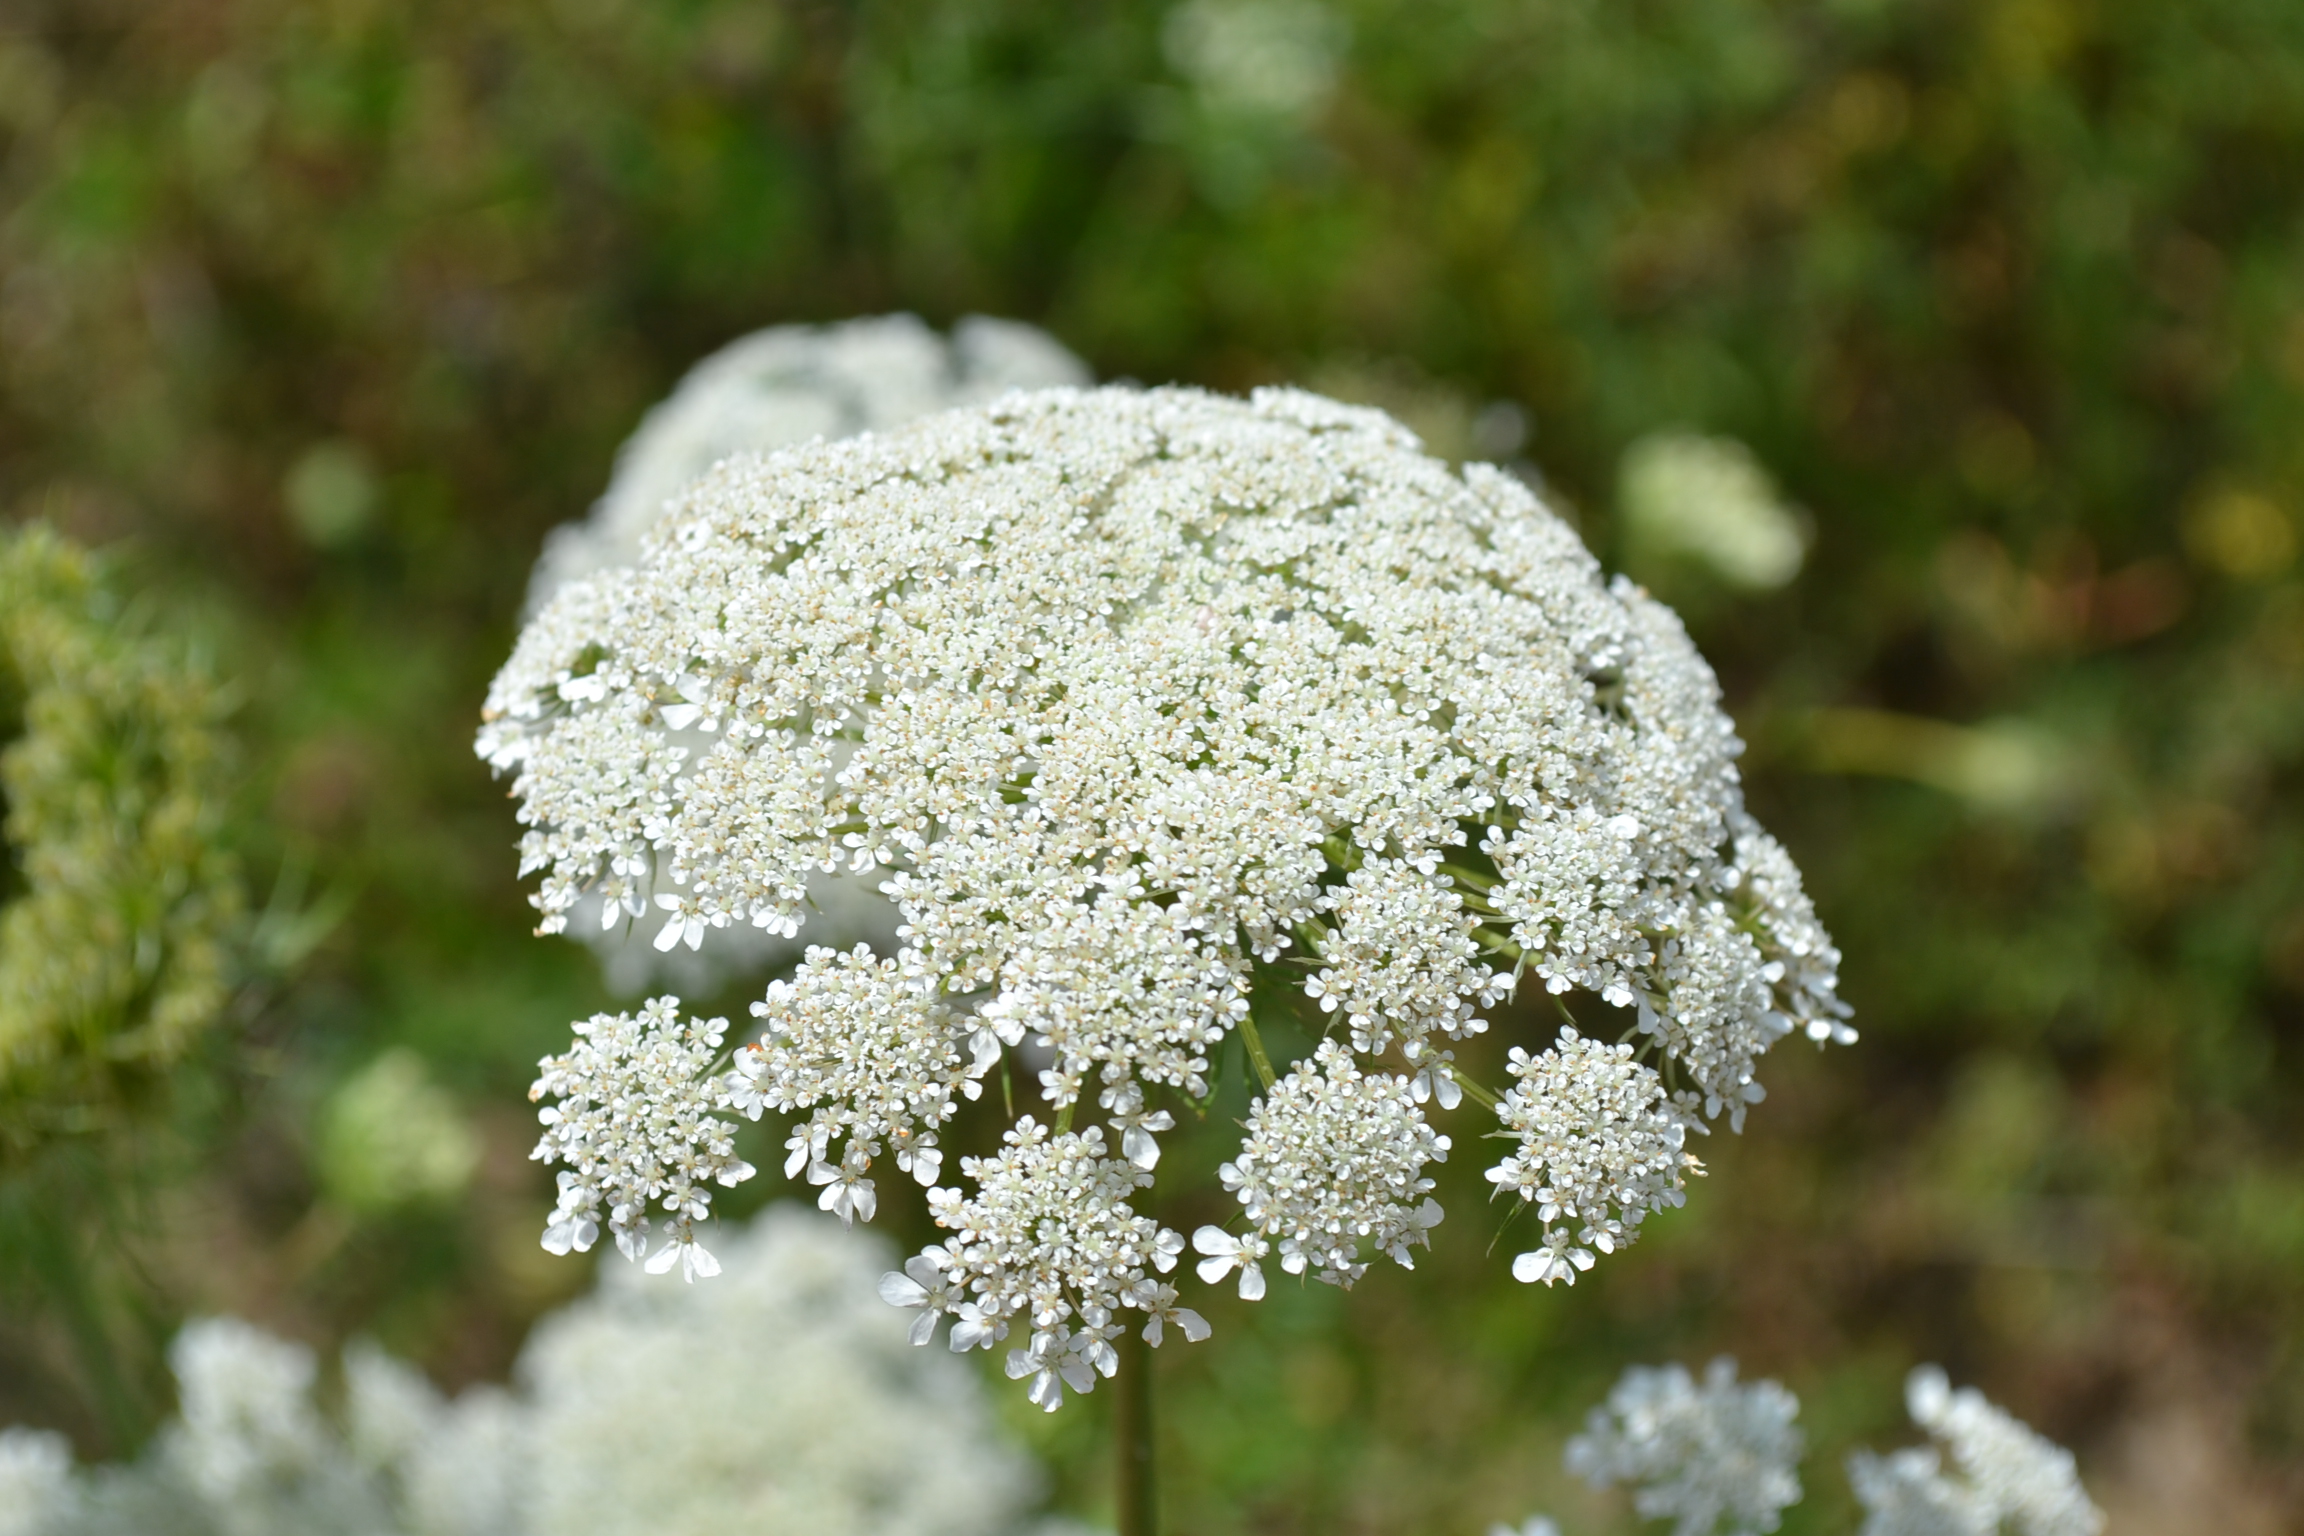
Uncomfortable
2015-07-20 22:11
This is how I'd tackle it. I didn't go too in-depth with it (or do too great a job), but I think the biggest change you could have made is to treat each clump as a mass that radiates from a center point, and placing your petals along the lines that come out from it.
Shindel
2015-07-20 22:40
Thanks for the time and showing me this. I see what you mean on getting this down.
I think a big part of my issue was, remembering right, I didn't realize they were smaller clumps until I was already too far in trying to work out on detail.
Sorry for making your hand hurt, haha, it was a hard plant to go with. Glad I didn't back down from the challenge.
Shindel
2015-07-20 20:38
I just went through the information on the cylinders, left me with a question to ask you. Did you see the same issue across some of my other drawings, or was it mainly because of the potted cactus? Just so I know going forward.
Looking back at my drawings, I mainly see it in the potted cactus. Drawing that, I just did my best at that point knowing it was completely off. After viewing the info, I'm pretty sure I can see how to make it better/improve on that lay-in.
Uncomfortable
2015-07-20 21:27
That potted cactus was the only one that jumped out at me as having that problem. That's also because it's the only one that was really composed of two cylinders.
number_forty_seven
2015-07-22 00:03
Overall I found leaf structure to be the hardest part. It reminds me of the challenge in trying to capture cloth/drapery.
Uncomfortable
2015-07-22 19:55
Your first page was laughably bad, but I was really pleased to see that the rest of your work was actually pretty good. You go on to demonstrate a decent use of form and construction.
There is definitely room to grow, but I'm pleased with your progress thus far. I will however leave you with this. Try to apply that leaf-drawing process to things like your last page. It's important to capture the most basic shape of the leaf first, without any fraying or warping in the leaf. Just capturing the simple motion through 3D space. Then you can build up the complexity on top of that, adding the waviness in its sides and such. That way those waves will still follow that initial gesture. If you jump into the greater degree of detail too early, the leaf will lose its solidity and believability.
Anyway, feel free to move onto the next lesson.
number_forty_seven
2015-07-23 04:11
Laughably bad is not reassuring. Lol. That's okay, nothing I wasn't surprised to hear. Honesty is best! Is the technique in that example different to that of 2.3 in the lesson? The example in the link looks like you capture the vein structure of the leaf, where as 2.3 is contour lines.
Uncomfortable
2015-07-23 19:46
Technically speaking they are contour lines, though in that first example I did follow the vein structure. Technically speaking, any line that runs along the surface of an object is a contour line, as it describes the distortion of that surface through 3D space. Usually though, I simplify it to talking about contour lines that cut a 90 degree cross-section when first introducing it to students.
Zoogdier
2015-07-22 23:30
Little question, how do you use references?
Do we have to draw the same "pose" and angle (using the methods we have learned ofcourse) of the object or should we draw a different pose/pov and only use the reference as a guidance to see how leaves twist etc.
Uncomfortable
2015-07-23 19:41
Very solid work. Generally you have a great sense of form, construction, and establishing a hierarchy of detail/focus. The only thing I'd like you to put more effort into is planning your marks before making them.
You're exhibiting a fairly common tendency of thinking on the page - you do it far better than most, as you appear to have a strong control of pen pressure. All the same, before you make a mark, you should consider whether or not it will contribute to either the final drawing, or your understanding of the forms you are depicting (like contour lines and drawing through forms). If any mark you're about to make does not on its own contribute to either of those categories, it may be unnecessary.
Long story short, instead of sketching on the page to find your forms and shapes, try spend more time visualizing them first.
As for your question, I'm a strong supporter of using the reference as a guide to understand the construction and nature of the plant, and not necessarily simply trying to 1:1 reproduce the image. I often recommend taking two photos of the same object and attempting to draw the object at a third angle.
Anyway, feel free to move onto the next lesson - you did a great job.
NeoEXMaster
2015-08-02 05:03
Here is my lesson 3 work:
Uncomfortable
2015-08-02 15:17
Unfortunately, I recently made an announcement about critiques in August being limited to patreon supporters only, since I'm totally swamped with work from my full-time job this month. Regular free critiques will resume on September 1st.
If you do happen to be a patreon supporter though, send me a message via Patreon with your Reddit username so I know to associate the two accounts.
NeoEXMaster
2015-08-02 16:12
Oh darn. Sorry, I wasn't aware, and a day too late it seems. However, I feel like I've been benefiting from the exercises so I'm willing to support you. I'll message you when I do.
Uncomfortable
2015-08-02 19:18
Thanks again for the contribution!
You're off to a decent start, but there's one thing that really jumps out at me about your approach - you're very much thinking right on the page.
What I'm referring to is really the sketchy quality to your linework. It's a normal thing to see, and is the result of drawing before you have a clear thought in your head. Instead of diving right into drawing, stop and think.
Consider the shapes and forms that exist in your subject. Consider how the lines of those more basic forms come together. Try to visualize them, one at a time, on the page. Think through the individual lines, and draw them each using the ghosting method. Draw a single mark for every line, no more than is necessary. Draw through them where you need to - I definitely encourage this - but always remember, one mark per line.
Focus on simplifying those shapes and forms. Generally I think you do this fairly well, it's just the hairiness of the linework that gets a little distracting.
Before moving forward, I'd like to see two more pages of lay-in constructions. Don't worry about moving into detail, just focus on those simple shapes and forms.
Try to follow this kind of process, trying to spend more time thinking before executing each mark.
NeoEXMaster
2015-08-08 02:09
As you requested, sorry this took so long:
I'll admit, it still feels a bit awkward drawing this way. It's hard to draw the complex curvatures as accurate as I like with a one line mark (and they aren't arbitrarily created like in previous exercises, the arrow one for instance, where you can just sorta wing it.) Especially since you can't adjust or correct yourself afterward, but I suppose that's the point.
Uncomfortable
2015-08-08 15:14
I can definitely see the awkwardness you're experiencing in your linework, but rest assured that you are getting there. It'll take more practice, but it'll start to feel more natural soon, just keep at it. Since you seem to be moving in the right direction, I'll mark this lesson as complete. Go ahead and move onto the next one.
mrlao
2015-08-04 19:59
Hi there! New batch of homework here. Take care and don't forget to take some rest!
Uncomfortable
2015-08-04 23:55
Phew. Just got back from work, and my spaghetti is a little too hot to eat, so I figure I'll do a few critiques.
Your plants are generally very well done. Your forms are pretty solid, and most of all I'm pleased with your approach to constructing those forms, moving from very simple to more and more complex.
One thing I wanted to weigh in one was your Camphor tree. The texture study you did in the top right was quite well done. The way you applied your texture to the larger drawing however didn't quite come out successfully. The use of shorter lines resulted in a wrinkly aesthetic. To tone down the visual noise, I'd recommend using some longer lines (since every line break will result in a little more contrast). To emphasize the roughness of the texture, I'd throw in a few shorter lines going perpendicular, to show where that particular bit of bark maybe protrudes and comes to a stop. Like a splinter of wood sticking out a bit. The wavy lines all running in the same direction tend to still promote a smoother texture. The study on the top right was done quite well because those waves all appear as layers of bark, and we get that sense of roughness where each layer comes to an end.
Anyway, that was mainly me being picky, because if I don't find something to critique, I don't feel like I'm doing my job. Generally you did a fantastic job, so feel free to move onto the next lesson.
mrlao
2015-08-05 05:44
Thank you for your input!
The texture study on the tree was done after i completed the sketch of the tree itself. I found it hard to make it resemble the kinda flaky texture there. It's a recurring problem for me, to be able to convey a sense of great detail using as few lines as possible. I'll give it another go sometime. If you have the time, I would be happy if you would give me an example. I used this as reference.
My favourites are the foxglove and potato sketches. The cauliflower... not so much. I rushed it to much and tried to cut corners regarding shape and detail. I think it looks kinda flat and boring. Any specific tips there?
I spent the most time on the potato sketch and I think it shows. Fortunately, I've got a girlfriend with art experience who gives me a lot of input, but she is generally less forgiving than you are... :)
I did the different sketches over a period of two months with long breaks in between. I notice that it shows on my linework, I tend to revert to the ol' sketchy behaviour instead of making distinct lines. I will spend some time doing warmup lines in each session and see if it helps.
EmperorJim
2015-08-13 22:41
The quality of these is a bit inconsistent I think.
I'm pleased with the weird ball fungus, because I really struggled at first. It looked complicated, so I started worrying about negative spaces and proportions and all that nonsense.
It isn't complicated. It's just a ball with holes in it. I salvaged the scribble!
The leaves will need some work, and I'll give those some more practice.
Uncomfortable
2015-08-14 21:56
Very well done! Your forms are strong, and your linework is confident. You also have a good sense of how to imply surface texture without overwhelming the drawing with contrast and noise.
The only thing I have to say in the way of critique relates to your leaves, and I suspect it's something you already know. When you're drawing leaves, on your first lay-in pass, try to ignore the complicated detail on the edges and focus on the overall shape, composed of smooth consistent lines. Then, based on that initial lay-in, you can start dropping in smaller details - serrating the edges where necessary, or adding waviness. Those details will abide by the first lay-in, maintaining a consistent flow and direction for the form. Often times if you skip that, all of the waves/jaggedy edges/details will go off in slightly different directions, compromising the overall solidity and consistency of the form.
This may give you a better sense of what I mean.
Anyway, you did extremely well - and the black letter type on page 2 is very impressive!
Grieffon
2015-08-16 09:04
Despite having done some drawing and painting before, this is the first time I feel like I have actually "learned" something. After finishing the exercise, I was able to draw them from just memory, so that was quite satisfying.
Regardless, I would like your advice on some specific issues.
-
The lotus seed pod. There's a bump surrounding every seed holes, and I'm not sure how to represent that while keeping things simple.
-
The willow tree. That one was a failure. I think I could understand the form of the foliage (cylinder with half sphere on top), but I wasn't able to take it further successfully.
Uncomfortable
2015-08-16 22:51
Generally you're doing pretty well. Blocking in your simple forms, then building on top of them with more and more complexity.
As for the things you asked about, I did a demo for how I'd handle the lotus seed pod. Basically, you can put a ring around the hole to imply the extra detail, but having a full closed ring will end up reading wrong. So instead, break it up, in what's often called "lost-and-found lines". That is, a line will get 'lost' (disappear) and then be 'found' again, leaving the viewer to fill in the detail in their own minds. You can also take advantage of the shadows that would be caused by that little lip, as well as the potential contour lines to imply volume.
As for the willow tree, that's likely outside of the scope of this lesson. Between the sheer scale of the object (large complicated trees tend to introduce their own troubles) and the nature of the hanging foliage, it's probably best that we tackle that at a later date.
Anyway, go ahead and move onto the next lesson.
Grieffon
2015-08-16 23:44
Thank you for your feedback! And wow, yours is really on a different dimension of skill. Just curious, how long did you spend on that seed pod? I don't mean to compare myself to a professional, but I would like to know what can be achieved, just for a bit of motivation to reach higher skill levels.
On an unrelated note, do you know any online course that is structured similar to yours (with lessons and exercises from simple to complex), but for painting? I would like something that focuses on the fundamentals, and not the techniques exclusive to different media. Or if you plan to make one in the future, that would be great to.
Uncomfortable
2015-08-17 00:10
I spent fifteen to twenty minutes on it, though I wouldn't look to that as the pinnacle of skill. I expect that you'll go far beyond that.
Unfortunately I don't know of many painting courses (since I never really got into painting traditionally), but if you're ever interested in something digital, check out Ctrl+Paint, where Matt Kohr has a lot of great videos and exercises.
[deleted]
2015-08-23 19:35
[deleted]
Uncomfortable
2015-08-23 20:07
In general, great work. You've done a solid job of breaking down the forms and organizing them into a hierarchy of importance. They all give a strong impression of being 3D objects, rather than simply being flat.
The only thing I'd like to draw your attention to occurs on the first page and the eighth. With the venus fly trap, I can see that you laid in the initial shape with a broken line, likely to keep it from being too apparent in the drawing. I strongly advise against using broken lines, because as soon as the line breaks, so does the integrity of the shape itself. The best way to achieve a solid shape is with a single continuous line.
You didn't demonstrate this problem very often, and I don't really see it anywhere other than those two places, but it's an important issue that many people face, so I wanted to be sure to stress it.
Aside from that, fantastic. Feel free to move onto the next lesson.
[deleted]
2015-08-25 17:44
This is gonna be helpful. Thanks! Keep it up with your work too, it's amazing.
Uncomfortable
2015-03-15 21:44
Your notes and observations are just fine - everyone records information differently, and it looks to me like you understand your notes perfectly. Also, your drawings are really quite beautifully done.
That said, you kind of went off on a tangent from what the lesson was covering. Your eye for detail is certainly solid, but it's the underlying forms that are lacking. The lay-ins weren't approached correctly.
Lets look at the first two pages, and compare them to your work from lesson 2. In lesson 2, you drew robust organic forms with great contours that wrapped nicely around them. There was a clear sense of volume. Your lay-ins here look completely different. The lines are timid and frightened, you don't want to risk putting down a line lest it be a mistake. Before, you weren't drawing specific objects, you were just drawing random forms. So this is to be expected.
When you're faced with a subject, it's very easy to become overwhelmed by the detail there. You've got to look beyond its little details and focus on the overall forms. You've got to draw complete forms with unbroken lines, and solid contours that wrap fully around the forms.
Take a look at this. That's what you're aiming for with your lay-in. Think beyond the details and the sketchiness and just look for the forms underneath.
I'd like you to do four pages of lay-ins only.
[deleted]
2015-03-16 11:55
[deleted]
Uncomfortable
2015-03-16 22:57
Definitely a HUGE improvement, big move in the right direction. Moving forward, I'd like you to ease up on some of the contour lines. One here and there is a great way to show volume, but overdoing it with a lot of regularly spaced lines will result in a sort of 3D-mesh effect. It looks cool on its own, but it's not too great when you want to move forward.
Also, I did notice that you're still being a little timid with those contour lines. When the lines break, they lose their flow - so a broken ellipse will generally end up misshapen, or a broken straight line will come out jagged and bent.
I'd like you to try two more pages of plant drawings, taking your new-and-improved lay-in technique, applying the things I mentioned above, and pushing them all the way through the detail phase. Don't go overboard with the detail, and remember to always keep that underlying form in mind. The detail is subordinate to the underlying form.
I'm thinking this should be the last step before I can let you move on to the next lesson.
[deleted]
2015-03-17 19:30
[deleted]
Uncomfortable
2015-03-17 19:46
Mistakes are par for the course. They happen, you get used to it, and gradually you learn to handle them or at least minimize their impact on a drawing.
I'm very pleased with the results - especially in comparison to the first set - so I'll be marking this lesson as complete. As you move forward, here are a couple things to keep in mind:
You may want to draw a little bigger. You actually handle drawing small quite well (for most people it makes drawings very clunky and stiff). It might also be part of the cause of your stiffness, but that has been greatly reduced. Still, it's something to think about.
I think I may have scared you a bit off pushing your details, so you threw in the minimum. I'm more interested in your forms, and you did great with those, but don't be afraid to push your details a little further. Put a light pass of detail over the whole thing, and then really ramp up the detail on your focal point. Finding the right balance takes some time, but I have no doubt that you're well on your way of achieving it.
In general, great work!