


8:47 PM, Thursday October 14th 2021
Hello Supers0nick, I hope you are well
Starting off with your arrows.
They came out pretty good. You are overlapping them properly and your lines are fairly confident. There are few places, especially tips of arrows where lines are left where they shouldn't. It happens quite often so keep in mind to plan your lines more or just extend lines a little to make them even.
I also want to say that you should compress your arrows more to make them more three dimensional. As it stands now to me, you do understand this principle but you are applying it only a little.
Moving onto your branches.
There are few things I want to point out here.
-
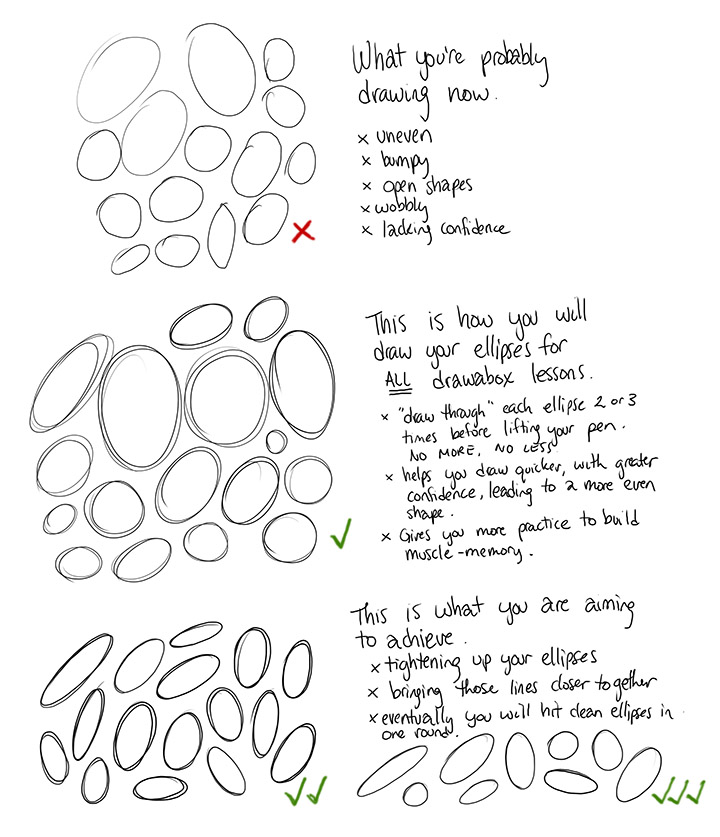
Remember to draw through your ellipses 2-3 times when you do DAB exercises. Doing so we gain experience faster. This also allows us to create a smoother shape of our ellipse. Also remember to vary your degree of ellipses more. As it stands now you change them very slightly.
-
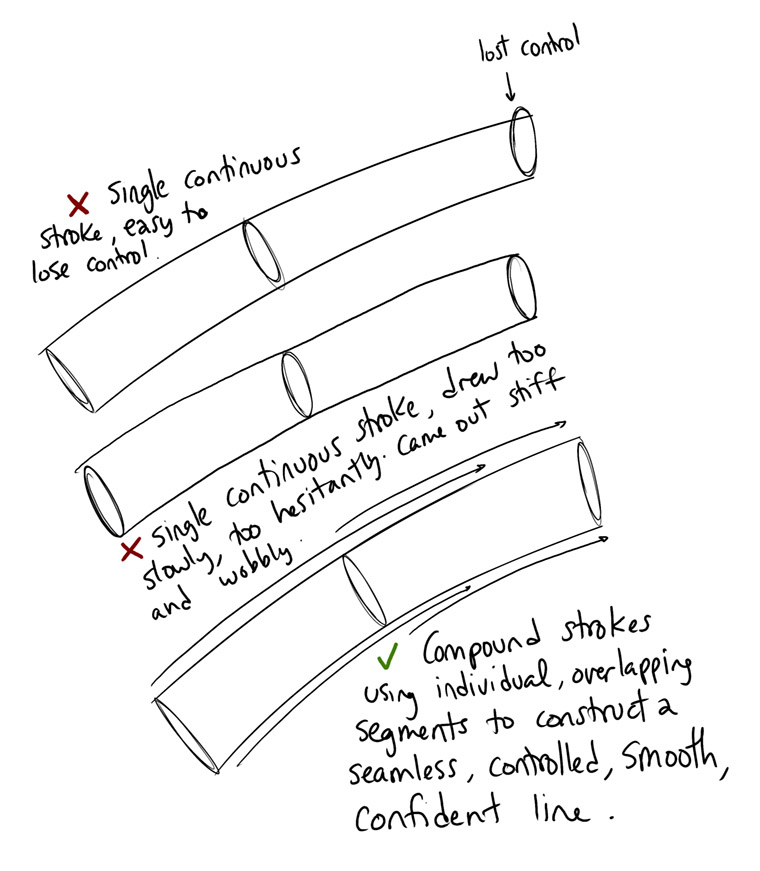
There are leftovers from your previous segments. Be sure to draw using the shoulder with a ghosting method. We want to execute our strokes confidently and make them go over the next ellipses. By following this process correctly we create a seamless illusion of a smooth line that curves.
Continuing onto your leaves.
Those came are pretty great. You show fluidity and how they change in space. There are few cases where I believe you overdid the folding. Remember to focus on the flow of the leaves, as this is the most important part which makes them believable to be real.
Lastly and biggest part of this lesson construction.
First thing that I want to point out is that you are drawing pretty small. Drawing small makes thing harder for us. We draw more clumsily and it limits our ability to think through spatial problem. It also makes it awkward for our arm, especially when we don't have as much experience with a shoulder. There is plenty of empty space on your pages so use it to full advantage. After finishing 1st drawing look at your page and think if there is enough space for next one. But don't force things into a tiny corner. You have plenty of blank space that should be used for your drawings. You did a great job using plenty of space for your last drawing so remember to do it in the future again.
When we build our leaves we want to start simply and then give it complexity in steps. But in the last drawing you applied construction incorrectly. So you did step one and then left it and went without construction. When doing a leaf that is built from smaller leaves we should use process from this diagram https://drawabox.com/lesson/3/2/skipping
When we add lineweight, we want to add another line on top of the previous one. We also want to blend them seamlessly. But as you add it, your initial lines lose their smoothness and become wobbly. When you add a lineweight ghost the line you want to add a ‘perfect copy' on top of the previous one.
Now with the things I said here please make 1 additional plant drawing, please pick something similar to your last drawing. As I would want to address your problem with leaf construction you applied incorrectly and remember to draw big. Don't leave that much empty space
If you have any question feel free to ask,
Next Steps:
1 plant drawing


