Lesson 3: Applying Construction to Plants

4:34 PM, Friday February 7th 2020

Adobe Acrobat

Adobe Acrobat: https://documentcloud.adobe.com/link/track?uri=urn%3Aaaid%3Ascds%3AUS%3A52c5d095-32ca-40ce-9e78-22b828117da4

Adobe Acrobat

Hope I had the right idea with the non-demo ones, and the demo ones. I probably should've ghosted more for the stems of the plants more to match the cylinders more, and I didn't know how big I should draw on a page. If I need to go back and draw two per page, happy to do so.

0 users agree
1:05 AM, Sunday February 9th 2020

Starting with your arrows, these are generally pretty well done. There are a few where the compression of positive/negative space isn't entirely consistent (positive space being the width of the ribbon, negative space being the distances between those zigzagging sections - perspective applies to both of these equally), so continuing to keep that in mind should help develop your ability to capture depth within the scene.

Looking at your leaves, these do flow quite nicely through space, but a key issue that stands out to me is that you're approaching these like a loose sketch. Your lines are drawn by instinct and reflex, and you're thinking right there on the page rather than demonstrating the kind of pre-planning that is embodied in the ghosting method. Instead of thinking in terms of drawing three dimensional forms in a 3D world (and cutting away from or adding to those forms, again in 3D space), you're very much putting marks down such that you're only thinking about drawing lines on a flat page. For example, if we look at the leaf towards the top left of the page, you've added these little marks along the edge that don't connect to anything. So those lines were not drawn with the intent of enclosing areas of space - they're just floating, independent entities.

The problem comes down to this: you're not drawing, you're sketching.

Moving onto your branches, things get a little better. You're drawing (mostly) in distinct strokes, each with their own specific goal. There's one spot (towards the end of the branch on the middle of the page) where you follow up with an additional stroke on either side, but the rest are single marks. Now, they are still somewhat rushed in a few places, where you either don't extend the previous segment halfway towards the next ellipse, or where the next segment doesn't quite start on the previous ellipse. Both of these end up limiting how much actual overlap you have between segments, and limit your ability to have them flow seamlessly from one to the other. When doing this exercise in the future, I recommend that you make a point of using the last chunk of the previous segment as a 'runway', overlapping it directly before shooting off towards the next goal.

Moving onto your plant constructions, I think the things you're trying to accomplish - in terms of the forms you're aiming to draw - you're demonstrating a good grasp of the overall concepts involved in constructional drawing. Where you're losing touch is, aside from the sketching vs. drawing I addressed earlier, in the underlying principles of construction and how you're building a strict scaffolding, and adhering to that scaffolding as you build out your object in successive phases.

Your construction instead tends to be quite loose. You'll put down a structural element - like say, in page 6 (the sunflower), you may put down an ellipse that is intended to determine how far out the petals extend. Then, instead of actually extending the petals out to that specific distance, so the ends of the petals' flow lines touch the ellipse you'd drawn, you make it more loose and approximate, using that ellipse as more of a suggestion.

In construction, there is no looseness, there is no approximation. Every mark we put down is an assertion - a decision made. And every time we take a decision and ignore it, we introduce a new answer to the given question, and in doing so, introduce contradictions. Like when telling a lie, we undermine the viewer's suspension of disbelief with every contradiction that is introduced.

Looking at the leaves for that same sunflower, here you've skipped steps - introducing more complex edge detail (with slight ripples) - without constructing a simpler leaf form first.

Another issue I noticed is that you have a tendency to try and hide your mistakes by creating larger areas black ink, as seen along the top leaf of the pitcher plant. That big chunk of black along the underside isn't a cast shadow, because it's not being cast onto an underlying surface. It sticks to the form that presumes to "cast" it. Instead, it's just an unseemly chunk of line weight.

Ultimately, you shouldn't be trying to correct your mistakes at all. Doing so just emphasizes those areas by piling on more ink. In turn, this results in the focal points that draw the viewer's eye being determined by where you mess up, rather than how you actually intend to steer the viewer's eyes.

Now, I've said a lot here, so I'll leave you to absorb it all. The key thing here you need to keep in mind is that each and every one of these drawings is intended to be an exercise. We're not here to create pretty drawings, to impress people with how well we can capture something by being sketchy and erratic. Each one is an exercise to develop your understanding of how forms exist in space, how they relate to one another, and how one can combine them to create more complex objects. Remember this goal, and don't allow the desire to create impressive drawings distract you from it.

Next Steps:

I'd like to see the following:

  • 2 pages of leaves

  • 5 pages of plant drawings.

No sketching, no loose drawings. Adhere strictly to each and every phase of construction you put down. Treat your marks as decisions being made, not as loose suggestions. You're not drawing lines on a page, you're constructing forms within 3D space.

When finished, reply to this critique with your revisions.
2:02 AM, Saturday March 7th 2020

I got troubled by the placement of branches into pots when putting down the path the branches and leaves take but I hope its more solid this time around.

https://documentcloud.adobe.com/link/track?uri=urn%3Aaaid%3Ascds%3AUS%3Acd1d6e0f-cf08-40c3-ac89-e7c819dc51ac

8:25 PM, Saturday March 7th 2020

This is definitely a move in the right direction, and I can see that you're pushing yourself to hold back on the urge to sketch more loosely. There is certainly more room for improvement in this area, but what's important to me is that you're taking steps to deal with this issue, and are showing progress in that direction. The result is that it's definitely looking much more solid.

One thing I do want to draw your attention to is how there still is a pretty strong distinction between the an underdrawing (where you do your earlier phases of construction) and the pass where you add further detail (like the little leaf edge details on the last page, and the nodes along the surface of the cactus). When going through Drawabox, I want you to make sure that every single mark you put down is drawn with confidence - that means not making any attempt to hide the lines you draw at any point. If you look at my demonstrations, you'll see that though I'm working digitally (where I could play with the opacity of my brushes, or work in layers, etc.) I choose a brush that refuses to make anything other than a fully dark stroke.

Always remember that every drawing we do as part of Drawabox is an exercise. These constructional drawings are about thinking about every mark we put down beforehand, about what it is intended to contribute to the drawing, and whether or not it is the best choice for that specific task. Once we decide that yes, this mark is valuable to either help us establish the forms in space, to understand the spatial relationships between that form and others, or to help communicate some additional information to the viewer, we make sure to draw it with full confidence, our focus only on executing that mark to properly accomplish the task it has on hand.

This is why we use a fineliner - when in proper working order, fineliners produce rich, dark strokes that cannot be ignored or swept under the rug. Many of your drawings do appear to use the correct tool (though the lines seem faint, which suggests that it may not be working correctly), but the cactus definitely looked more like you were working in ballpoint, or like you switched tools afterwards when moving into more detail.

To the point on detail, I did notice that for most of the little bumps along the base of the cactus, as well as for the pebbles, you first established the outline of each textural form, then proceeded to apply form shading to it. This is incorrect on both points - as explained in the texture section of lesson 2, we avoid drawing outlines at all, instead focusing entirely on capturing the shadows these little textural forms cast on their surroundings. Cast shadows are different from the form shading you've done here as well - all of this is explained in the texture section linked above, which was updated at the beginning of February, so you may not have seen the latest resources on the subject, and I highly recommend you go through them.

Anyway, all in all you are definitely moving in the right direction, and while there are some small issues to contend with, I think you're ready to call this lesson complete.

Next Steps:

Feel free to move onto lesson 4, but be sure to look over the texture section of Lesson 2 before doing so. Also, make sure you're using fineliners that are working correctly, and do not switch tools in the middle of a drawing (unless it's to use a brush pen to fill in cast shadow shapes). This will help keep your drawing unified, and avoid the little jumps in line weight or line quality.

This critique marks this lesson as complete.
The recommendation below is an advertisement. Most of the links here are part of Amazon's affiliate program (unless otherwise stated), which helps support this website. It's also more than that - it's a hand-picked recommendation of something I've used myself. If you're interested, here is a full list.
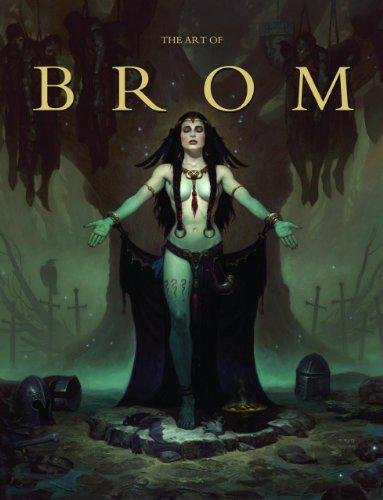
The Art of Brom

The Art of Brom

Here we're getting into the subjective - Gerald Brom is one of my favourite artists (and a pretty fantastic novelist!). That said, if I recommended art books just for the beautiful images contained therein, my list of recommendations would be miles long.

The reason this book is close to my heart is because of its introduction, where Brom goes explains in detail just how he went from being an army brat to one of the most highly respected dark fantasy artists in the world today. I believe that one's work is flavoured by their life's experiences, and discovering the roots from which other artists hail can help give one perspective on their own beginnings, and perhaps their eventual destination as well.

This website uses cookies. You can read more about what we do with them, read our privacy policy.