


Lesson 3: Applying Construction to Plants
10:54 PM, Wednesday September 1st 2021

Hi!
The leaves exercise has been very difficult for me, I will keep working on it. Thanks for your attention and your time.
Greetings
Starting with your arrows, these are quite well executed. You've drawn them with a good deal of confidence, which helps you to convey the fluidity with which the arrows/ribbons move through space. You're also employing the line weight fairly well, in that you're focusing it on the areas where overlaps occur (at least in many of them - some of them you push beyond that limited scope, applying line weight to perhaps too much, but those are generally the ones to the top of the page).
Continuing onto your leaves, I think you continue to do a good job of establishing how these leaves not only sit statically in the world, but also how they move through the space they occupy. I have noticed however a couple issues with how you build up your edge detail:
You seem to be drawing a single continuous stroke in at least some cases (like this one), having it zigzag back and forth instead of building up each bump or bit of edge detail with individual strokes as explained here.
You also tend to draw the edge detail with a much heavier stroke, pressing quite hard on the pen and ending up with a thicker line. This encourages the idea that the later phases of construction are meant to replace those preceding it, which is not the case. Each phase of construction builds upon what's already there, only adding the elements that change. In the future, try to maintain a consistent line thickness, and add line weight as its own separate pass towards the end, focusing on establishing how forms overlap one another and limiting it to those specific, localized areas (where the overlaps occur).
Lastly, while you do have some examples of handling more complex leaf structures well, this one should definitely have been constructed in the manner shown here, with each individual 'arm' being first built up as its own complete leaf structure, then merging them together.
Moving onto your branches, there are a number of elements from the instructions that you're missing here as well:
Most importantly, the manner in which we transition from one segment to the next is an important component of this exercise. As demonstrated here, we start each segment at one ellipse, go past the second, and stop halfway to the third. The next segment then repeats this pattern, starting at the second ellipse, going past the third and so on. You appear to only be starting each segment roughly where the previous one ends.
There are also a couple concepts from Lesson 1 that you're missing here - you're not drawing through your ellipses two full times before lifting your pen, and you're also maintaining a consistent degree for all your ellipses, instead of having them get wider as we slide further away from the viewer as explained in Lesson 1's ellipses video.
It seems to me you may have gotten a little ahead of yourself here, and need to take more care in following the instructions.
For the most part, your work on the plant constructions is coming along well - there are a few issues I want to call out, but I see many examples of you applying principles from the lesson effectively. I particularly feel this plant does a great job of establishing the fluidity of your leaves, paired with solid overall structure. Here are the points I want you to keep in mind:
I see a number of places where you allow certain forms to get cut off where they are overlapped by other forms. For example, this one where the leaves are broken into separate shapes where they are passed over by the other trunk. Drawing each and every form in its entirety is important to understanding how they all exist in 3D space, and how they relate to the other 3D forms around them. Remember that these forms continue to exist even when we cannot see them - they would only cease to exist if we were actually looking at a flat, two dimensional drawing. The goal here is to develop the belief and understanding that they are indeed three dimensional, and that the page itself is just a window that looks out onto a three dimensional space.
Similarly to the point above, be sure to draw "through" any forms you construct - including the flower pots. So for example, the flower pot on the form I linked above should have a complete ellipse drawn for its base. It should also be constructed around a central minor axis line, to help you keep those ellipses aligned to one another. I did notice that you made an effort to draw the base of the pot for this cactus - it was however somewhat half-hearted. Every single ellipse you draw should be drawn through two full times before lifting your pen, as discussed back in Lesson 1. Do not make the mistake of thinking that what we're doing here is making pretty drawings, and thus striving to keep them clean where possible. Every drawing throughout this course is an exercise. In these constructional lessons, we are merely performing the same task again and again - solving spatial puzzles to help develop our brain's capacity for spatial reasoning.
Of course, the points I raised previously apply here in your drawings as well - so for instance, in this drawing you effectively replaced the simpler petals' edges with a single continuous stroke, creating an entirely new edge in one go. This should have been built on top of the previous phase of construction (which itself should not have been drawn to be faint/replaceable), through the addition of individual bumps or cuts coming off and returning to that existing edge.
While I do feel you're moving in the right direction here, there were enough issues that were mentioned in the instructions that I feel it'd be worthwhile to have you complete a few pages of revisions so you can demonstrate your understanding. Those pages will be assigned below.
Next Steps:
Please submit the following:
1 page of leaves
1 page of branches
2 pages of plant constructions
Hello again
A month later, this review has coincided with my vacation and also I have taken a few days to observe well what my failures have been.
This is my result, I feel that there are still faults to be polished but I hope I can overcome them with mileage.
thank you very much for your time, greetings
https://drive.google.com/drive/folders/1-1_o0Vq5M1ieeoO7l0SgpwkAiwos8WZv
Starting with your leaves, these are for the most part looking quite well done. There's just one small point I noticed - for this more complex leaf, each of those arms should be constructed as its own separate leaf structure, then merged together. I had another student approach a similar leaf in that manner, and put together this quick demonstration for them. While I've got two viable options (either just treating it as a simple leaf and cutting back into the silhouette or treating it as a complex leaf structure) presented there, I feel in your case the second option of sticking to treating it as a complex structure would be most in line with your leaf.
Continuing onto your branches, I am still noticing an issue that the flow of your edges seems to break pretty sharply whenever you hit a bend or a curve. This, along with a few more obvious cases where you're not following the instructions of overlapping segments to achieve a smoother, more seamless transition (like here), I do still suspect that you're not following these instructions as closely as you should. Please review the feedback I offered on this exercise in your initial submission, specifically the first point.
In terms of the second point, I can see some shift in the degree of your ellipses. This should definitely be pushed and exaggerated further, but as a whole it's moving in the right direction. Lastly, be sure to draw through each and every ellipse you freehand throughout this course two full times before lifting your pen, as discussed back in Lesson 1.
Continuing onto your plant constructions, for the most part these are being handled fairly well. There is really just one overall suggestion I have to offer - draw bigger, and give the first drawing of a page as much room as it requires, rather than artificially limiting it so you can fit more drawings in later on. Only when you're done that drawing should you assess whether another one will fit - if it will, certainly add one in order to make full use of the page. If nothing else will fit however, it's perfectly okay to leave it to just one drawing, so long as the space is being put to good use.
The reason for this is that our brain benefits from being given more room to think through spatial problems, and it also makes it easier to engage our whole arm while drawing. These are both things that we will improve at doing in smaller, tighter spaces as we progress, but we must first get comfortable with doing them at larger scales, eliminating any other complications now, so that later we can focus more on the specific concerns of working smaller. Throughout this course, always aim to give yourself as much space and time as you require.
Now while your branches are still not quite addressing the points I raised, I am going to leave you to deal with that on your own with the feedback you've already received. I trust you'll review them appropriately, and I don't think this is something to hold you up over.
I'll go ahead and mark this lesson as complete.
Next Steps:
Move onto lesson 4.
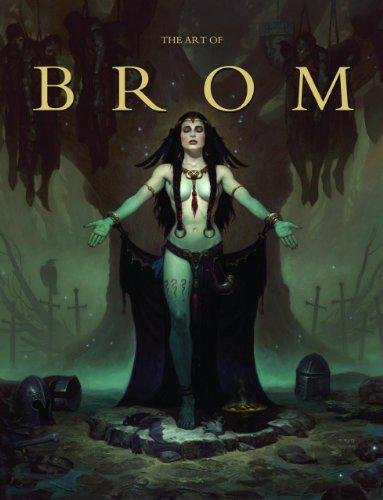
Here we're getting into the subjective - Gerald Brom is one of my favourite artists (and a pretty fantastic novelist!). That said, if I recommended art books just for the beautiful images contained therein, my list of recommendations would be miles long.
The reason this book is close to my heart is because of its introduction, where Brom goes explains in detail just how he went from being an army brat to one of the most highly respected dark fantasy artists in the world today. I believe that one's work is flavoured by their life's experiences, and discovering the roots from which other artists hail can help give one perspective on their own beginnings, and perhaps their eventual destination as well.
This website uses cookies. You can read more about what we do with them, read our privacy policy.


