Lesson 6: Applying Construction to Everyday Objects

10:11 AM, Wednesday July 20th 2022

Drawabox Lesson 6 - Album on Imgur

Direct Link: https://i.imgur.com/4FqWLbO.jpg

Find, rate and share the best memes and images. Discover the magic of th...

Hi

So I finished lesson 6 and here are my assignments.

A lot of them are out of proportion because I didn't get the size of the box correct.

With the spoon I tried drawing it one more time using a different method.

I have a question about transferring measurements from plane to plane.

Is there any technique for transferring a measurement from a plane to a plane right next to it? Or is it enough to figure out where the measurement approximately sits on the first plane (the one in my example (last picture in the set) is close to one third/quarter of the plane) and then transfer it accordingly to the second plane? Or is there any other more effective way of doing this? Or is it enough to just eyeball it?

Thank you!

0 users agree
8:06 PM, Friday July 22nd 2022

Jumping in with your form intersections, your work is progressing well, although I did note a couple minor corrections here on your page. Generally speaking as students push past lesson 2, through L3-L5, in playing with the interactions and relationships between different forms in those constructions, they do inherently improve their comfort and familiarity with the form intersections. Not to say they nail them down perfectly, just that we get into a better position to talk about them a bit further. So, here's an additional diagram that may help you further refine your understanding of the way in which these forms relate to one another, and how to think through the more complex intersections involving curving surfaces.

Continuing onto your object constructions, frankly you've done a great job through and through. This lesson is the first point at which we really focus on the concept of precision in our constructions. Up until this point, going through Lessons 3-5, we're primarily working in a reactive fashion. We'll put down masses, and where the next masses go depends on how large or small we ended up drawing the previous ones. There's no specific right and wrong, just directions in which we're moving which impact just how closely we matched the reference. You can think of it as a manner of constructing that works from inside out. Conversely, what we're doing here works outside in - everything is determined ahead of time, and as we build out the various aspects of our construction, we either do so correctly based on our intentions, or we miss the mark.

Precision is often conflated with accuracy, but they're actually two different things (at least insofar as I use the terms here). Where accuracy speaks to how close you were to executing the mark you intended to, precision actually has nothing to do with putting the mark down on the page. It's about the steps you take beforehand to declare those intentions.

So for example, if we look at the ghosting method, when going through the planning phase of a straight line, we can place a start/end point down. This increases the precision of our drawing, by declaring what we intend to do. From there the mark may miss those points, or it may nail them, it may overshoot, or whatever else - but prior to any of that, we have declared our intent, explaining our thought process, and in so doing, ensuring that we ourselves are acting on that clearly defined intent, rather than just putting marks down and then figuring things out as we go.

In our constructions here, we build up precision primarily through the use of the subdivisions. These allow us to meaningfully study the proportions of our intended object in two dimensions with an orthographic study, then apply those same proportions to the object in three dimensions.

Throughout your constructions, you've been very specific in terms of the positioning of many elements of your constructions - although there are some areas where there is room for improvement, just not many. So for example, this bottle was very well developed in terms of where the individual elements of note are positioned along the length of the structure. If we look at this stapler however, there are more things that are left up to approximation/eyeballing - basically decisions that were not established in the orthographic plan, and therefore ended up being left to estimation in the 3D construction.

Here I've marked out various landmarks (mostly on the side view) that are largely left undefined in terms of where they're situated along the length and height of the bounding box. Obviously when actually constructing it in three dimensions you leveraged far more subdivisions, but in order to achieve meaningful precision, it is important to make those decisions ahead of time.

This camera mounting clamp may not have every little measurement marked out on the orthographic plans, but each one can still be determined by looking at how you leveraged subdivision to identify them. They're not random lines placed without thought - they're specific. Furthermore, this isn't about necessarily having to know exactly that a particular feature is situated, say, 39/50ths along the length of a structure. In this phase, we have every option to simplify those measurements - taking that 39/50th to 4/5ths instead. It's the act of making decisions like this that defines the intention behind the 3D construction, and imbues it with precision.

Another point to keep in mind is what I've explained here - when dealing with curving surfaces (again, like the stapler), it's important that you not jump straight into those curves right off the bat, because they do not lend themselves to specificity or precision. Curves tend to be much more vague, and so it helps to establish their intended path by first representing them as a series of flat surfaces or straight edges, then rounding them out later on.

Now, all that said, as a whole you're still doing a great job as a whole, so just keep these points in mind in terms of ways you can continue improving the overall precision of your process. This will definitely be important as you push forward into Lesson 7 - although we're not quite there yet.

As to your question, we actually do talk about exactly that in Lesson 7, in this video. So worry not, it does come up.

I'll go ahead and mark this lesson as complete. Keep up the good work.

Next Steps:

Feel free to move onto the 25 wheel challenge, which is a prerequisite for lesson 7.

This critique marks this lesson as complete.
1:26 PM, Saturday July 23rd 2022

Thank you for your critique!

The recommendation below is an advertisement. Most of the links here are part of Amazon's affiliate program (unless otherwise stated), which helps support this website. It's also more than that - it's a hand-picked recommendation of something I've used myself. If you're interested, here is a full list.
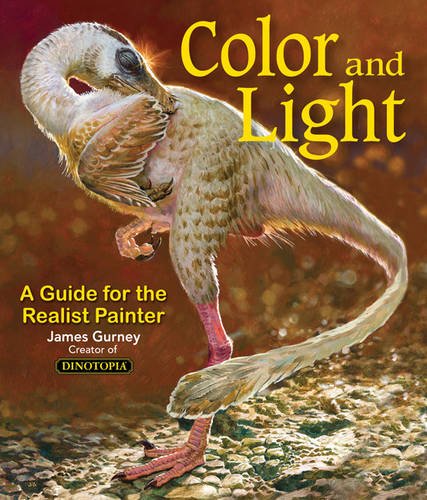
Color and Light by James Gurney

Color and Light by James Gurney

Some of you may remember James Gurney's breathtaking work in the Dinotopia series. This is easily my favourite book on the topic of colour and light, and comes highly recommended by any artist worth their salt. While it speaks from the perspective of a traditional painter, the information in this book is invaluable for work in any medium.

This website uses cookies. You can read more about what we do with them, read our privacy policy.