Congrats on completing drawabox! Very few make it to this point and only a handful can persevere for 3+ years to reach the end!

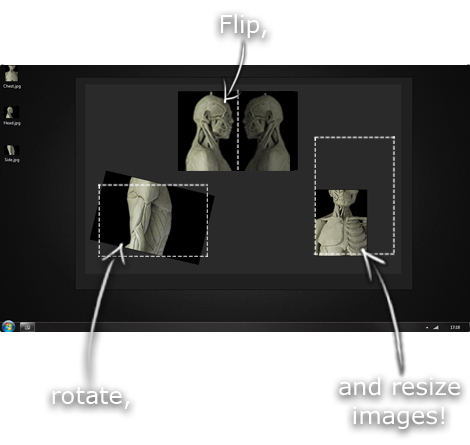
Starting with your form intersections overall your work is pretty good! I can see that you are comfortable with all types of surface interactions (flat-flat, flat-round, round-round). The only confusing intersection was between the sphere on the left and the boxes (flat-round) where it seems you've drawn through the sphere intersection. My advice is to not draw through the intersections as it can make the object seem more flat (ironically) and it adds more complexity to the exercise. I feel like this diagram could further your understanding of intersections, additionally looking through this form intersection pack made by optimus on discord could also increase your understanding. Finally if you have a windows computer you can use paint 3D to experiment with different intersections and see how the forms interact.

Moving onto your boxed cylinders from what I can see you are applying the line extension method correctly which is all that we check to make sure you do it correctly in your warmups.

For your vehicle form intersections it seems you've gone further than necessary. This exercise serves as a reminder to students that at the end of the day we are still dealing with primitive forms.

Finally your detailed vehicle constructions certainly demonstrate that you've developed your 3D sense nicely, however for whatever reason your vehicle form intersections ended up more precise than the detailed ones. Precision is the main idea of lesson 6 and 7. Precision is often conflated with accuracy, but they're actually two different things (at least insofar as I use the terms here). Where accuracy speaks to how close you were to executing the mark you intended to, precision actually has nothing to do with putting the mark down on the page. It's about the steps you take beforehand to declare those intentions.

So for example, if we look at the ghosting method, when going through the planning phase of a straight line, we can place a start/end point down. This increases the precision of our drawing, by declaring what we intend to do. From there the mark may miss those points, or it may nail them, it may overshoot, or whatever else - but prior to any of that, we have declared our intent, explaining our thought process, and in so doing, ensuring that we ourselves are acting on that clearly defined intent, rather than just putting marks down and then figuring things out as we go.

In our constructions here, we build up precision primarily through the use of the subdivisions. These allow us to meaningfully study the proportions of our intended object in two dimensions with an orthographic study, then apply those same proportions to the object in three dimensions. Orthographic studies allow us to be as precise as possible because they allow us to make decisions about where everything will go before we've even drawn the vehicle.

Now if your detailed vehicles were somewhat as precise as your vehicle form intersections I wouldn't have as much of a problem with you not using these orthographic plans. However, they seem to be based more on observation rather than understanding how they sit in 3D space in that they don't utilize subdivision at all or very minimally compared to your vehicle form intersections. Therefore I'll assign a revision of 1 more vehicle construction.

Before I explain how I want you to go about this revision I'll explain how solid black is to be used in the context of this course.

  • When filling in areas with black, always remember that we're reserving that for cast shadow shapes only. There are cases where you'll find yourself tempted to fill in an existing shape with solid black, but remember that in most cases, introducing a new cast shadow will involve designing a new shape for the shadow, then filling it in. There are cases where you might end up filling in an existing face or shape entirely, but if you catch yourself doing that, it's important to take a moment to ask yourself about whether or not it's actually a cast shadow. So for instance, filling in the wheel wells on this car is not a cast shadow - rather, you're filling in that surface of the car, making it dark based on its orientation in space (and to help make the wheel stand out). There's no other form casting a shadow upon that surface. One area where this may be somewhat confusing is the interior of the cars, as this is a bit of a grey area. We treat it as though it's the car itself casting shadows onto the interior, but of course this would not cover every surface, as there would be plenty of light penetrating through the windows to catch on those surfaces. But, for our purposes here, it helps us to understand the structures we're looking at, and we can explain it away as being a cast shadow in some manner or another well enough to let it through. As you leave this course, you're not going to be as rigidly controlled by the specific restrictions we use here, but do just be sure to ask yourself those questions when you catch yourself filling areas without necessarily thinking it through.

  • Additionally the wheels on vehicles 7 and 8 you use form shading on the things protruding from the wheels instead of drawing the cast shadows. This is more in the realm of texture so I won't go too deep into it but I recommend you review those notes.

So! For the revision vehicle, I want you to draw an orthographic study where you decide the positioning of landmarks for the front and side view of a car / bus before you go in to draw the constructional vehicle. For the orthographic study you might end up doing it like uncomfortable does, however his demos end up being imprecise as shown here on his mouse demo. If you want an example of good orthographic plans, I'll give you this students work which takes precision to the extreme, however, you don't need to go that far. If you decide that the landmark is only roughly 1/3 of the vehicle then that is completely fine. By deciding on everything before drawing the 3D construction through subdivisions, it just becomes a matter of copying / transferring the plans onto the construction.

Before I end the critique I want to explain curves briefly as looking over your work again I can see you've freehanded the vehicles (you should always use a ruler for every single line) and so when you go back and use a ruler you might end up missing the notes in lesson 6. As explained here in Lesson 6, it helps a great deal to treat all your curves as though they're simplified down into a chain of flat lines or surfaces, effectively leaving the curving aspect out of it entirely. Some shallower curves can be represented with one line/flat plane (like the windshield), whereas others might need to be broken up into a couple or more (like the rear window). This way we can build our construction more solidly first, then round them out later. You'll also notice that as a result of breaking the curves down into straighter chains, we end up with some clearer landmarks which we can then position at specific points along the length of a given dimension - so for example, we know that the very top of the windshield, where it meets the roof of the car, is positioned right at the 1/2 way mark along the length of the car. I would strongly recommend actually placing those landmarks by using the diagonal subdivision technique. Reason being, if the process we use in our 2D orthographic plans is the same we use when transferring it to 3D, there's less chance for information to be lost in translation. It becomes a matter of simply repeating the same process.

If you have any questions or if anything was unclear don't hesitate to ask me!