Lesson 3: Applying Construction to Plants

7:16 PM, Wednesday February 1st 2023

Imgur: The magic of the Internet

Direct Link: https://i.imgur.com/W1oYIoa.jpg

Find, rate and share the best memes and images. Discover the magic of th...

I'm having difficulty applying the branch method to branches going into/out of the page (Lucky Bamboo, Mushroom Patch). How should I approach these?

Detail/Texture:

-Daisy (Demo)

-Mushroom (Demo)

-Potato Plant (Demo)

-Cherry Tree Branch

Construction Only:

-Erythronium Flowers

-Lucky Bamboo

-Velvet Foot Mushrooms

-Opuntia Vulgaris Cactus

0 users agree
12:38 AM, Monday February 6th 2023

Hello Bammer95, I'm ThatOneMushroomGuy and I'll be the TA handling your critique today.

Arrows

Let's start with your arrows, you're doing really well in this exercise. Your linework is looking very confident which makes your arrows look very fluid, you're also making great use of the depth of the page with your application of foreshortening to your arrows, as well as placing the shading at the correct side of the bend, which helps reinforce the illusion of depth you wish to achieve with these structures.

The only thing to mention here would be a reminder to make sure that you're always adding extra lineweight on top of arrow overlaps, and that when you're doing so keep in mind that lineweight should be added with a single, confident line superimposed on top of the previous mark.

Leaves

Moving on to your leaves they're looking pretty energetic, but be wary of unnatural folds as some of your leaves aren't folding as naturally as they could, remember the concepts introduced in the arrows exercise on how to make flat objects feel tridimensional. Leaves are pretty flexible lenght-wise due to their spines, but not as much on their width, so be sure to maintain their size consistent and follow the flow line.

Your application of edge detail is looking alright, but there are some things that you should keep in mind. Firstly edge detail should be added with roughly the same lineweight as the rest of your construction in order to not encourage you to draw more than you strictly need to. Another thing is to make sure you're working additively with your edge detail whenever possible.

And lastly make sure that you're putting as much time and energy as necessary to execute every single of your edge detail marks, remember the principles of mark making introduced in lesson 1 and keep in mind that each of your marks should start at the outer edge, rise off, establishing the edge detail form and only then coming back down to the preexisting line.

The texture in your leaves is leaning towards the explicit side, you can find here some useful notes on how to think when approaching leaf textures.

Branches

Moving on to your branches you have one pretty major deviation from the characteristics we want to maintain for these forms - simple cylinders of consistent width, with no foreshortening applied to it.

When approaching this exercise make sure that all of your ellipses are roughly the same size throughout your entire branch's lenght, especially when your ellipse degrees are gradually changing as having ellipses with a higher viewing angle being bigger than ellipses with a smaller viewing angle goes against the rules of perspective and how the ellipse degree shift works.

It's good to see that in general you're sticking to the instructions for this exercise by extending your line segments correctly which allows for a healthier overlap between your lines and greater control over them, while you still have some visible tails in your compound strokes this is a mistake that will be easier to avoid through practice. It's great to see that you're overall drawing through your ellipses twice and varying the degrees of your ellipses.

Plant Construction Section

Continuing on to your plant constructions, you're starting to understand and apply the concepts of construction introduced in this lesson. This is all helping you develop your sense of spatial reasoning and draw solid, believable structures.

There are of course, always things to improve, so here are the points I believe you should work on so you can keep improving your skills.

When constructing objects of a cylindrical nature make sure to always make use of a minor axis in order to keep your several ellipses aligned, this includes minor axis for mushroom caps.

And speaking of mushroom caps you don't fully construct the caps in this page, instead opting to draw them as shapes after constructing the initial ellipse for the cap, this slightly flattens your drawing and makes it difficult to keep the form of the cap congruent with the forms of the mushroom body, or in other words, the caps either have some slightly different perspective to them, or don't align well with the mushroom body.

When approaching any construction try your best not to accidentally undermine the marks you've put down by drawing later marks that contradict the forms you've drawn previously.

For example, keep in mind that we're not looking to draw aesthetically pleasing plants or to draw them the prettiest we can, instead we're using these exercises as opportunities for learning and part of this learning is to understand that all marks we put down on our page aren't just lines, they represent solid structures - all marks represent edges in a 3D space.

This means that these edges must be respected as they don't only communicate forms, but also communicate their relationship to other forms, in order not to undermine your constructions by accident, never cut back into your forms, and always treat your ellipse's outermost perimeter as the defining form, in order to not accidentally cut into you form and maintain all stray marks contained inside the construction.

For this construction you end up accidentally flattening it by not using the branch construction method for drawing some of the branches that connect to the berries.

As mentioned before the purpose of these exercises is not to make aesthetic drawings, it's to learn and develop your spatial reasoning skills, as such it's incredibly important that you're always making use of the techniques and methods introduced in order to engage your sense of spatial reasoning, and not only draw what you think these plants look like but also understand the subject you're drawing to it's fullest, making sure you understand and can show to your viewer how each different part of the plant connects and relates to each other.

You seem to be skipping some construction steps in this plant as well because some of your leaf structures have a higher level of finish to them, having some slight addition of texture as well as edge detail. Remember that edge detail is not optional, and make sure that you're always committing to your decisions, giving up on a drawing also means giving up on a learning opportunity, as such if you decide to add something to your drawing you must take it to it's completion.

Your constructions would have greatly benefitted from extra lineweight in order differentiate between overlaps.

Texture in the context of this course is an extension of the concepts of construction, with construction being focused on the big and primitive forms that make up different structures and texture focusing on communicating the small forms that run along the surface of an object, essentially texture is a way of visually communicating to the viewer what it would feel like to run their hands across that surface.

None of this has to do with decorating any of our drawings, what we draw here is based on what's physically present in our construction. As introduced here, we can notice that we should focus on each individual form and how it casts a shadow on neighboring surfaces, understanding how each individual form sits on a 3D space, and analyzing all of this information present in our reference to be able to translate it to our study. The shape of this shadow is important as it's the shape that defines the relationships between the form casting it and the surface it's being cast on, as such you should design your shadow shape in a way that feels dynamic, as shown here.

This approach is of course much harder than basing our understanding of texture on other methods that may seem more intuitive, but in the long run this method of texture is the one who enforces the ideas of spatial reasoning taught in this course. By following these ideas, you'll find yourself asking how to convey texture in the most efficient way possible, with less lines and ink, focusing more on the implicit mark-making techniques introduced in Lesson 2. Going forward here are a couple of final reminders of how texture in Drawabox can be approached.

Lastly, for your question, you're already approaching these branch structures correctly although with a couple of bumps and hiccups in places where you don't extend your lines correctly or where the ellipse degree shift can use some work, being a bit more gradual in some places and being pushed further for some branch structures, usually the ones which are bending the least. With practice it'll get easier to approach these objects.

Final Thoughts

Your work is looking good as you seem to understand the concepts this lesson seems to seek, you only need to refresh your memory in order to follow some of the instructions more closely, but overall you're moving in the right direction and starting to understand how to draw solid structures that feel believable and tridimensional.

I'm going to be moving you to Lesson 4 as I believe you've shown adequate understanding of the lesson material, with only some minor things that should be addressed ( branches and edge detail ), don't forget to keep practicing these exercises and apply my feedback in the future, good luck in Lesson 4.

Next Steps:

Keep practicing these exercises during your warm ups and revisit them in this way, in the future.

Move on to Lesson 4.

This critique marks this lesson as complete.
2:25 AM, Monday February 6th 2023

Yes, I regret not going back and watching the mushroom demo again before trying the mushroom patch... I should've constructed them with those extra ellipses! Also, I totally should have added edge detail to the leaves.

Thank you for the feedback! It was very thorough. :)

The recommendation below is an advertisement. Most of the links here are part of Amazon's affiliate program (unless otherwise stated), which helps support this website. It's also more than that - it's a hand-picked recommendation of something I've used myself. If you're interested, here is a full list.
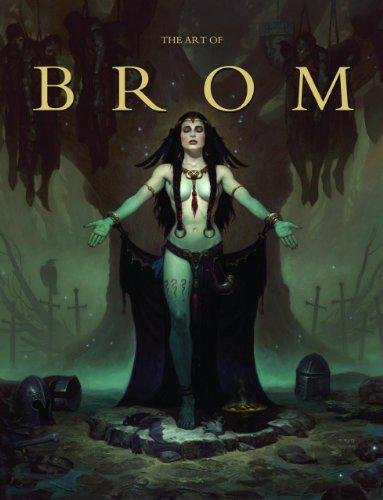
The Art of Brom

The Art of Brom

Here we're getting into the subjective - Gerald Brom is one of my favourite artists (and a pretty fantastic novelist!). That said, if I recommended art books just for the beautiful images contained therein, my list of recommendations would be miles long.

The reason this book is close to my heart is because of its introduction, where Brom goes explains in detail just how he went from being an army brat to one of the most highly respected dark fantasy artists in the world today. I believe that one's work is flavoured by their life's experiences, and discovering the roots from which other artists hail can help give one perspective on their own beginnings, and perhaps their eventual destination as well.

This website uses cookies. You can read more about what we do with them, read our privacy policy.