


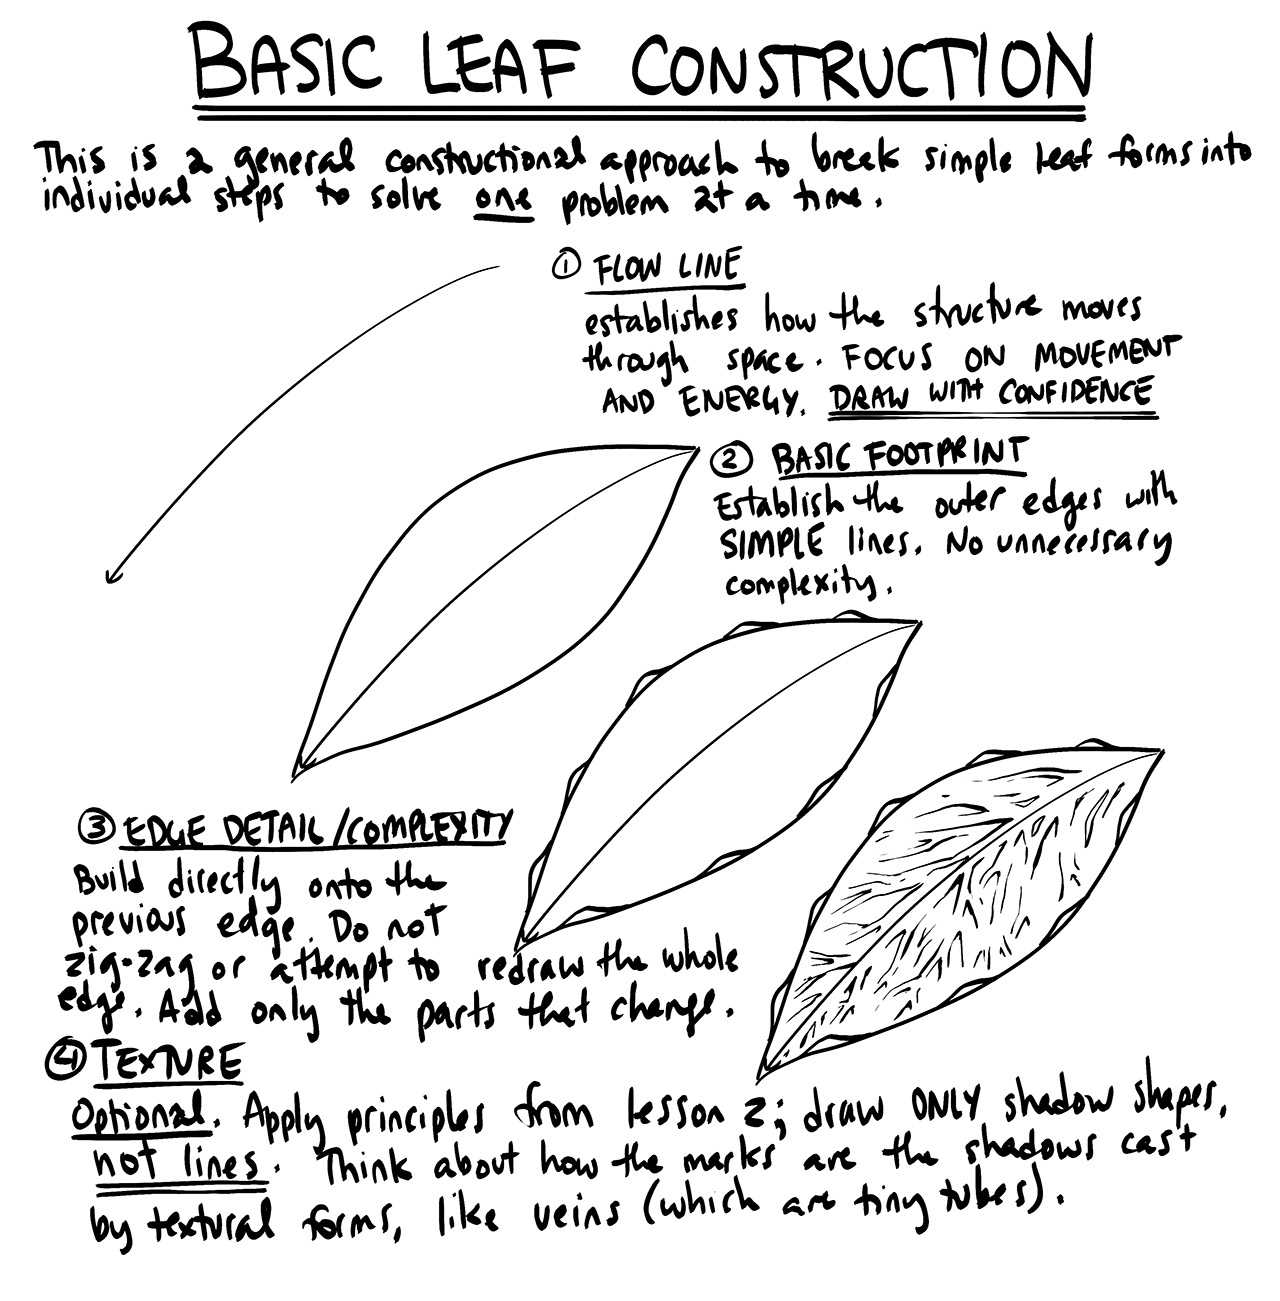
Lesson 3: Applying Construction to Plants
7:06 AM, Sunday January 17th 2021

hello, happy new year
Starting with your arrows, these are flowing really well with a great sense of confidence. Just be sure to compress the gaps between your zigzagging sections as shown here to better convey the sense of depth in the scene.
Moving onto your leaves, you've carried over this sense of fluidity and motion to capture not only how the leaves sit in space, but also how they move through space. I'm also pleased to see that you've built up the edge detail along the sides nicely, drawing each individual bump as an addition to the simpler edge, rather than trying to replace it with a single continuously zigzagging line.
Just one point in regards to your leaf vein texture here - you worked pretty exclusively with line there. You were on the right track in terms of drawing around the veins instead of drawing the veins themselves, but as discussed back in Lesson 2, the key is to work in cast shadow shapes rather than lines. You can actually see a direct example of this in the instructions for this exercise.
For your branches, while these are mostly looking good, you're missing the part of the instructions that states your line segments should go from one ellipse, past the second, and halfway to the third, then the next should start at the second ellipse and continue this pattern as shown here. As a result, you end up missing on the overlap between them that is intended to make the transition more seamless from one to the next.
Moving onto your plant constructions, these are by and large quite well done. The first thing that jumped out at me though is that a number of your drawings appear to have really thick lines, which suggests that either you drew with a different kind of pen, or more likely, you drew those quite small and cropped your image in tightly. There are two issues with that:
It's really important that you draw big - this helps give our brain room to think through spatial problems without getting clumsy, and it also helps make it easier to engage our whole arm while drawing.
I do assign the homework in pages, not drawings. Make sure everything you submit is photographed as a page, so I can see the edges. This will also help me assess how you're using the space available to you on the page.
Now, because those drawings are obviously more limited due to being smaller, I'm going to focus on drawings that were given more space. For example, this one has really nice fluidity to the flower petals, and the general construction is well done. I'm unsure why you added so much heavy line weight at the opening of the "cup" section of it though - in general, such bold areas of solid black should be reserved only for cast shadow shapes, like the ones we use in our textures. Line weight should be kept subtle and understated, and any areas of "local colour" that result in darker surfaces on your reference object should be ignored, instead treating the drawing as though it is covered in the same flat white.
One issue with this drawing - forms should not be represented as simple lines. They should all be drawn as forms. If that means having really, really slender branch structures, then that's what you'll need to draw.
Lastly, here you got entirely too caught up in the idea of drawing a pretty, detailed drawing of this flower and effectively abandoned all the principles covered in the lesson. You're not drawing the petals around their central flow lines, you're not drawing each form in its entirety to fully grasp how they all sit in space and relate to one another within that space, and you've gotten pretty derailed in your focus on outlining the patterns on the petals' surface.
What we're doing in this course can be broken into two distinct sections - construction and texture - and they both focus on the same concept. With construction we're communicating to the viewer what they need to know to understand how they might manipulate this object with their hands, were it in front of them. With texture, we're communicating to the viewer what they need to know to understand what it'd feel like to run their fingers over the object's various surfaces. Both of these focus on communicating three dimensional information. Both sections have specific jobs to accomplish, and none of it has to do with making the drawing look nice.
Now, all in all you're moving in the right direction, but there are definitely points where you need to refresh your understanding of the material and the instructions. I'm going to assign a few pages of revisions before you move forward. You'll find them listed below.
Next Steps:
Please submit the following:
1 page of branches
2 pages of plant constructions
hello,
While it's not abnormal for a student to misunderstand or misinterpret part of the critique, there are certain kinds of things that suggest quite clearly that a student hasn't actually followed what was stated.
This came up with the first time you submitted Lesson 3 - your revisions repeated the same issues I called out quite specifically. And it has happened again with these revisions.
In regards to your branches, I stated:
For your branches, while these are mostly looking good, you're missing the part of the instructions that states your line segments should go from one ellipse, past the second, and halfway to the third, then the next should start at the second ellipse and continue this pattern as shown here. As a result, you end up missing on the overlap between them that is intended to make the transition more seamless from one to the next.
I actually called this out in your original homework submission as well. But what I see here is that you did not make any visible attempt to change your approach - so even if you didn't understand what I was explaining for whatever reason, no attempt was made to actually figure it out. You just repeated the same process you'd applied previously.
Here I've drawn out the issue right on your work. Your segments start at an ellipse, go past the next ellipse, and stop halfway to the third.
As a side note to this, you should be drawing through all of your ellipses as explained here.
The veins on your leaves in your plant drawing are a very minor point, but the same thing happened again. I mentioned:
Just one point in regards to your leaf vein texture here - you worked pretty exclusively with line there. You were on the right track in terms of drawing around the veins instead of drawing the veins themselves, but as discussed back in Lesson 2, the key is to work in cast shadow shapes rather than lines. You can actually see a direct example of this in the instructions for this exercise.
The key point there was "draw shapes, not lines". As shown here you drew in lines again, same as before. No attempt to change the approach. In my original critique of your lesson 3 work, I talked about this sort of thing, and showed you this two-step process which makes it impossible to work in line, but you're not applying it.
One thing you did improve upon in your second Lesson 3 submission (the one I critiqued yesterday) compared to the previous one, is that you were drawing your flower pots much better, with multiple ellipses to define the thickness of the rim, you constructed them around a central minor axis line, and so on. Unfortunately you appear not to have done that here.
The last point is that about 14 hours passed in between me submitting my critique and you submitting your revisions. Sure, you were only asked for two pages of revisions, but that's not a lot of time to read my critique, to think about it, to work through what I'm saying, and to do the revisions while applying what was called out, making an effort to improve. And that lines up with what I'm seeing.
From my perspective, it seems a lot like instead of putting that additional time in, you're churning your work out as quickly as you can, not investing the appropriate time to process the information provided to you, in favour of having me explain things over and over again. Instead of investing your time, you're having me spend more of mine. That unfortunately is not how this works. Drawabox is able to be as cheap as it is entirely because students are expected to put in the majority of the effort and time.
I will give you one more opportunity to do the requested revisions correctly, and if you continue to use the same approaches I've called out previously, in this critique and those given for the previous submission, I don't think you'll be able to continue along with this course. It really isn't that you're bad at this - for the most part you're doing quite well, but if you are obstinate in following clear instructions, then this simply won't be worth either of our time.
Next Steps:
Redo the revisions assigned previously: 1 page of branches, and 1 plant construction to the absolute best of your current ability.
hello, thank you for the multiple revisions from before and now for lesson 3 , i apologize if i dont get some of the instructions from the first or second time as english is not my native language, some things get lost in translation sometimes, from now on i will only work on the course and homework on weekends as i am bombarded with things during the week and my job, i feel im not focused enough as the previous lessons because i wasnt working at the period, your instructions are clear and this is my fault i didnt mean to waste your time as i know you have a lot of work on your hand regarding the website with reviewing and rewriting material and other things, i really hope i can continue with the course and official critiques, i apologize for taking much of your time to write similar points in the revisions for me, i understand that it is frustrating and time consuming i will do my best to recheck everything before i submit it in future lessons if i pass , for the branches i didnt do any connecting ones to draw as as much as possible as i got it on how to tackle them.
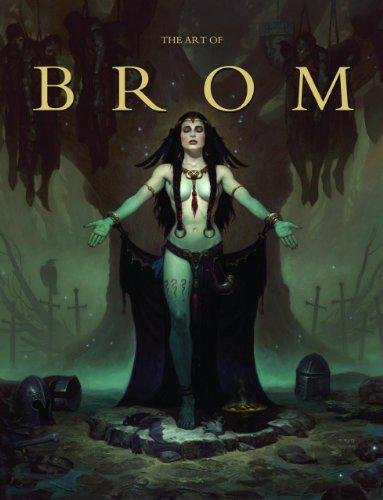
Here we're getting into the subjective - Gerald Brom is one of my favourite artists (and a pretty fantastic novelist!). That said, if I recommended art books just for the beautiful images contained therein, my list of recommendations would be miles long.
The reason this book is close to my heart is because of its introduction, where Brom goes explains in detail just how he went from being an army brat to one of the most highly respected dark fantasy artists in the world today. I believe that one's work is flavoured by their life's experiences, and discovering the roots from which other artists hail can help give one perspective on their own beginnings, and perhaps their eventual destination as well.
This website uses cookies. You can read more about what we do with them, read our privacy policy.


