


11:39 PM, Saturday July 11th 2020
I have to admit that while there is definitely improvement all in the right direction here, coming back with 6 individual drawings in under 24 hours is always a red flag that the student may not have put in as much time and effort into each individual drawing as they could have. Additionally, while I did not restrict you from including draw-alongs with demonstrations in these revisions, it is certainly something I'm taking note of. I do have some information to share about how to look at the demonstrations, but I'm going to focus my critique on the one drawing you did at the end on your own.
So, the thing about the informal demos is that those at the top of the list are newer than those further down. Because of how the course itself is continually being updated and altered (the process of critiquing students brings to light ways in which I can explain concepts more effectively, and also allows me to develop more successful techniques for how to approach these exercises), there are going to be areas where older demos don't reflect certain techniques that are stressed in later ones. The demos are there because they're still valuable, and serve an important role until I can actually find the time to create a more succinct, up-to-date collection of demonstrations (which I should be able to start getting to soon, as I've put in notice at my day job).
That said, if you look at, say, the elephant demo, you'll notice that the leg constructions don't apply the sausage method, which I stress in more recent ones. That is for the simple reason that I hadn't developed that methodology at that point.
This is basically just something to keep in mind when digesting the demonstrations - you still do need to think critically about what you've learned in the lesson thus far, and identify where those newer techniques override the ones presented in older demonstrations.
So, looking at your komodo dragon drawing, this is certainly moving more in the right direction in a number of ways. Your marks, while still not as confident and "complete" (in terms of drawing entire closed forms without gaps), are visibly less tailored towards keeping things clean and hidden away. You're also pushing the use of the sausage method much further. There are of course issues which I've outlined here. Since I've written a lot of notes there, I'll outline them a bit more cleanly below:
-
One thing to keep in mind is that no mark should be drawn without considering precisely what its purpose is, whether it is the best stroke to accomplish that task, and whether any other mark is currently attempting to accomplish the same task. Specifically here this relates to your tendency to draw more contour lines than are really necessary. Contour lines tend to suffer from diminishing returns, where the first will have a more significant impact, but your second will have less of one, your third will be even less, and so on. Furthermore, different kinds of contour lines will be more effective overall - like the contour lines that define the relationship between different forms in 3D are always, by their very nature in defining those relationships, more effective at creating the illusion that the forms are three dimensional, than the contour curves that wrap around the surface of a single form. In most cases you can actually get away with just the contour lines that define those connections/relationships.
-
Your forms tend to still have gaps, which immediately undermine the illusion that they're actually solid. If you look at the drawing of the komodo dragon's leg in the bottom left there, you'll see how every single form I've drawn is complete. I'm not being timid or tentative here - I decide a particular form needs to exist, and I draw it in its entirety, fully enclosed, within the space. My focus is on giving the impression that this form first and foremost is solid and 3D, and then thinking about how it relates to the forms around it.
-
When adding additional forms, don't give them artificially sharp corners. Think of those masses like chunks of meat - meat itself, without actually being cut, doesn't come to its own sharp corners - it's more malleable with gentle curves that will wrap around whatever it's placed upon, whilst maintaining its own volume.
-
Your head construction doesn't really reflect the kind of specific structure shown in the tapir head demo, where we establish the different components as though they're pieces of a 3D puzzle that fit together. The eye sockets ought to be buttressed on its various sides by other components such as the muzzle, the brow ridge, the cheekbone, etc. Having them fit together in this specific manner is key to making the head feel solid, and having all those pieces feel grounded.
-
To take this point further, I drew my own approach at this head construction here. There are no additional notes, but the key comes down to how every component is clearly defined, enclosed, and drawn with confidence and purpose. I'm not timidly putting down subtle suggestions - I'm clear and direct in every constructional choice, focusing on how each form or addition exists in 3D space. Also for the tongue, I've approached it constructionally as well, similarly to how we tackled the leaves in lesson 3.
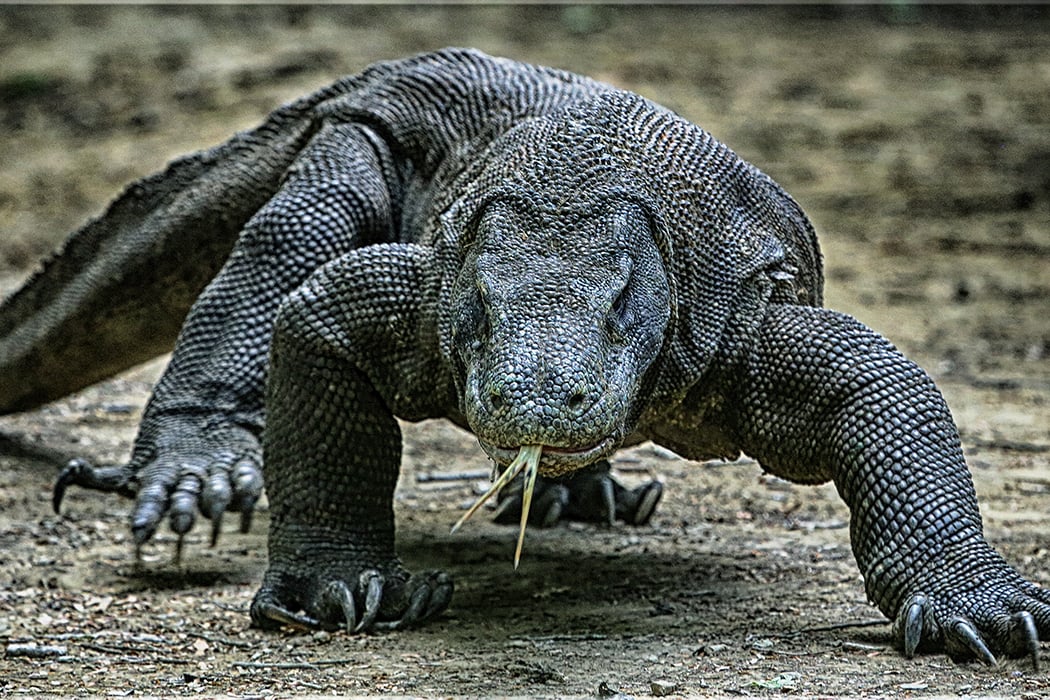
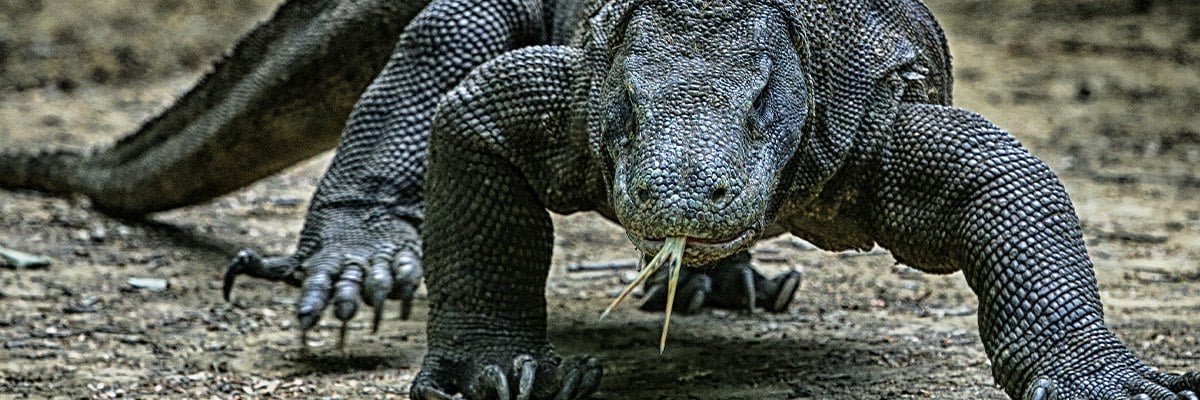
One point I didn't mention in the redline notes is that I went looking for a komodo dragon reference from which to do my head drawing, and I believe I found one that appears to match yours' pose pretty accurately, here. I also noticed that there were no larger images of this aside from this one, which is somewhat cropped. I'm not sure if you were able to find your own high resolution image, but resolution is pretty important - there's a lot going on, especially with the scaly texture of its skin that can make it quite a bit more difficult to identify all that's going on. Definitely be sure to work from high resolution images - even the size of the larger, cropped one I found is the bare minimum of what I'd generally want to work with. Given that I have more experience with what to look for, I can work a little better with low resolution images, but I would by no means ask that of you at this stage.
You are indeed making progress, but I'm going to assign 4 more pages with a few more restrictions, which I'll list below. I am definitely expecting that my critique on your next set will be a simple "much better", rather than another lengthy critique.
As a side note about the whole balance between the finding a balance between fun and improvement, that is certainly something all must struggle with - however, not within the context of this course. The drawings you do for this course are specifically just exercises we're doing to help develop your skills. The stuff you do for fun, which is extremely important, should be entirely separate, as described back here in Lesson 0.
Next Steps:
Submit 4 additional animal drawings, adhering to the following restrictions:
-
I only want you to do one such drawing per day. This is specifically so you're not put in any position where you might be inclined to focus on the completion of many in a given sitting, which can even subconsciously cause you to spend less time on a given drawing than you otherwise could.
-
All of these drawings should be your own - none of them should be done from the available demonstrations.
-
Do not employ any contour lines that rest on the surface of a single form (like the komodo dragon's tail). You are absolutely allowed and encouraged to include contour lines that define the connection between different forms, however.


