Lesson 5: Applying Construction to Animals

12:46 PM, Sunday September 13th 2020

DrawABox L5 - Album on Imgur

Direct Link: https://i.imgur.com/KWKsz6r.jpg

Discover the magic of the internet at Imgur, a community powered enterta...

Hey boss,

I finally mustered up the courage to draw animals for the first time ever after finishing 150 cylinders, the lesson was extremely hard but I learnt a lot and had a lot of fun, thanks for the critique ^^

0 users agree
9:31 PM, Monday September 14th 2020

Overall your work throughout this lesson is pretty well done. You've clearly put a lot of effort into understanding and applying the principles covered here, and while there is definitely room for improvement and things that I will point out, by and large you're moving quite well in the right direction.

Starting with your organic intersections, you're doing a pretty good job of establishing how these forms interact with one another in 3D space. Just two things to remember:

  • Don't ever draw so small - it's not to your benefit at all, and it will make solving these spatial problems harder. One big pile in the middle of the page, taking up loads of space is far better than two small piles.

  • To further the idea that this is a pile of sausage forms, don't forget that the ground plane exists beneath it. Be sure to cast shadows upon it to help ground the whole set of forms.

Moving onto your animal constructions, that point about avoiding smaller drawings comes into play with a number of these. For example, these ones feel visibly cramped, and while you've worked pretty well within those constraints, there's no reason to force yourself to work within such small areas. Always focus on giving the first of your drawings as much room as it requires, then if you think there's enough space to fit another, go for it. No harm in having just one drawing on a page, though.

I can see that you've made a fair bit of use of the additional forms to really flesh out your constructions as a whole. This is great to see, although there are some ways in which these can be improved. You can see some notes and diagrams on how to think about these additional forms here. The main point to keep in mind from those notes is the idea of where to keep those additional forms simple. The bear on this page for instance has a few forms along its back, and even though there's nothing actually pressing upon the tops of those forms, they still have curvature that adds complexity and undermines their solidity.

Another thing to avoid is how on the back of this one you've got a sharp corner on that additional mass for no reason, as explained here. As a side note there, you definitely didn't put any real effort into establishing actual feet for that one. I understand that certain parts of an animal may not be visible in your reference image, but there's no reason you can't grab another reference image of the same kind of animal to fill in the gaps.

When it comes to some of your head constructions, things appear to be a little hit-and-miss. For example, the moose especially looks off. There's actually a demonstration for a moose head on the informal demo page, here. Admittedly I think the small size of your drawing overall definitely contributed to that head not coming out great.

Looking at the two drawings on this page (the frog and komodo dragon), one thing that stands out to me is that it looks like you're redrawing the silhouettes of your forms. Remember that constructional drawing is not about creating a scaffolding and then recreating your "final drawing" on top of it. If the basic construction already establishes the forms you need, then you don't need to redraw them. If you want to add line weight, it's only going to be in certain limited areas (not tracing back over the whole form) to clarify specific overlaps only.

Admittedly I think that while you overall demonstrated pretty decent constructional skills overall, the hybrid - which usually tests one's grasp of form/construction in order to combine elements from different animals - didn't come out that well. I think the reason for this may have been two things:

  • Again, drawing pretty small (only taking up half the page)

  • I'm not seeing a lot of signs that you actually drew directly from reference. Even though we're inventing something new doesn't mean we can't pull most of our information directly from the reference images, just as we had been doing for the rest of the lesson.

While I am mostly pleased with your work, the fact that everything's really tiny tells me that I'm not actually seeing your best here. So, I'm going to assign a couple additional pages before I mark this lesson as complete.

Next Steps:

Please draw two additional animal drawings, a full page given for each. I want you to do no more than one drawing on a given day, and if you feel you need more than a single day to complete a given drawing, then you should feel welcome to spread it out.

Then once those two additional pages are done, I'd like you to do one more hybrid drawing, focusing on using your reference images as much as possible.

When finished, reply to this critique with your revisions.
10:03 PM, Monday September 14th 2020

Thanks very much boss

10:25 PM, Monday September 14th 2020

Hey boss,

Sorry for the second notification, but just to clarify, is the pose of the hybrid meant to done from a reference animal, with the other parts then slapped on? or do I study the animals I'm doing, and then draw the whole thing entirely from imagination? (I tried to do the second one)

10:35 PM, Monday September 14th 2020

It's probably best to use an existing pose. I am not at all expecting students to be able to generate their own poses right now, as that's the sort of thing you learn from doing a lot of studies to learn particular animals' poses.

2:11 PM, Thursday September 24th 2020
9:27 PM, Thursday September 24th 2020

These are honestly really quite well done, and you show a good deal of progress over the full set. You've done far more than I asked for - which would have been a problem if you didn't actually demonstrate that you took your time with each (since quantity doesn't trump quality in this situation) - but it looks like you definitely pushed your understanding of the material quite a bit.

I was especially fond of your doberman, and the way you handled the additional masses along its shoulder/back area. These wrap very nicely around the underlying structure, which is something you struggled with in some of the earlier drawings. For example, with the bull on the bottom right of this page, as well as the elephant above it, you tended to just kind of plop those forms on top, rather than properly integrating and wrapping them around the underlying structure. This is one of the more notable areas in which you improved.

I did notice though that the doberman's ribcage seemed to be a bit small - something that you actually did pretty often. Note that the ribcage is 1/2 the torso length, and definitely not the same size as the pelvis.

On the bottom right of this page it stood out quite a bit more strongly that you tend to draw construction with a fainter mark, and then you go back over things, "tracing" them with a final pass. When working on Drawabox, don't do this - I don't want you replacing or redrawing marks that already exist as part of your construction. All the lines of your construction should be drawn confidently, not trying to make them faint or hidden, and they should be part of the final drawing, not something to be ignored. Remember that we're not just creating a pretty drawing and focusing on reproducing the reference image - we're building something up, working on a three dimensional puzzle, using simple forms. At no point in the process are you to say "okay I've finished the puzzle, now to actually make it look like the animal" and start treating it like a 2D drawing again. It is always a 3D structure.

One other minor point - you've got a few drawings where you filled areas in with solid black. In general, when working through this course, only reserve those filled black shapes for cast shadows and nothing else. Not for filling in a black nose (local colour should be ignored), not for filling in the far legs, etc.

So! I'll go ahead and mark this lesson as complete. Keep up the good work.

Next Steps:

Feel free to move onto the 250 cylinder challenge, which is a prerequisite for lesson 6.

This critique marks this lesson as complete.
9:32 PM, Thursday September 24th 2020

thank you very much for the critique boss!

The recommendation below is an advertisement. Most of the links here are part of Amazon's affiliate program (unless otherwise stated), which helps support this website. It's also more than that - it's a hand-picked recommendation of something I've used myself. If you're interested, here is a full list.
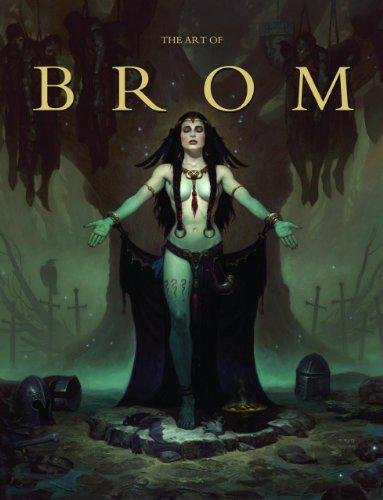
The Art of Brom

The Art of Brom

Here we're getting into the subjective - Gerald Brom is one of my favourite artists (and a pretty fantastic novelist!). That said, if I recommended art books just for the beautiful images contained therein, my list of recommendations would be miles long.

The reason this book is close to my heart is because of its introduction, where Brom goes explains in detail just how he went from being an army brat to one of the most highly respected dark fantasy artists in the world today. I believe that one's work is flavoured by their life's experiences, and discovering the roots from which other artists hail can help give one perspective on their own beginnings, and perhaps their eventual destination as well.

This website uses cookies. You can read more about what we do with them, read our privacy policy.