250 Box Challenge

4:23 AM, Thursday March 18th 2021

250 Box Challenge - Album on Imgur

Direct Link: https://i.imgur.com/ysInWDt.jpg

Discover the magic of the internet at Imgur, a community powered enterta...

The linework and hatching could have been better on this, and my convergences still need work. I understand somewhat how a box is turned in space, and I accidentally had my count of boxes off by one. I wasn't sure if the hatching was optional or not so that is why some pages do not have it.

0 users agree
6:32 PM, Thursday March 18th 2021

Congratulations for completing the 250 Box Challenge!

You did a good job on the challenge overall.

I can see you made some good improvement with the quality of your mark making. Your lines steadily become straighter and more confident looking as you progressed through the challenge. You also start to do a better job of getting your sets of parallel lines to converge more consistently towards their shared vanishing points!

Before we begin I just want to let you know that in general TAs will ignore student self assessment or critique so as not to contaminate our own critique of your work. If you have any questions not answered in your critique, feel free to ask them here. Back to your critique.

While your mark making has improved, I do see that you still hesitate in some areas. This is likely due to prioritizing your accuracy over creating a smooth, confident looking line.

Just remember that the confidence of the stroke is far and away your top priority. Once your pen touches the page, any opportunity to avoid mistakes has passed, so all you can really do is push through. Hesitation serves no purpose. Mistakes happen, but a smooth, confident mark is still useful even if it's a little off. If the line is wrong, we leave it and move onto the next step. Accuracy is something that you will improve on as you continue working through Drawabox and practice ghosting.

Now, while it is important that you use the ghosting method of each mark you make while doing Drawabox one thing you can try to help with ending your marks closer to where you want them is lifting the pen off of the page rather than stopping the motion of your arm. You can do this with extra line weight as well. I would also recommend that you read this comment by Uncomfortable, where he talks more about hesitation. You can also reread this section from lesson 1 about arcing.

I noticed that you still struggle a bit with applying your extra line weight. When you go to add weight to a line it is important that you treat the added weight the same way you would a brand new line. That means taking your time to plan and ghost through your mark so that when you go to execute your extra line weight, it is done confidently and so that it blends seamlessly with your original mark. This will allow you to create more subtle and clean looking weight to your lines that reinforces the illusion of solidity in your boxes/forms. Extra line weight should be applied to the silhouette of your boxes. I recommend that you try adding your extra line weight in no more than 1-2 pases so that you can easily identify mistakes in your work. This diagram should help you better understand how to properly apply your extra line weight.

Extra line weight should never be used to correct or hide mistakes. Something to keep in mind as well, when you are working through Drawabox you should be employing the ghosting method for every mark you make. This includes the hatching that we sometimes use for our boxes.

Some of your boxes were drawn a bit small. Part of the reason for the 5-6 boxes per page rule is so that students have enough room to draw their boxes larger while having room to check their convergences. By drawing your boxes very small you limit your own ability to execute your lines from the shoulder confidently, which affects the quality of your mark making. Drawing bigger also helps engage your brain's spatial reasoning skills, whereas drawing smaller impedes them. It isn't a problem if your line extensions end up touching other boxes on the page so long as the boxes themselves do not touch or overlap. This should give you enough room to draw your boxes at a larger, more useful size.This, along with varying your foreshortening and orientations of your boxes, will help you get the most out of the exercise.

Keep in mind as you progress through Drawabox and begin to construct more complex forms that it is important to put in the time and focus required to execute each step correctly and to apply the ghosting method to every step of the process, as explained here. If you ever have any questions or are uncertain about what your next step is or how you should be doing something, you should first reread the instructions and if you are still uncertain you can always ask questions here.

I did see that you were checking some of your convergences incorrectly.

Checking your convergences is an important step so you should always take your time and make sure you are extending your sets of lines correctly. Noticing and identifying mistakes is a major part of the learning process. Checking your boxes for mistakes is how you know what areas you need to address so that you get the most out of each exercise.

Your line extensions should extend away from the viewer and towards their implied vanishing point. You should do this for all three sets of lines that make up your box. They should never be coming off of the center of the original Y that you use at the beginning of your construction. Be sure to visit the link for more information and for examples that you can use as reference. You can refer to the diagrams in this link if you are ever confused or uncertain.

For some of your boxes, you appear to have purposely tried to keep your sets of lines parallel on the 2D page, drawing them all to an "infinite" vanishing point. As explained in this section, because these boxes are oriented with us looking at the corner of the box, you should be drawing your boxes in 3 point perspective - meaning with 3 concrete vanishing points, each set of lines converging towards a real point in space, even if that point is far off and the convergence is gradual. At no point in the instructions does it state that you should draw your boxes without any foreshortening. All of the boxes you draw will have some foreshortening even if the convergence is very gradual. The circumstances in which vanishing points go to “infinite” as discussed in lesson 1 are only in specific orientations that run parallel to the viewer. In this exercise we are working with completely random rotations and so those cases are exceedingly rare. You can also watch this video I made where I demonstrate how I approach drawing boxes.

To clarify, when I say "sets of parallel lines" or refer to your sets of lines as parallel, I am referring to lines that are parallel in 3d space not parallel on the page. If you remember from lesson one, the core principle of perspective is that when we draw a 3d form on a flat surface those lines that are parallel in 3d will now converge towards a shared vanishing point on the page.

Which means your sets of lines will not appear perfectly parallel on the page. Think about how those lines converge, do not purposely try to keep them parallel on the page.

I think this diagram will help you as well. When you are looking at your sets of lines you want to be focusing only on the lines that share a vanishing point. This does not include lines that share a corner or a plane, only lines that converge towards the same vanishing point. Now when you think of those lines, including those that have not been drawn, you can think about the angles from which they leave the vanishing point. Usually the middle lines have a small angle between them, and this angle will become negligible by the time they reach the box. This can serve as a useful hint.

Before moving onto lesson 2, I am going to have you draw 50 additional boxes.

For these boxes you will do the following:

  • Use the ghosting method for every mark you make, including hatching and extra line weight

  • Apply extra line weight in a single pass along the entire silhouette of your boxes

  • Draw all of your boxes in 3pt Perspective

  • 5 boxes per page maximum

  • Check all of your convergences as per the instructions

I will mainly be looking at the quality of your mark making to see if you are employing the ghosting method correctly for all of your mark making, including extra line weight and hatching. I will also be looking at your boxes to make sure your sets of lines are not being kept purposefully parallel.

Make sure you visit every link I have left for you and reread the challenge instructions in their entirety before beginning your revisions.

Next Steps:

50 additional boxes as described in the critique.

When finished, reply to this critique with your revisions.
11:46 PM, Thursday March 18th 2021

Which lines of the box are the silhouette of the box?

3:13 PM, Friday March 19th 2021

The silhouette is the outer edges of the box, you can read more and see an example here.

5:05 AM, Saturday March 20th 2021

What's a good strategy for hatching on one of the box's faces?

View more comments in this thread
2:30 AM, Friday March 26th 2021

https://imgur.com/a/Mqsoynx Here are my revisions.

7:34 PM, Saturday March 27th 2021

This is a good improvement! I can see that your sets of lines are doing a better job of converging towards their shared vanishing points.

You are still drawing your boxes a bit small though. Keep in mind what I said in your original critique about how drawing bigger also helps engage your brain's spatial reasoning skills, whereas drawing smaller impedes them.

I will go ahead and mark this lesson as complete and you can now move onto lesson 2!

Next Steps:

Continue to lesson 2!

This critique marks this lesson as complete.
The recommendation below is an advertisement. Most of the links here are part of Amazon's affiliate program (unless otherwise stated), which helps support this website. It's also more than that - it's a hand-picked recommendation of something I've used myself. If you're interested, here is a full list.
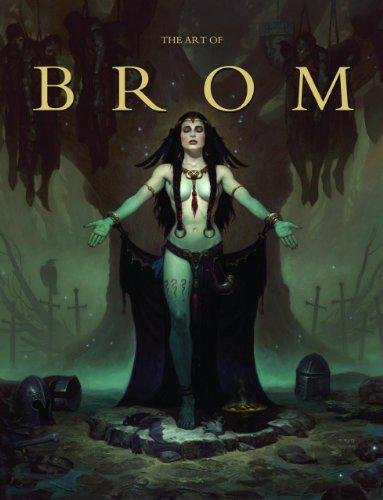
The Art of Brom

The Art of Brom

Here we're getting into the subjective - Gerald Brom is one of my favourite artists (and a pretty fantastic novelist!). That said, if I recommended art books just for the beautiful images contained therein, my list of recommendations would be miles long.

The reason this book is close to my heart is because of its introduction, where Brom goes explains in detail just how he went from being an army brat to one of the most highly respected dark fantasy artists in the world today. I believe that one's work is flavoured by their life's experiences, and discovering the roots from which other artists hail can help give one perspective on their own beginnings, and perhaps their eventual destination as well.

This website uses cookies. You can read more about what we do with them, read our privacy policy.