Rivgar

Victorious

The Indomitable (Spring 2022)

Joined 4 years ago

18200 Reputation

rivgar's Sketchbook

  • The Indomitable (Spring 2022)
  • Sharing the Knowledge
  • Victorious
  • High Roller
  • Technician
  • Geometric Guerilla
  • Tamer of Beasts
  • The Fearless
  • Giver of Life
  • Dimensional Dominator
  • The Relentless
  • Basics Brawler
    6:53 PM, Tuesday December 7th 2021

    Hello again,

    For your head construction,

    I notice that you skipped a couple of steps in the process, for example muzzle in a fox drawing and masses. You aren't supposed to use an initial ball for a head/cranium as our whole head, there should be additional masse. You should draw the cranium smaller. We sometimes underestimate how much fat and fur there is. By making it smaller it lets us focus more on those additional masses as the brow ridge, the cheekbones, muzzle, eye sockets, etc. Remember to fit masses written above like a puzzle, it helps to create an illusion of a solid 3d head.

    Take more time to look at your references. You should be looking more than drawing, be patient. You can't rush those things, but if you do your proportions and overall drawing is going to be worse in all aspects. I would recommend that you take more time for each drawing and studies.

    Here I went over your fox drawing and made a few minor adjustments and pointed out things that you should look at in the future like a silhouette of your reference and how you should build a head.

    I will now assign an extra 4 drawings. I also suggest for you to do the informal head demo until it stuck to you that you know how to use the method presented in it, for me it took a quite some time to get used to it and grasp it all. Tapir and moose head demos go more into that refined look of our masses so they should also greatly help you. Rat demo shows greatly how we should lay our initial three masses/balls small and build on top of them our additional forms.

    Next Steps:

    Please submit extra 4 animal drawings.

    When finished, reply to this critique with your revisions.
    2 users agree
    6:36 PM, Monday December 6th 2021

    Hello Tryingtodrawabox, I hope you are well.

    Including demos isn't necessary, but it does help me judge how much work you have put into the lesson.

    Judging by the number of demos you have done you put a lot of work into it and it clearly pays off as you become quite fluent with animals.

    That said, let's start the critique.

    Starting with your organic intersections

    You did a great job handling them in a 3d space. You make your shadows follow the curvature of the form it is cast on. Your sasusages feel solid and thoroughly designed, but there are few that show you struggled with them(middle left of a 2nd page).

    In future avoid "mother ship" arrangements of your sausages, instead of making one big sausage and then adding smaller ones, try to keep them the same size. This will allow for more useful exploration of their interactions in space.

    Our sausages aren't stiff, they are supposed to be squishy. But here you made a stiff sausage, when it sag.

    Moving to animals

    You have quite a great job with those. At the beginning you were a bit stiff but after completing a couple of them you get so much better at them.

    That said, one thing that sometimes comes out badly is your linework. There are few cases(animals) which have a comparable worse linework and I believe it is caused by you rushing. Be patient with ghosting and take as much time as needed for each line. Then when it feels right, confidently execute the line.

    Sometimes you make a bad line and try to fix it in the form of repeating the line. Don't do that in the future, even if you made a bad line, leave it and treat it as if it was the correct one. We don't want to correct our lines as it starts bad habits and teaches us that we don't have to commit to our lines. Leave your bad line there to be seen. Next time you try to make a line, don't repeat the same mistake you did the previous time.

    I notice you wrote you have problems with heads, one way to fix that problem is to do them more. But there are a couple of things I will say that might help you with them.

    • Draw your cranium(initial ball for the head) smaller. We sometimes underestimate how much fat and fur there is.

    • Making it smaller also lets us focus more on those additional masses as the brow ridge, the cheekbones, muzzle, eye sockets, etc.

    • Try to fit masses written above like a puzzle. You already do it pretty well, but there are few heads where you forgot about it. Making them fit really help solidifies your drawing

    • This demo is the most up to date when it comes to how we should tackle heads. I know you already did it but it could be worth revisiting.

    In your octopus I noticed you have a bit of a problem with defining the degree of our contour line. Our contour's degree is defined by how far it is from the viewer, I am sure you will get more comfortable after the 250 cylinder challenge and lesson 6.

    In your pig I noticed you made a bunch of medium sized masses on the back. I would advise to merge a few of them into bigger one, as with more masses on the page the more busy the drawing becomes. It is also more pleasing to the eye to have varied masses but that is not the point of those exercises. But that's just my personal taste so don't take it too far.

    Conclusion

    You haven't made any major mistakes, just a few minor ones. There is also a big sign of growth from you, so I will mark this lesson as complete now.

    PS. Doing studies like you do, drawing just a leg or a head is a great way to get better at certain subjects so keep that way of learning in the future. If we can draw a head easier and better from those studies, our whole animal will also become better looking.

    Also it looks like I picked the wrong option, please reply to this so I can mark this as complete, sorry for inconvenience.

    If you have any questions feel free to ask me,

    Have fun during your journey.

    Next Steps:

    Continue to 250 cylinder challenge

    When finished, reply to this critique with your revisions.
    9:24 PM, Friday November 26th 2021

    What do you mean by marking? Ghosting and placing a point?

    We should always ghost to our vanishing point with a lifted pen. In this challenge you might perhaps do it when you have two faces defined(as you said) and forward from that point. When we make a scene/environment we can't just put our vanishing points in random places. There is a horizon, 1-3pp perspective, rotation of the object and other rules.

    If I may, I would advise drawing a couple of boxes sharing the same vanishing points. During this challenge we only learn how to draw ONE box with nothing that relates to it in space and shares the same vanishing points.

    2 users agree
    9:35 PM, Wednesday November 24th 2021

    Hello Purpel, I hope you are well,

    Last page isn't what represents your work, it is all those 250 boxes that you did in the span of 25 days and how you improved from them.

    What stands out the most to me is that your lineweight is quite messy and I know you could do better as your linework is quite good as you can make straight lines if you commit to them. So for lineweight remember to also ghost for that process. What we want to do is add another line on top of our initial one and what we should get is an effect of our line becoming more drak(as we fill more ink on it) and make it slightly wider(as ink spills slightly to the sides). Making our line wider isn't our goal, it is to make it stronger/darker. This diagram conveys what I am trying to say.

    Sometimes your lines converge in pairs, https://imgur.com/KSHwTwo this is what you do sometimes, we don't want that because we want all our 4 lines to meet in the same point, a vanishing point, as shown here https://imgur.com/8PqQLE0. That says to me that you perhaps lost your initial vanishing point. This diagram should also help you understand the angles of lines converging to the vanishing point. The inner lines have a smaller degree unless our box is long and it also depends on the position of our vanishing point. I want you to remember that our lines should always converge in one point, vanishing point, but they never meet in pairs.

    Also when you add hatching remember to keep it even and ghost it as it is line too. Don't make it messy, as when we add hatching to the face, it will become our point of interest for that box, so we want to make that point pretty to please the eye.

    In summary, you did a good job. Your linework needs to see more work in the lineweight and repeating lines departments, those are by far your biggest weaknesses.

    Your boxes came out great, there are places where your convergence could be better, but I believe you are on the right track to get even better than you are now.

    So I will mark this challenge as complete.

    If you have any questions feel free to ask me,

    Have fun on your journey,

    Next Steps:

    Move to lesson 2

    This community member feels the lesson should be marked as complete, and 2 others agree. The student has earned their completion badge for this lesson and should feel confident in moving onto the next lesson.
    2 users agree
    10:24 PM, Tuesday November 16th 2021

    Hello Ttomaz, I hope you are well,

    If you were the best you wouldn't be doing those exercises :), but I am glad you did your best as you should have.

    Starting with your lines.

    In superimposed lines you fry both ends. It is normal to fry one end, but frying both, tells me that you don't prepare enough for each stroke. Remember to plan each stroke by positioning your pen on the start of your line, then confidently execute the stroke. Also I notice that you had a problem with arching lines, you can try to direct your shoulder a little in the opposite direction to your arching.

    Moving to ghosted lines. You focus on accurate rather than confident and smooth lines. It is completely normal to miss our mark slighly. We want to take as much time as needed for our ghosting and then put our line confidently. If done well we get a smooth line. We may miss our mark a little as we aren't experienced with the process yet, but that's fine for now, we work here in levels as shown in diagram. That is by far your biggest weakness, we want our lines to be as straight as possible even by a cost a accuracity. Straight and smooth line is what we strive to gain from this lesson. Confidence is the key to success in those exercises, even in your fun drawings. Even if you want to have a "style" that uses wobbly lines, that's perfectly fine, but to break the rules you need to know them first.

    Lastly in this section, ghosted planes. They are done without any major faults, except for your line work as you don't commit enough to lines as they wobble. Remember to be patient with ghosting and take as much time as needed for each line. Then when it feels right, confidently execute the line. Also keep in mind to use your shoulder with a locked wrist.

    Moving onto ellipses.

    Starting with tables of ellipses. You try to not overlap them, but some of them do. That's completely fine for now, but keep in mind that what we want to gain from this section is a habit of drawing through each of our ellipses and making them as smooth as we can. We ghost every ellipses with as much time as needed then we execute them with confidence. That is one of the core principles of every ellipses we want to draw in this section and carry over it to later lessons. Don't focus on accurate, wobbly ellipses. Execute your ellipses with a confidence built up by ghosting. Don't worry, if your initial ellipses are not accurate for now, as it takes a lot of time. Be patient with this skill.

    Also I would discourage small ellipses in this exercise, as when we draw small we tend to use our wrist and that is completely opposite of what we want to learn and that is to use our shoulder and get used to its motions.

    Next we have ellipses in ghosted planes. Keep in mind that the centre of the ellipse isn't the same as the centre of our plane. Ellipses have to be symmetrical and also have the same form regardless of where they are, the only thing you can change is how wide they are and in which position it is.

    On funnels, you don't align ellipses to the minor axis. Remember that our ellipses should be cut by the center line in two symmetrical halves if that means you need to ignore the initial curves. Also the same tendency as before you focus on accurate ellipses over smooth ones.

    Lastly in this lesson boxes.

    This is the hardest section of this lesson, it is supposed to be challenging, "boss" of lesson one.

    What I wrote about line work in the lines section.

    I don't notice any major mistakes in this section, except that your rotated boxes are quite messy and it is caused by you overdoing your lineweight. This diagram shows a proper way of applying lineweight to our drawings. Additionally you are actually not rotating them, but rather skewing and translating over. When we rotate a box we also move its vanishing point, use this gif to understand how the rotation is correlated with the motion of the vanishing points.

    In your organic perspective, you did a pretty good job. You overlap your boxes to strengthen the feel of depth in your drawing. You vary the sizes adequate to their position on how close they are to the viewer.

    Conclusion.

    I could see that you did those exercises to your best, but I noticed a couple of problems and I would love to have them fixed as soon as possible. So I will assign 2 pages of ellipses in ghosted planes and 1 page of organic perspective. Confidence is one of the most important keys in this lesson. Be patient. Do those pages to the best of your ability. No less no more.

    If you have any question feel free to ask me them here or on discord,

    Have fun during your journey,

    Next Steps:

    Please, 2 pages of ellipses in ghosted planes and 1 page of organic perspective.

    When finished, reply to this critique with your revisions.
    3 users agree
    10:08 PM, Monday November 15th 2021

    Hello Xanxan0303, I hope you are well

    Starting with your lines.

    Those came out fairly well. In superimposed lines you fry both ends a little in longer strokes. It is normal to fry one end, but frying both, tells me that you don't prepare enough for each stroke. Remember to plan each stroke by positioning your pen on the start of your line, then confidently execute the stroke.

    With your ghosted lines I notice that quite often you focus on accurate rather than confident and smooth lines. It is completely normal to miss our mark slighly. We want to take as much time as needed for our ghosting and then put our line confidently. If done well we get a smooth line. It may miss our mark a little as we aren't experienced with the process yet, but that's fine for now, we work here in levels.

    Lastly in this section, ghosted planes. There I see that you repeat some of your lines. In future keep in mind to not do that, even if you made a bad line, leave it and treat it as if it was the correct one. We don't want to correct our lines as it starts bad habits and teaches us that we don't have to commit to our lines. Leave your bad line there to be seen. Next time you try to make a line, don't repeat the same mistake you did the previous time. Your 2nd page is way better than the previous one, as there your lines become more straight but there is still the problem of you repeating your bad lines.

    Moving to your ellipses.

    Your tables of ellipses are quite good. You focus on smooth and confident ellipses rather than accurate ones, which is a proper decision. Additionally you draw through ellipses 2-3 times as supposed to. That said you need to work on your ellipses, because sometimes you do overlap them, even if you know that's wrong.

    Next, we have ellipses in planes. Here I notice that you have a bit of trouble placing your ellipses, but that is completely normal for beginners. Keep in mind that our ellipses have to touch all four corners of the plane and also spend more time ghosting your ellipses as some of them lack smoothness.

    On funnels, you don't align ellipses to the minor axis. Remember that our ellipses should be cut by the center line in two symmetrical halves if that means you need to ignore the initial curves.

    Keep in mind that what we want to gain from this section is a habit of drawing through each of our ellipses and making them as smooth as we can. We ghost every ellipses with as much time as needed then we execute them with confidence.

    Lastly your boxes.

    This is the hardest section of this lesson for various reasons, but you did a great job with those exercises. I don't see any major mistakes here just a few minor one:

    • In organic perspective, remember to overlap your boxes as this creates a feel of depth in your drawing, you could also vary your sizes of the boxes more,

    • In rotated boxes, as you wrote yourself. You need to rotate them more to create a feel of a sphere out of them,

    • Additionally your line work could be way better. You don't commit enough to lines as they wobble. Remember to be patient with ghosting and take as much time as needed for each line. Then when it feels right, confidently execute the line. Also keep in mind to use your shoulder with a locked wrist.

    Conclusion

    I will say work on your line work in warmup, you need to be patient with that skill, as it takes quite a bit of time to get good enough.

    I don't see any big mistakes in exercises so I will mark this lesson as complete.

    Now about your comment. It doesn't have to look good. What we are doing here are exercises to become better, we are practising. We don't create a portfolio/gallery pieces.

    "I hope I'm cut out for the rest of the course

    To be cut out for this course all you need to do is give your all when doing those exercises and as you said you did that. That's all you need to do. Well remember to not rush it and grind.

    Drawabox is a set of free exercise-based lessons that focus on the fundamentals - the skills you'll need to make sense of all the other resources and tutorials out there. First we focus on the basic mechanics of mark making, and how to use your arm. By the end, we develop a strong understanding of form, 3D space and construction.

    I won't lie to you - our approach is tough and involves a lot of hard work. It's also structured and gives you a clear path with concise explanations and assignments you can complete and submit for review.

    If you have any question feel free to ask me them here or on discord,

    Have fun during your journey,

    Next Steps:

    Continue to 250 box challenge

    This community member feels the lesson should be marked as complete, and 3 others agree. The student has earned their completion badge for this lesson and should feel confident in moving onto the next lesson.
    0 users agree
    6:32 PM, Saturday November 13th 2021

    Hello kennyken, I hope you are well.

    Your boxes came out quite well. But what I noticed is that sometimes your lines converge in pairs, https://imgur.com/KSHwTwo this is what you do sometimes, we don't want that because we want all our 4 lines to meet in the same point, a vanishing point, as shown here https://imgur.com/8PqQLE0. That says to me that you perhaps lost your initial vanishing point. This diagram should also help you understand the angles of lines converging to the vanishing point. The inner lines have a smaller degree unless our box is long and it also depends on the position of our vanishing point. I want you to remember that our lines should always converge in one point, vanishing point, but they never meet in pairs.

    Next on the topic of your line work. In the beginning it is quite wobbly, it does get better in the end but it isn't where I would like it to be. Make sure to commit to each of your lines, this also goes for your hatching. Also remember to be patient with ghosting and take as much time as needed for each line. Then when it feels right, confidently execute the line. Also keep in mind to use your shoulder with a locked wrist.

    Lastly there are cases where you repeat the line. Try to not do that, even if you made a bad line, leave it and treat it as if it was the correct one. We don't want to correct our lines as it starts bad habits and teaches us that we don't have to commit to our lines. Leave your bad line there to be seen. Next time you try to make a line, don't repeat the same mistake you did the previous time.

    That all that said, you didn't make any major mistakes in this challenge. So I will mark it as complete. Keep in mind what I said here and try to apply it to your warmup. Fixing your line quality would also greatly benefit you art for fun.

    If you have any questions feel free to ask me,

    Have fun on your journey,

    Next Steps:

    Continue to lesson 2

    This community member feels the lesson should be marked as complete. In order for the student to receive their completion badge, this critique will need 2 agreements from other members of the community.
    2 users agree
    7:56 PM, Friday November 12th 2021

    Hello Raulilo, I hope you are well,

    Starting with organic intersections.

    These came out pretty good, you stick to simple sausages and you think about how they relate in space. But there are cases where you leave an empty space between sausages. That's bad because you aren't bending sausages in those cases, but even if you did bend them, their shape would become too complicated for our exercise. So what I am trying to convey is that you should think more how those sausages correlate in space to each other and try to not leave empty space between them

    Second thing that I want to point out is that your shadows mostly hug forms creating them. Remember that our shadows needs to warp around the surface it is cast on. Also try to have only one light source for a whole scene to make it consistent and easier for ourselves.

    Moving onto your animals.

    You forgot to add an intersection contour curve at the joints, this is an important step for us. Because if done correctly it definitely will strengthen the feel of 3d in our drawing.

    Second thing that I want to point out is that your additional forms feel flat. When we add them it could be helpful to imagine the mass that we want to add in an empty space. With line line drawing it all comes to the silhouette of the mass. If nothing is touching it will be simple but if we press it against another mass it will change drastically to a more complex silhouette. But remember it is never random, it changes when there is a contact with a mass it is touching. As shown in this diagram

    Keep in mind that when we add masses we want them to feel 3d, it is shown perfectly in this diagram.

    I went over most important things you should adres right now in this overpaint of your camel drawing.

    Please revisit this head demo, as it contains most up to date information. This is a really important demo in this lesson so please go over it a few times if needed.

    Additional do it also for a fur.

    I am not a fan of putting my own work in critiques but I drew a camel for lesson 5 and it should help you learn how to tackle it with construction.

    Last thing I want to point out is that you aren't paying enough attention to reference. Making a perfect copy of an image isn't a point of draw a box, but studying our object or animal is. So I want you to keep in mind to look more than your draw. You can do overdraws in photoshop with your mouse or stylus if you have one. I did this lesson for this lesson and I learnt a lot of the subject I was drawing at the moment.

    Conclusion

    I feel like you rushed through demos or didn't do them at all. As your construction is lacking in most areas. It does get better but it isn't good enough to get a pass. So I will assign an additional pages before marking this lesson as complete.

    Please do 4 pages of animals and please do few recent demos to get a hang of drawing animals quicker.

    Next Steps:

    Please draw 4 additional animals, dont forget that you can use demos as your drawings

    When finished, reply to this critique with your revisions.
    2:15 PM, Tuesday October 26th 2021

    Well your boxes were good enough already, you had a slight problem with convergence, but it wasn't that extreme for a redo.

    I wanted to make sure you can make a box that has vanishing points really far away(as this is helpful for later lessons) and also get a little better at the convergence. You did get better so I will mark this challenge as complete.

    Also if you can I would highly recommend using a A4 copy paper for draw a box, as notebook paper with lines really flattens out our drawing and it can be in small format. Drawing small can be awkward and problematic for us.

    Have fun during your journey,

    Next Steps:

    Continue to lesson 2

    This community member feels the lesson should be marked as complete, and 2 others agree. The student has earned their completion badge for this lesson and should feel confident in moving onto the next lesson.
    9:04 PM, Monday October 25th 2021

    It is by far looking way better, you applied the lineweight correctly, as it isn't wobbly. You didn't skip leaf construction so good job addressing those mistakes. I still do think that you should build your smaller leaf in bounds of the 1st big leaf shape, but you follow the form of it so it doesn't make that much of a difference.

    Many students use lineweight as their 2nd pass, 1st being construction. Remember that line weight doesn't involve going back over whole lines and shapes, we want to add it only on top of our important overlaps of lines.

    Also when you take a photo of your drawing, remember to include the corners of the paper, as it is one reliable way to judge how big your drawing is.

    I will mark this lesson as complete then.

    Have fun on your journey,

    Next Steps:

    Continue to lesson 4

    This community member feels the lesson should be marked as complete, and 2 others agree. The student has earned their completion badge for this lesson and should feel confident in moving onto the next lesson.
The recommendation below is an advertisement. Most of the links here are part of Amazon's affiliate program (unless otherwise stated), which helps support this website. It's also more than that - it's a hand-picked recommendation of something I've used myself. If you're interested, here is a full list.
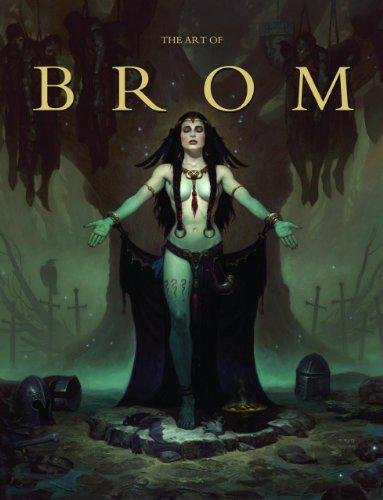
The Art of Brom

The Art of Brom

Here we're getting into the subjective - Gerald Brom is one of my favourite artists (and a pretty fantastic novelist!). That said, if I recommended art books just for the beautiful images contained therein, my list of recommendations would be miles long.

The reason this book is close to my heart is because of its introduction, where Brom goes explains in detail just how he went from being an army brat to one of the most highly respected dark fantasy artists in the world today. I believe that one's work is flavoured by their life's experiences, and discovering the roots from which other artists hail can help give one perspective on their own beginnings, and perhaps their eventual destination as well.

This website uses cookies. You can read more about what we do with them, read our privacy policy.